Premiere Pro Audio Workflow Guide for Editors: Part 1

Part 1: Loudness Auto-Match, Audio Gain, and Loudness Radar
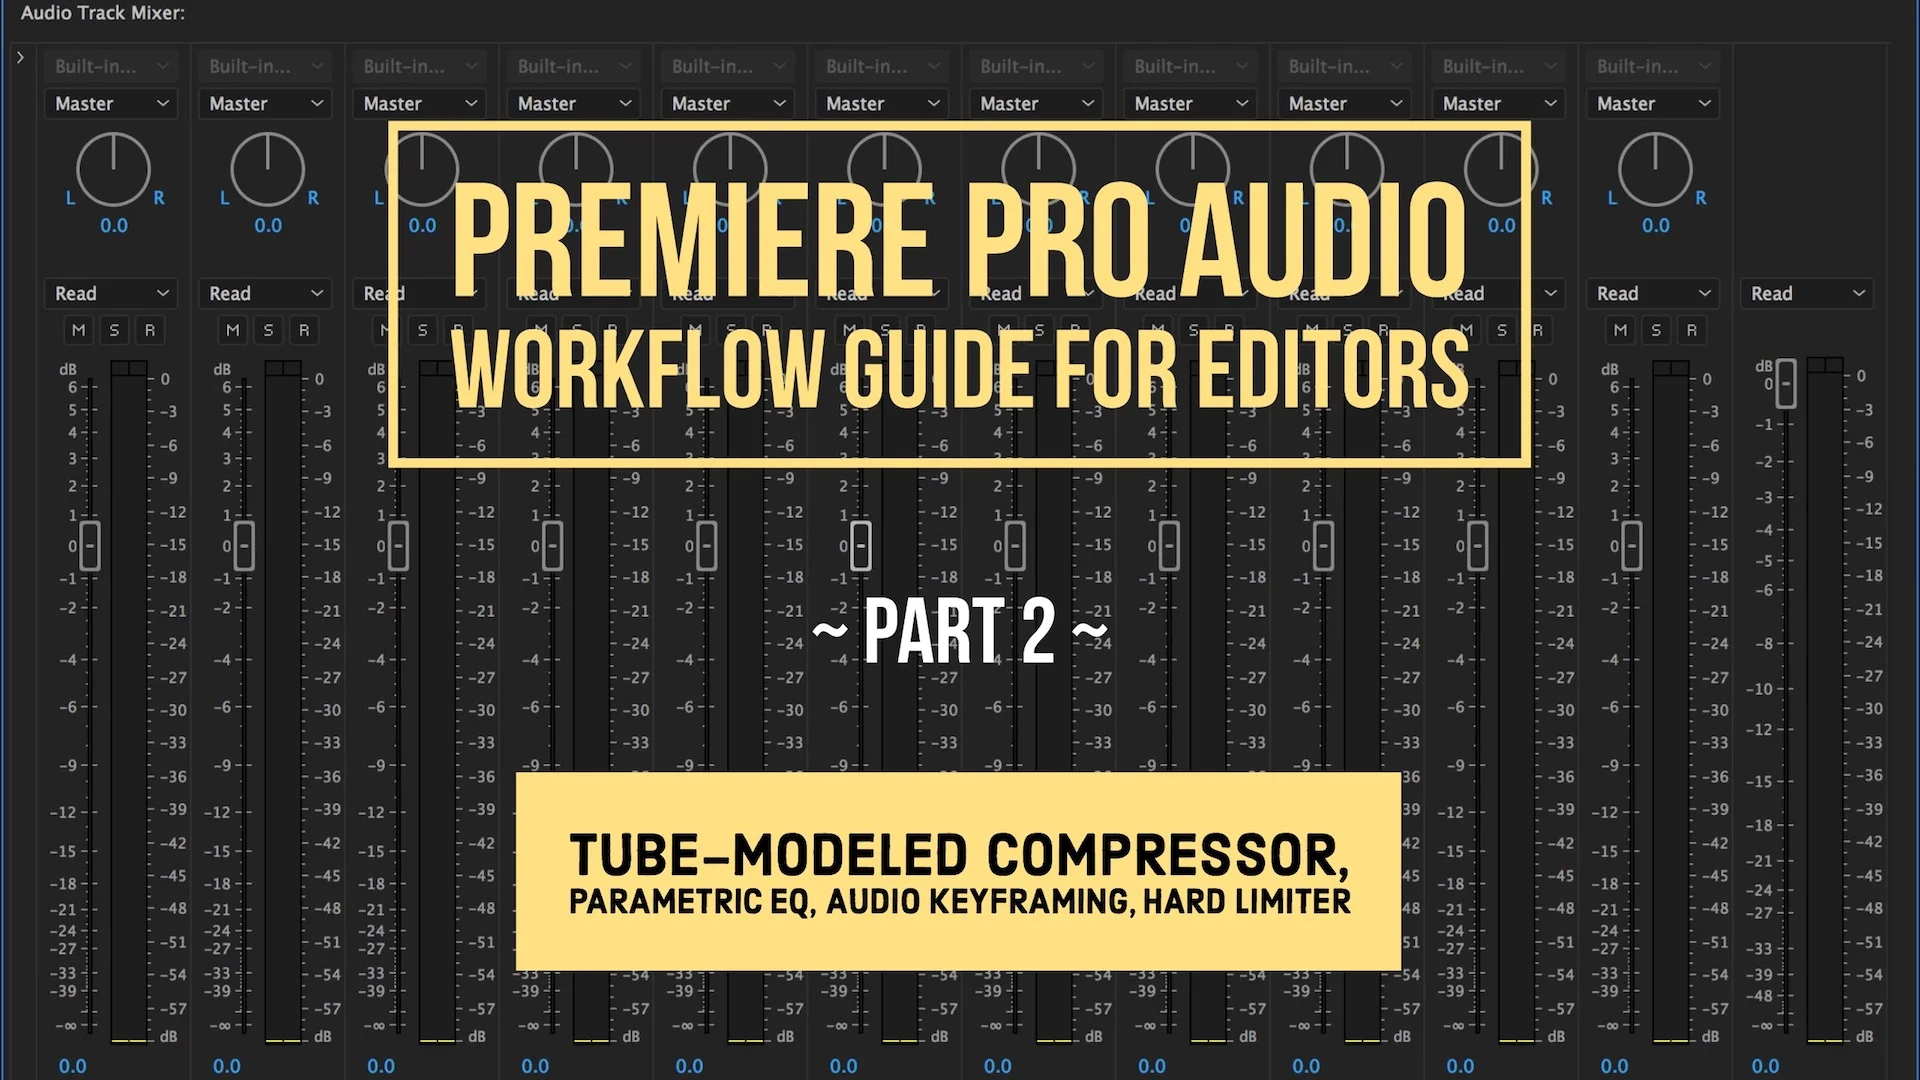
This Premiere Pro Audio Workflow Guide for Editors is a 2-part series. Read Part 2.
With the addition of the Essential Sound panel and the enhanced interchange with Audition CC, it’s never been easier for video editors to mix their own audio in Premiere Pro.
Or has it? There's so many audio solutions within the Adobe Creative Cloud ecosystem that the question becomes: which audio tools should you use? Is it really possible to produce a professional audio mix without leaving Premiere Pro? What filters should be part of a Premiere Pro audio workflow? How essential is the Essential Sound panel in Premiere Pro?

To help answer these questions, editor and trainer, Paul Murphy, shares some sound tips (pun intended) based on his personal audio workflow in Premiere Pro. Paul has a deep understanding of working with audio; check out his recently published Audition CC 2017 Essential Training course on Lynda.com.
The inspiration for this blog post came from Paul's contribution to the Essential Sound panel discussion on PProChat, the Premiere Pro user chat. If you're a Premiere Pro user, join PProChat!

Loudness Auto-Match
“For me, the power of the Essential Sound panel lies in the Loudness Auto-Match button, which you would otherwise need to go to Audition for.” Don’t mistake Paul, also known as The Premiere Pro, for someone who is just looking for the easiest audio solution. Also, don’t assume Paul only edits videos for the web. You might be thinking, surely no broadcast editor would lean on the Auto-Match button! “I finish about 80% of my overall mixes in Premiere Pro, so Auto-Match Loudness is a godsend - especially because most of those projects are delivering to broadcast, where I need to work with LUFS not dBFS."
Paul first uses Auto-Match on his clips before making other audio level adjustments. This makes his peak audio levels consistent, and gives his clips an even starting point to begin his mix.
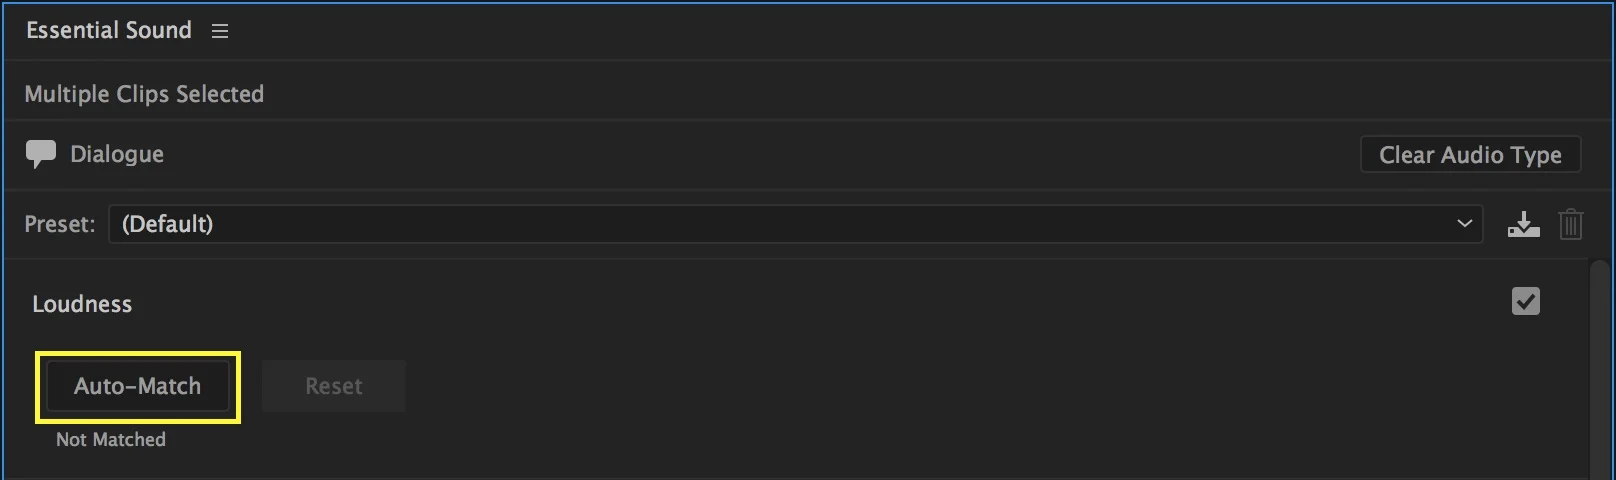
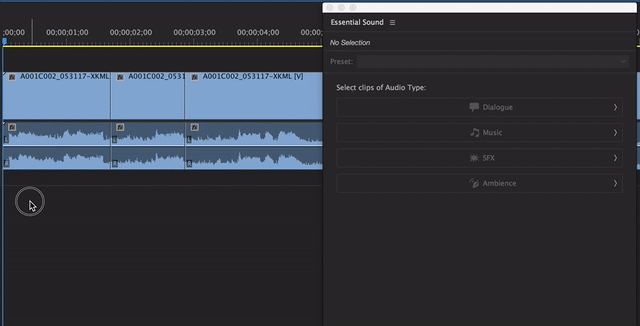
Using Auto-Match is as easy as it sounds. Select the audio clips you want to match, pick the audio type (Dialogue, Music, SFX, or Ambience) in the Essential Sound panel, and click Auto-Match under the Loudness tab. You'll see the clip audio waveforms change, and the clip fx badges will turn yellow indicating an intrinsic effect has been modified.
What exactly is the Auto-Match button matching to? Is it matching the clips to themselves, like tuning a guitar to itself? No, the Loudness Auto-Match button adjusts the clip audio levels to a preset target loudness, measured in LUFS, depending on the audio type. The Essential Sound panel only displays the target loudness after clicking Auto-Match.

Below is the Auto-Match target loudness for each Essential Sound audio type:
- Dialogue -23 LUFS
- Music -25 LUFS
- SFX -21 LUFS
- Ambience -30 LUFS
These values are compliant with most broadcast specifications. But what if you are publishing video to the web? Usually video for the web is mixed much louder. "If I was doing this for web, I’d bump up the overall loudness with Gain > Adjust Gain By." (See Audio Gain below.) As someone who frequently edits video for the web, I usually aim for -6dBs with peaks no higher than -3dBs. In which case, -16 LUFS is a suitable de facto target loudness for the web. Need another reference? Visit Premiere Pro CC: Loudness Radar and Average Audio Levels by Larry Jordan.
So the question is, can you set the target loudness for the Auto-Match button? Unfortunately, not at the time of this writing. Paul says, “It would be great if we could set those levels ourselves, because [-23 LUFS] is really only useful to people in broadcast - you'd want to set it much higher for the web. I suspect that with the inclusion of Auto-Match in this version of Premiere Pro (CC 2017.1), the ability to set loudness using LUFS, LKFS or LU must be around the corner, because dealing in dBFS is becoming less and less useful or relevant.”
Audio Gain
It’s important to realize that the Auto-Match button is a helpful tool, but it’s not foolproof. Paul always checks his results by ear. “The Auto-Match button is great and gets you most of the way, but will also get some things wrong, so you can't just click it and assume your dialogue all sounds the same.” As stated earlier, Paul manually fixes Auto-Match inconsistencies by adjusting the Audio Gain.
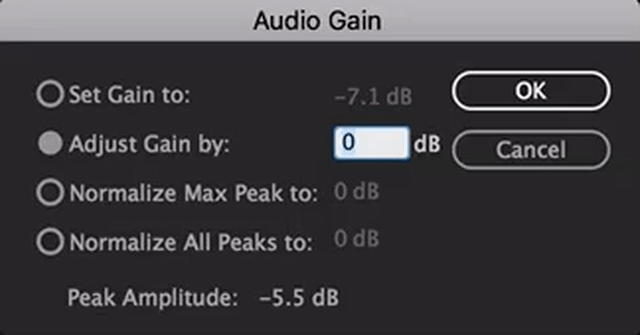
Select the clip and use the keyboard shortcut (G) to open the Audio Gain window. First, notice how Auto-Match has changed the "Set Gain to" number. This number represents the actual gain. Paul uses “Adjust Gain by” to raise or lower his clip audio gain levels. Note how the actual gain will update to reflect the entered "Adjust Gain by" value. It makes sense to use Audio Gain for tweaking Auto-Matched clips because that's where you can see the Auto-Match results. Click here to learn more about how to normalize one or more clips in Premiere Pro.
Just like your eyes are the authority for color grading, your ears are the authority for a good mix. But your ears and eyes can play tricks on you. On top of that we're dealing with both LUFS and dBs in Premiere Pro. We're aiming for -16 LUFS for the web, but the Audio Gain window and audio meters in Premiere Pro are both in decibels. If only there was a loudness measurement tool that could help us...
Loudness Radar
“I live and die by the Loudness Radar.” says Paul. The Loudness Radar by TC Electronic measures average audio levels over time, and was added in the first release of Premiere Pro CC. It works as an audio filter that must be applied to the clip or track you want monitor.

Most of the time you will want to apply the Loudness Radar as a track effect in order to monitor all the audio clips on that track. This means you must add it in the Audio Track Mixer panel. (We'll talk about several track effects in part 2.) If you don't see the Audio Track Mixer, you can open it under the Window menu.
To add Loudness Radar to a track, click the Show/Hide Effects and Sends disclosure triangle in the top left of the Audio Track Mixer panel. This reveals 5 audio effect slots. Click one of the Effect Selection disclosure triangles, and in the dropdown menu navigate to Special > Loudness Radar.
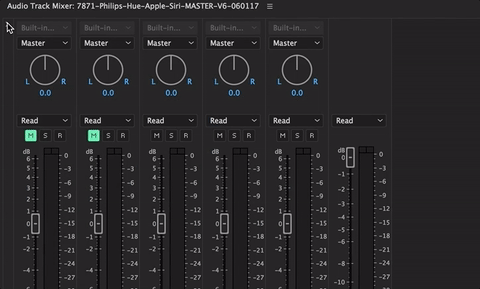
Double-click the Loudness Radar to open it in its own window. As you play your sequence, the “momentary ring” shows the real-time dynamics, and the radar history records the average loudness for that audio track. You can apply the loudness Radar to multiple tracks (e.g. dialogue, music, ambience, etc.) and measure their average loudness individually. If you want to measure the loudness of your entire mix, add the Loudness Radar to the Master Track.
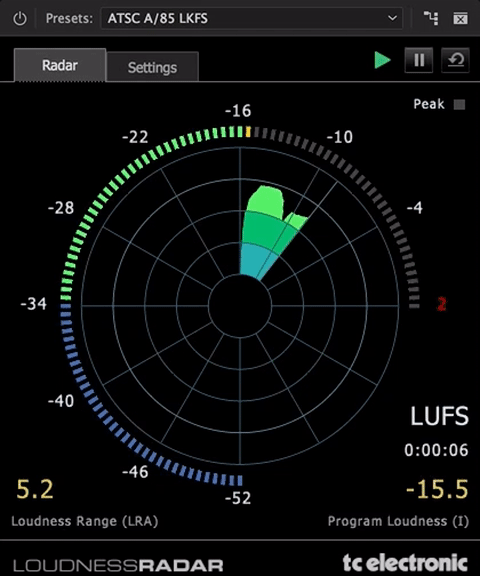
Reading the Loudness Radar is easy; just remember it's about target loudness, not an exact level.
- The Yellow color indicates louder parts that go over the target
- The Green color indicates softer parts that go below the target
- The Blue color indicates audio below the noise floor
The video below gives some really good background and insight into the Loudness Radar in Premiere Pro. At 3:21 it explains how to read the history radar display. Just remember it's referring to the broadcast standard, not the -16 LUFS standard for the web.

You want to balance your peaks on the line between green and yellow - this is your Target Loudness. For example, dialogue should be green with peaks in the yellow. If you’re dialogue peaks in the yellow and dips to the blue, you may need to add more compression to reduce the dynamic range of your audio. (We'll learn more about compression in part 2.) Click here for more Loudness Radar tips from TC Electronic.
We know that -16 LUFS is a suitable target loudness for the web. You can change the Target Loudness of the Loudness Radar by clicking on the Settings tab, and dragging the Target Loudness up to -16. (Don't be confused by LKFS, as of March 2011 they are effectively the same thing.)

The Loudness Radar is the best tool to help you measure Auto-Match and Audio Gain adjustments in Premiere Pro. “Everyone, EVERYONE should be using it, whether you mix for web, broadcast or film. Not using it is like color grading without scopes.”
Thanks for reading! The information in the post had a huge positive impact on my audio workflow as editor. Understanding these tools gave me the confidence to mix more audio in Premiere Pro. I hope this post does the same for you. If you have any comments, corrections, or suggestions, please let me know in the comments below. I reply to everything!
Read Part 2