The Complete Lumetri Color Workflow in Premiere Pro

3-Part Tutorial Series on Lumetri Scopes and Lumetri Color Panel in Premiere Pro.
This tutorial series, featuring chinfat, a professional working editor in the industry, is truly all you need to know about color correction and color grading in Premiere Pro. It's basically a free 1-hour course on the Lumetri Scopes and Lumetri Color panel. The series is available as one long video (below) or as 3 individual tutorials. In this post, we've taken the 3 videos and broken them down by topic into smaller segments.

The is the full version of the 3-part episodes. This contains instructions on the Lumetri Scopes, Panels, and how to color grade and correct. —chinfat
All chinfat tutorials are extremely in-depth. And in this one, he intentionally takes his time covering all the details of the Lumetri Scopes and Lumetri Color panel. In fact, Chinfat even says he's not going to "just get to point" right at the beginning of the series. We recommend watching the entire series, you never know when chinfat will mention something you never knew. But, you can also pick and choose which segments you want to watch in our guide below.
Series Intro
Chinfat sets the stage in part 1 with the Lumetri Scopes and general principles of color correction. These principles are the foundation for part 2, the Lumetri Color panel. Chinfat covers every part of the panel, showing exactly how each control affects the Lumetri Scopes. Finally, part 3 combines knowledge of the Lumetri Scopes and tools in the Lumetri Color panel to correct and grade footage.
Part 1: Lumetri Scopes
In Part 1, chinfat introduces the Lumetri Scopes in Premiere Pro. He omits the Histogram and Vectorscope HSL from his tutorial because as he says they're not commonly used by most editors in the industry. The primary purpose of the Lumetri Scopes is to be a visual guide for color correcting and grading your footage. The scopes show when luma (light) or chroma (color) values exceed legal range for broadcast delivery. And they can also help make creative decisions as well. Watch all of Part 1 below or continue to see each scope in its own video segment.

The is part 1 of 3 episodes. This contains instructions on the Lumetri Scopes in Premiere Pro CC 2018. —chinfat
Waveform Monitor
The Waveform monitor shows luminance — lightness and darkness — in the image, also referred to as "tone". In Premiere Pro, the Waveform monitor can also show color values, but primarily it's for reading luminance.

In this segment, chinfat explains how to read the Waveform monitor in Premiere Pro.
The important thing to know about the Waveform monitor is it displays your image from left to right. Use the Waveform monitor to keep your whites and blacks in "legal range", not exceeding above or below the graph. Chinfat spends the most time explaining the Waveform monitor compared to the other scopes. This is a good indicator for how helpful it is for color correction.
RGB Parade
The RGB Parade is similar to the Waveform monitor in that it mirrors the image left to right, but for each color channel. So the red section is the entire image from left to right and same with the green and blue trace.

In this segment, chinfat explains how to use the RGB Parade in Premiere Pro.
The RGB Parade is especially helpful for correcting white balance. When the red, green, and blue sections are similarly distributed, this usually results in a well-balanced shot.
Vectorscope
The Vectorscope is used for reading saturation in the image. It has six vectors for each of the primary and secondary colors.

In this segment, chinfat explains how to use the Vectorscope in Premiere Pro.
When the trace in the Vectorscope goes past the vector lines, the image is oversaturated and "illegal". For YouTube and the web, this is not a concern, although oversaturated images will still look bad. But some broadcast stations will reject deliveries if saturation exceeds legal range. The Vectorscope is also useful for identifying and correcting skin tones.
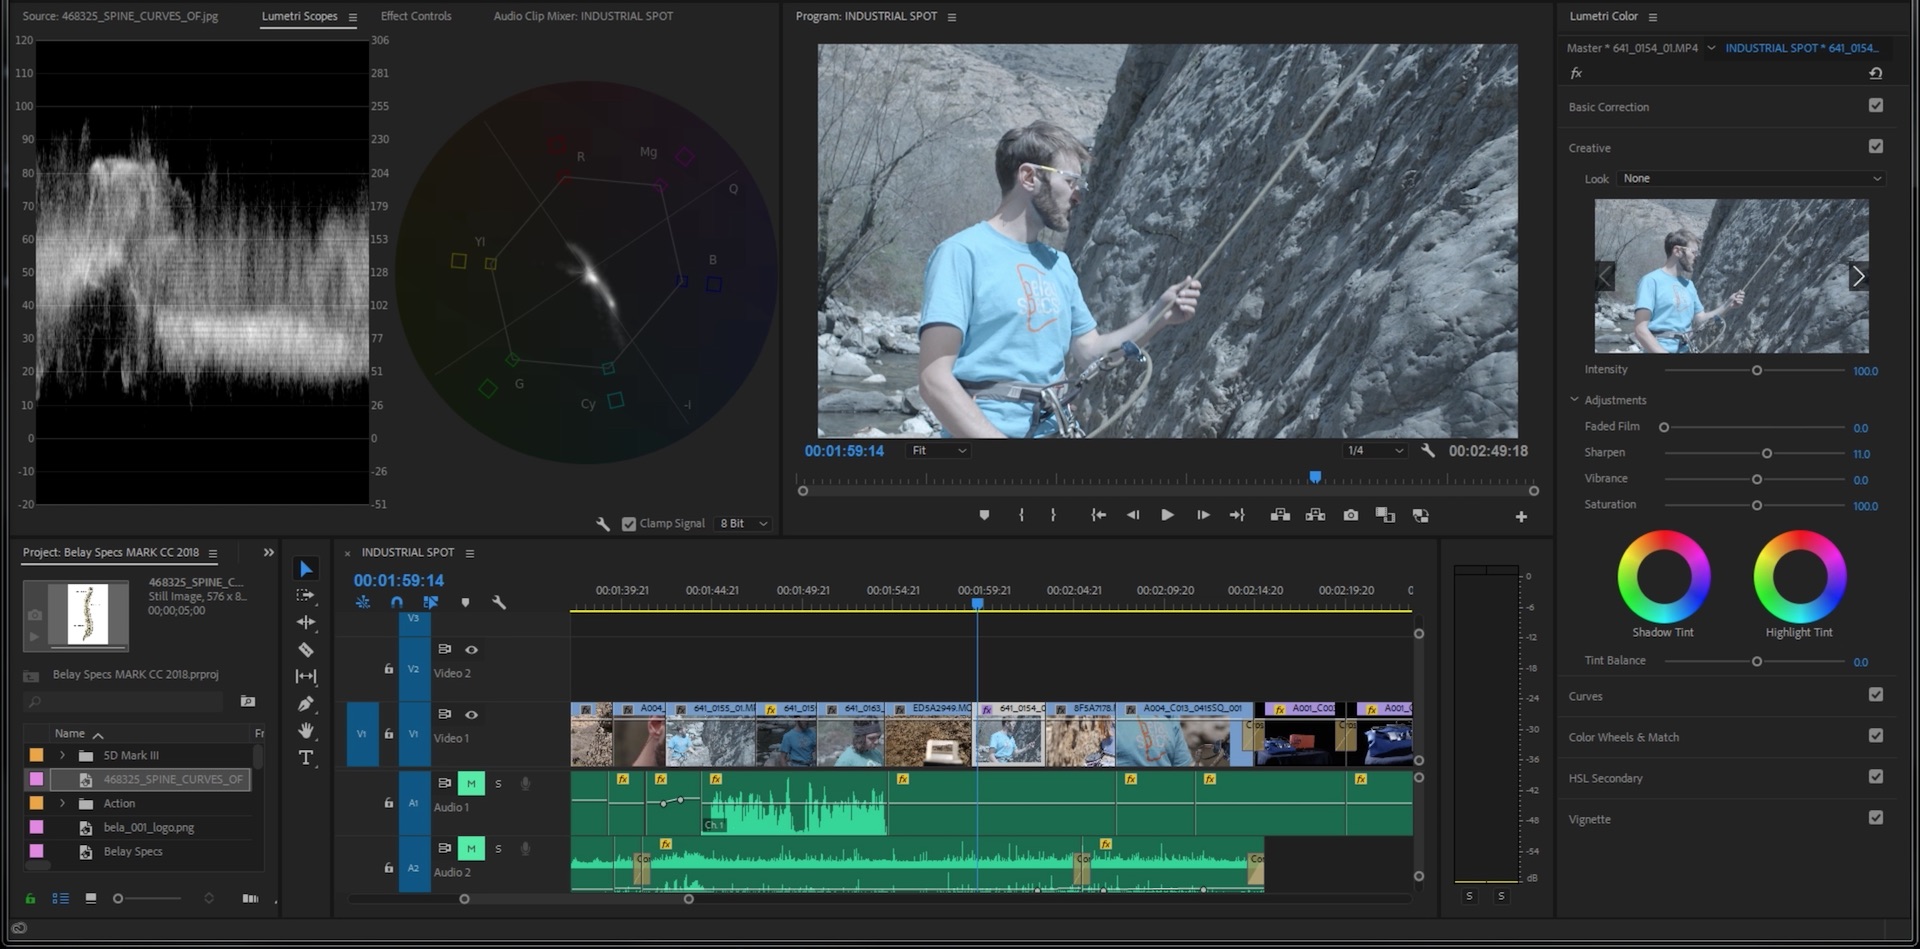
Part 2: The Lumetri Color Panel
This section focuses on all the controls in the Lumetri Color panel. Chinfat goes through each tab one-by-one, explaining how each tool and slider affects the image. He builds on Part 1 by showing how Lumetri Color adjustments are displayed in the Lumetri Scopes. Watch the whole of Part 2 below or continue to see each Lumetri Color tab in its own segment.

The is part 2 of 3 episodes. This contains instructions on the Lumetri Panel in Premiere Pro CC 2018. —chinfat
Basic Correction
The Basic Correction tab is where the majority of primary color corrections are made in the Lumetri Color panel. Primary color corrections are ones that affect the entire image, both luma (light) and chroma (color). Use the sliders to correct white balance and contrast in the image.

Watch this segment to learn the Basic Correction tools in the Lumetri Color panel.
The Basic Correction tab has an Input Lut for converting log or raw footage to Rech 709. (You can apply creative LUTs here as well.) Use the Temperature and Tint sliders at the top for correcting white balance. Use the rest of the sliders to control the contrast of your image.
The Exposure slider will adjust the global darkness and brightness of the image. The contrast slider will increase or decrease the difference between the shadows and highlights in the image. (Typically, cinematic images have more contrast.) Use the Highlights and Whites sliders to control the bright parts of your image, and the Shadows and Blacks sliders to control the dark parts. Lastly, you can increase or decrease the color intesntiy with the Saturation slider.
Creative
The Creative tab is, as the name implies, where you can make global creative decisions for the look of your image. One of the primary functions of the Creative tab is applying creative LUTs or "looks" as they're referred to in the Lumetri Color panel.
Watch this segment to learn the Creative tools in the Lumetri Color panel.
Premiere Pro comes with a bunch of preset looks. All of which can be easily previewed in the Lumetri Color panel before being applied to your clip. Use the intensity slider to increase or decrease the amount of the look.
The Creative tab has its own sliders: Faded Film, Sharpness, Vibrance and Saturation. You can also tint the shadows and highlights specific color using the Tint Balance wheels and slider.
Curves
In the Curves tab you have RGB and Hue Saturation curves. The RGB curves is the square graph with white (luma), red, green, and blue curves. Below that is the Hue Saturation curves which looks like a color wheel. (Notice how the Hue Saturation curves mimic Color Wheels and the Vectorscope.) Click the curves to add control points and make adjustments. Alt/Option click control points to delete them.

Watch this segment to learn the RGB and Hue Saturation Curves in the Lumetri Color panel.
Use the Master RGB curve (white) to control the luma or tone of the image. This is where you can apply a common S-curve to increase contrast. Use the other curves to independently adjust the tonal values of the red, green, and blue channels. Curves are very useful for making specific changes to a specific color channel. For example, if an image looks to warm in the highlights, you can level off the top of the red curve.
The Hue Saturation curve is a great tool for increasing or decreasing the saturation of a specific hue. For example, if there is too much green in the image, you can add control points around the green part of the curve and pull it towards the center to reduce saturation in the greens. Inversely, let's say you wanted to add more saturation to skin tones. Add control points around the red and orange tones and push it to the outside of the curve to increase saturation.
Color Wheels & Match
Color Wheels are viewed as the more classic color correction tool compared to Curves. With Color Wheels, you can make hue adjustments to a particular tone: shadows, midtones, or highlights. Beside each wheel is a vertical slider for luma adjustments to each tonal range.

Watch this segment to learn the Color Wheel and Color Match tools in the Lumetri Color panel.
Color Match is a recently added feature that uses the power of Adobe Sensei to match the overall look of one shot to another. To use this feature, you must be in Comparison View, which can be enabled right in the Lumetri Color panel. Color Match is dialed into the Color Wheels which can be manually adjusted as needed.
HSL Secondary
The HSL Secondary tab is a very cool and powerful color tool in Premiere Pro. As the name states, it's intended for secondary color corrections — corrections that are applied to a specific part of the image. HSL stands for hue, saturation, and luminance, which are used to make the color selection.

Watch this segment to learn the HSL Secondary tools in the Lumetri Color panel.
Use the eyedroppers to select the color you want to change, and fine-tune the selection using the HSL sliders. Once you’re happy with the selection, use the color wheels and correction sliders to adjust the color, sharpness, saturation, etc. This tool is great for fixing objects in the frame that are underexposed or oversaturated, etc. It’s also a great way to bring out your skin tones and smooth blemishes.
Vignette
If all you want is a simple black or white vignette, it can easily be done in the last tab of the Lumetri Color panel. Vignette can feel a little gimmicky because of it's limitations. For example, the shape can only be changed from an ellipse to a circle using the Roundness slider.

Watch this segment to learn how to make a Vignette in the Lumetri Color panel.
Part 3: Color Correction and Color Grading
Now that we have a foundational understanding of Premiere Pro's Lumetri Scopes and Lumetri Color tools, it's time to start using them on some footage! Follow chinfat through several color correction and color grading examples in Part 3 below.

The is part 3 of 3 episodes. This contains instructions on to Color Correct and Grade in Premiere Pro CC 2018 using Lumetri. —chinfat
Bropinion
We tend to not share color tutorials on Premiere Bro more than any other kind of tutorial. Color is an art and science in itself; too often we see color grading minimized or misrepresented in amateur tutorials. In fact, we recommend avoiding any tutorial that claims it can teach you color grading in two minutes. LUTs are not color grading! However...
We are big fans of chinfat (which sounds funny to say) because his tutorials are always extremely thorough. It’s obvious from watching chinfat's videos that he is a very active video editor in the industry. Many of his tutorials feature scenes from films and commercials that he’s edited. This tutorial series is no different. It's one of the most comprehensive tutorials we’ve seen on the Lumetri Color workflow in Premiere Pro. Even though it's an hour long, it is well-worth watching.
One thing we would add is trust your eyes. Understanding the principles of color correction and how scopes work is critical for keeping your color in legal range and meeting your delivery specs. But, when it comes to the final creative look, the final 'scope' should always be your eyes. Of course, it can take years of experience to develop an eye for color. And remember to give your eyes plenty of rest when you’re color grading. They will play tricks on you!
What are you thoughts on this mega tutorial series? What new thing did you learn about color correction or color grading with the Lumetri Color panel in Premiere Pro? Let us know below!

chinfat
Known only as "chinfat", this YouTuber has lots of experience in post-production and specifically with Premiere Pro. Support chinfat by subscribing to his YouTube channel.