
Drop-Zone Editing in Premiere Pro
Insert, Overwrite, Overlay, and Replace Clips in Premiere Pro with Program monitor Drop-Zones.
There's more than one way to do pretty much everything in Premiere Pro. Especially when it comes to editing clips to the Timeline. In this tutorial featuring Colin Smith of VideoRevealed, you will learn how to Insert, Overwrite, Overlay, and Replace clips using the 'hidden' drop-zones in the Program monitor.

New users may find this drag and drop method of editing a little easier than dragging to the Timeline. The overlay will guide users to all the typical editing operations like insert, overlay and replace. Via VideoRevealed
What are Drop-Zones in Premiere Pro?
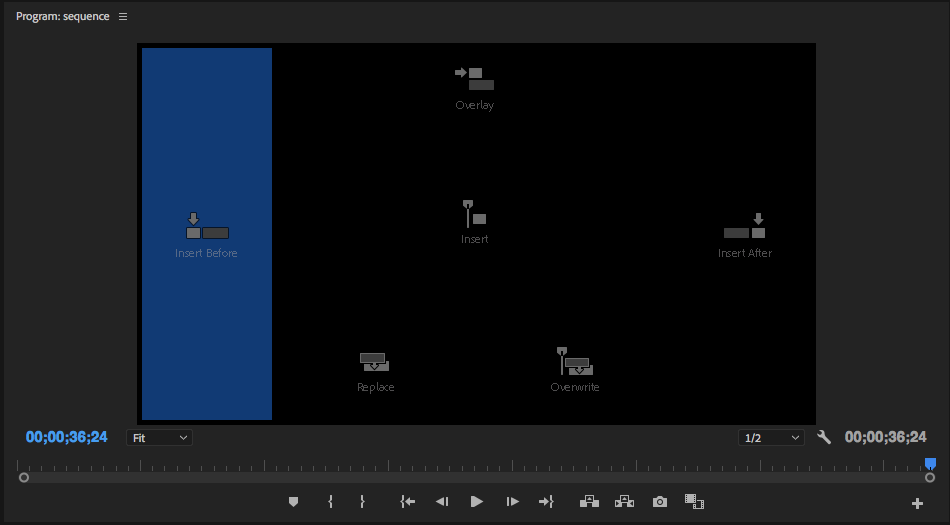
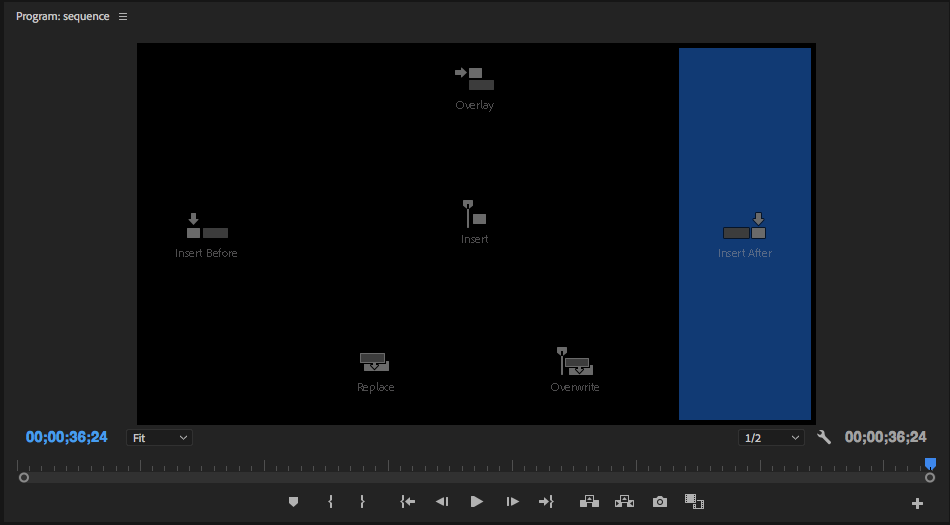
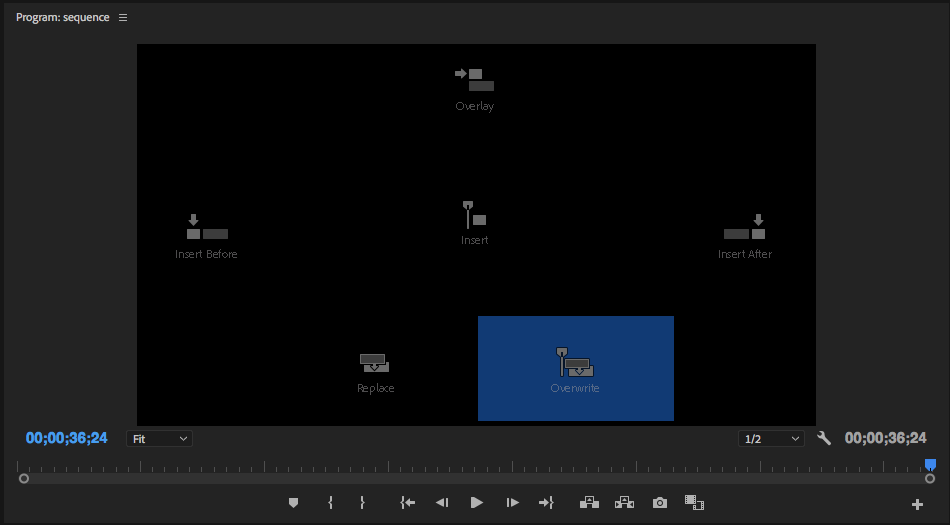
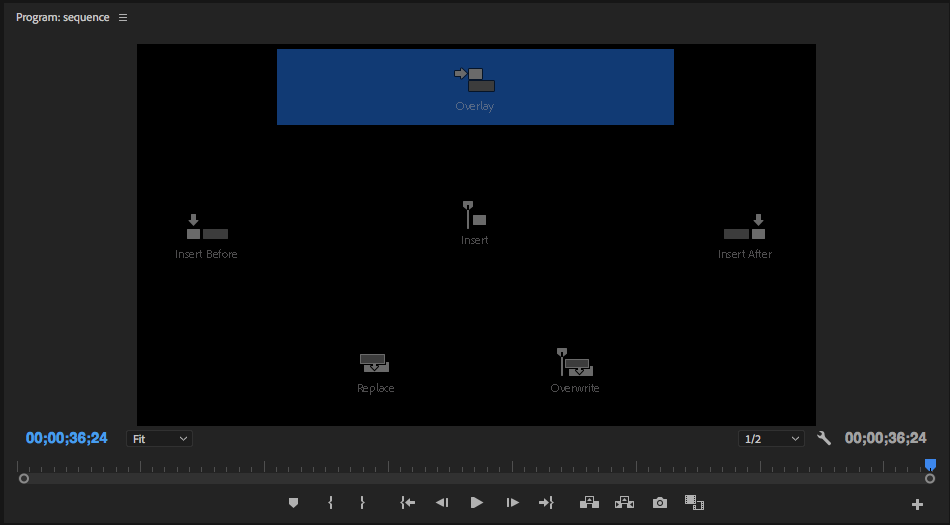
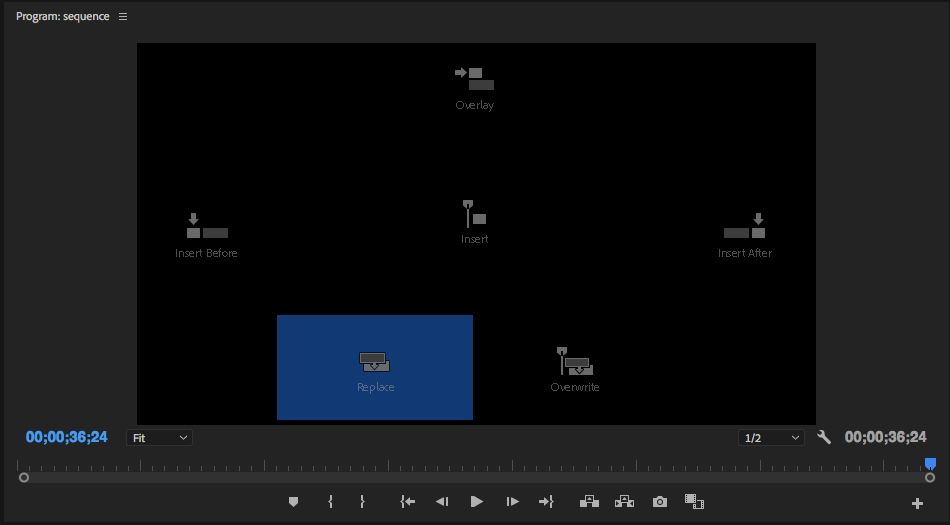
When you drag clips over the Program monitor, a blue grid overlay appears. Each part of the grid is a drop-zone that performs a different edit.

Dragging clips over the Program monitor reveals drop-zones.
According to Collin, this feature was "borrowed" many years ago to help Final Cut Pro 7 users switch over to Premiere Pro. Now, however, the Program monitor drop-zones are part of Premiere Pro's touch and gesture functionality, which is why it's not a commonly known feature on desktops. Watch the Adobe video on editing with touch and gesture actions.
Source Assignments and Source Patching in Premiere Pro
Before you start dropping clips on the Program monitor, it's important to understand where they will go in the Timeline. This is called Source Patching. Watch the video segment below for Collin's brief summary of source patching in Premiere Pro.

Watch a brief overview of source patching in Premiere Pro. Via VideoRevealed
In short, Source Patching tells Premiere Pro where to put clips in the Timeline. When a clip is selected in the Project panel or loaded in the Source monitor, you will see the blue V1 and A1 source assignments become active.

V1 and A1 source assignments are activated when clip is selected.
These indicate the number of video and audio tracks and where the will go in the Timeline. Source assignments also indicate how many video and/or audio tracks are in a clip. You may see more tracks (V2, V3, V4, A2, A3, A4, etc.) for multi-camera sequences or sources with multiple audio channels.
Source Patching is easily confused with Track Targeting. An easy way to remember the difference is source patching controls where media is coming from. When editing with drop-zones, make sure source patching is turned on. Source assignments an be toggled on or off by clicking them.

Source assignments are on the left, track targets on the right.
Editing with Program Monitor Drop-Zones
One more thing you have to know before getting started is clip placement in the Timeline is determined by the Playhead. For example, in the animated gif below, Insert After inserts the mango clip after the clip under the playhead, the magenta clip.

Learn how to use the program monitor editing mode in Premiere Pro. Via VideoRevealed
Time to let the clips drop! Watch Collin walk through each of the Program montior drop-zones in the video segment above. For your convenience, we've provided our own animated drop-zone reference guide below.
Insert
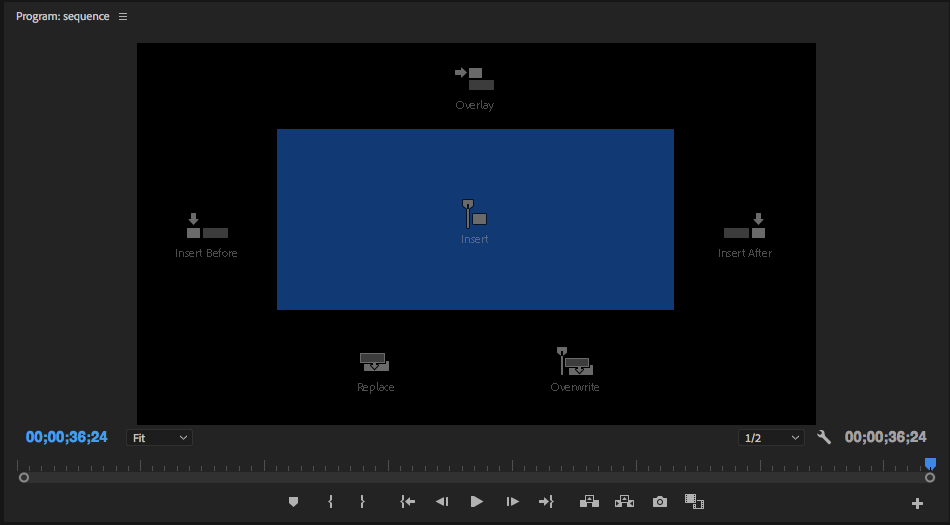
Insert Before
Insert After

Overwrite

Overlay
Replace
NOTE: Clip selection will overrule current playhead position.
BONUS: Drag and drop from the Media Browser
In the beginning of the video Collin promises a tip that nobody knows. Sorry for spoiling it in the section title, but the video is still worth watching!
Clips can be dragged from the Media Browser and dropped on the Program monitor. Via VideoRevealed
Remember...
A couple things to remember when editing with Program monitor drop-zones.
- Drop zones obey source patching. So, if you drop a clip in the Program monitor and nothing happens, check your source patching.
- Clip In and Out points will be honored. Set in and out points in the Source monitor before dragging the clip onto a drop-zone.
Bropinion
Editing with Program monitor drop-zones is an interesting workflow. Generally, anything done with the mouse is going to be slower than keyboard shortcuts. And all the drop-zone functions can be mapped to the keyboard. On the other hand, it's cool that drop-zone edits are determined by the playhead's position. Especially with the Insert edits. The Replace drop-zone is also very convenient. That alone might be enough reason to adopt drop-zones into your editing workflow.
What are your thoughts on drop-zones. Are they something you would use? In what situation could they speed up your editing workflow? Let us know below!

VideoRevealed
Collin Smith is the founder and frontman of VideoRevealed. Having worked at Adobe, Collin's tutorials are particularly insightful. Support Collin and VideoRevealed by subscribing to the YouTube channel and make a donation.


