
4 Little-Known Effects in Premiere Pro
How to create a logo animation, background color ramp, liquid title transition, and lens distortion in Premiere Pro.
Chances are you're not familiar with all the native effects in Premiere Pro. At the very least, there may be some that you've forgotten about. Let this 4-in-1 tutorial by Motion Array guide you to four particularly helpful effects in Premiere Pro. In this post, we break down all four effects and draw out some helpful, practical uses for each one. By the end of the tutorial, you'll know how to animate a logo, create a background ramp for titles, create a liquid title transition, and fix lens distortion.

In this Premiere Pro tutorial we explore 4 helpful effects that you might not have known were inside of Premiere Pro. —Motion Array
Basic 3D
The Basic 3D effect in Premiere Pro completely eliminates the need for After Effects. Kidding. But it's more than sufficient for doing exactly as its name implies: basic 3D. In the video segment below, Motion Array covers the Basic 3D controls and suggests a couple practical uses for the effect. We highlight them further down.

Use the Basic 3D effect in Premiere Pro to create professional looking effects, transitions and logo animations. Via Motion Array
Basic 3D Effect Controls
- Swivel - Rotates the image on the Y-axis
- Tilt - Rotates the image on the X-axis
- Distance - Scales the image on the Z-axis
- Specular Highlight - Adds a light source that reflects of the image.

"Wall of Footage"
Using the Basic 3D controls above, you can construct 3D "walls" of clips as shown below.

Via Motion Array
Simple Transition
The Basic 3D effect can be used to create simple rotating, flipping, and spinning transitions. The important thing is starting and ending Swivel and Tilt animations on 90° and/or 270°. The image is perpendicular to the frame at these degrees, making it look like its disappeared.

Via Motion Array
Logo Animation
The Basic 3D effect works especially well for creating logo animations in Premiere Pro. Motion Array teaches how to create your own logo animation in the video segment below.

Learn how to create a logo animation with Premiere Pro’s Basic 3D effect. Via Motion Array
Apply the Basic 3D effect to your logo.
Start either the Swivel or Tilt on a right angle (90° or 270°) so the logo is perpendicular to the frame, effectively disappearing like a sheet of paper.
Toggle the animation stopwatch to set the starting keyframe, move forward in the timeline, adjust the Swivel/Tilt to taste and the ending keyframe will automatically be set.
Check the Specular Highlight to add flare or realism to your animation if desired.
Ramp
Titles on a solid background has a nice, clean look. But sometimes you might want to create some visual depth in the background. This can be done with the Ramp effect in Premiere Pro.

Learn how to create a background gradient with the Ramp effect in Premiere Pro. Via Motion Array
Ramp Effect Controls
The Ramp effect controls are simple. Use them to select the where the starting color begins and where the second color ends. Under Ramp Shape you can switch from Linear Ramp to Radial Ramp for a circle.
PRO TIP: Click the Ramp effect in the Effect Controls panel to activate the control points in the Program monitor. Drag the points to quickly adjust the Start and End of Ramp.

Create a Color Matte and place it beneath your title in the Timeline.
Apply the ramp effect to the Color Matte.
Choose Linear Ramp or Radial Ramp under Ramp Shape.
Set the Start of Ramp and End of Ramp to taste.
Customize your Start and End Colors.
Turbulent Displace
The most complex effect of the four, Turbulent Displace has many different uses. Video creators have used this effect to create a wide variety of transitions. Think of Turbulent Displace like this: turbulent = unsteady, chaotic and displace = to move from its place. Put them together and you get something that's moving around like crazy! In this video segment, Motion Array shows how Turbulent Displace can be used to create a liquid title transition.

See how to use the Turbulent Displace effect in Premiere Pro to create a liquid text transition. Via Motion Array
Trippy LSD Effect
Use Turbulent Displace to create drug-induced, face-melting effects. This look could also work well in hip-hop music videos.
PRO TIP: Try dramatically shortening the duration of the Turbulent Displace to give it more of glitch look.

Via Motion Array
Hand-drawn wiggle
Motion Array also shows how Turbulent displace can be applied to hand-drawn graphics to make them wiggle as shown below. The look is similar to popular animated cartoons. Watch Motion Array's full tutorial on how to create hand-drawn graphics in Premiere Pro.

Via Motion Array
Lens Distortion
Bringing up the rear is the Lens Distortion effect. While there are many camera-specific presets built-in to Premiere Pro for correcting lens distortion, there are many creative uses for this effect as well. Motion Array explains in this last video segment.
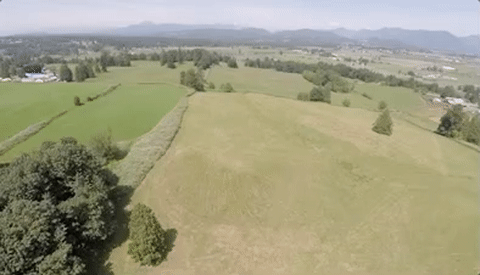
Apply Premiere Pro’s Lens Distortion effect to correct fisheye-looking footage like from a drone or GoPro. Via Motion Array
Bropinion
This Motion Array video packs the same punch as four separate tutorials. We were particularly impressed with all the uses of the Basic 3D effect highlighted in the video. Basic 3D is one of those effects you forget is there—similar to the title of the video. But it's love all over again once you remember.
Which was your favorite effect in this tutorial? Which one didn't you know about? Can you share any practical examples of how you've used any of these effects? Let us know below!

Motion Array
Motion Array is the ultimate video maker's platform. Create, review and publish amazing videos using one integrated solution. Motion Array's Premiere Pro tutorials are created by Jordan Dueck.


