Make the Most of Masks in Premiere Pro
How to Remove Objects and Make Isolated Adjustments with Masks in Premiere Pro.
From complex visual effects to simple fixes, masks are an essential part of video editing. A mask is simply a selection of the frame—everything outside the selection is invisible or "masked out". In this tutorial, featuring a video by Jordan Dueck of Motion Array, you will learn four different ways to use masks in Premiere Pro. Follow our guide to the tutorial below.
Masking in Premiere Pro
Masking is easy in Premiere Pro. Select a clip, go to the Effect Controls panel, and look for Opacity. To create a mask, click any of the three masking tools: ellipse (oval), 4-point polygon (rectangle), or free draw bezier (pen tool).
Your mask will appear in the Program Monitor where you can add, remove, or reposition the mask points using the Pen tool. Use the Mask controls in the Effect Controls panel to edit:
- Mask Path (shape) - use the tracking controls to automatically track the mask to a moving subject
- Mask Feather (edge softness)
- Mask Opacity (transparency)
- Mask Expansion (size)
By default, everything inside the mask is seen and everything outside is eliminated. Check the Inverted box to invert the mask selection.
PRO TIP: Masks can be copied (CMD/CTRL+C) and pasted (CMD/CTRL+V) to other clips. Just make sure the clip's Opacity is selected in the Effect Controls panel.
1. Make Objects Disappear
Also known as object removal, this masking technique is like post-production sleight of hand. In this example, Jordan removes a woman from a shot of the beach. As Jordan points out, this method can be used to save shots with unwanted objects in the frame.
Use a simple ellipse mask to isolate the subject from the background. If your subject is moving, animate the mask by adding keyframes to the Mask Path.
Increase the Mask Feather and check Inverted so everything outside the mask is visible.
Copy the clip above itself in the Timeline. Delete the mask from the bottom clip.
Use the Slip tool (keyboard shortcut: Y) to adjust the timing of the bottom clip. It's CRITICAL that you have a shot of the background (also called a "plate") without the object/subject in the frame.
It's important to point out that Jordan is working with a static shot—the camera isn't moving. This makes masking and tracking MUCH easier. In fact, you'll notice all four of these masking tricks use static shots.
PRO TIP: Plan ahead. Use a tripod for shots that require object removal or for shots you want to add isolated color adjustments. You can always create digital camera movement afterwards in post.
2. Isolate Light and Color
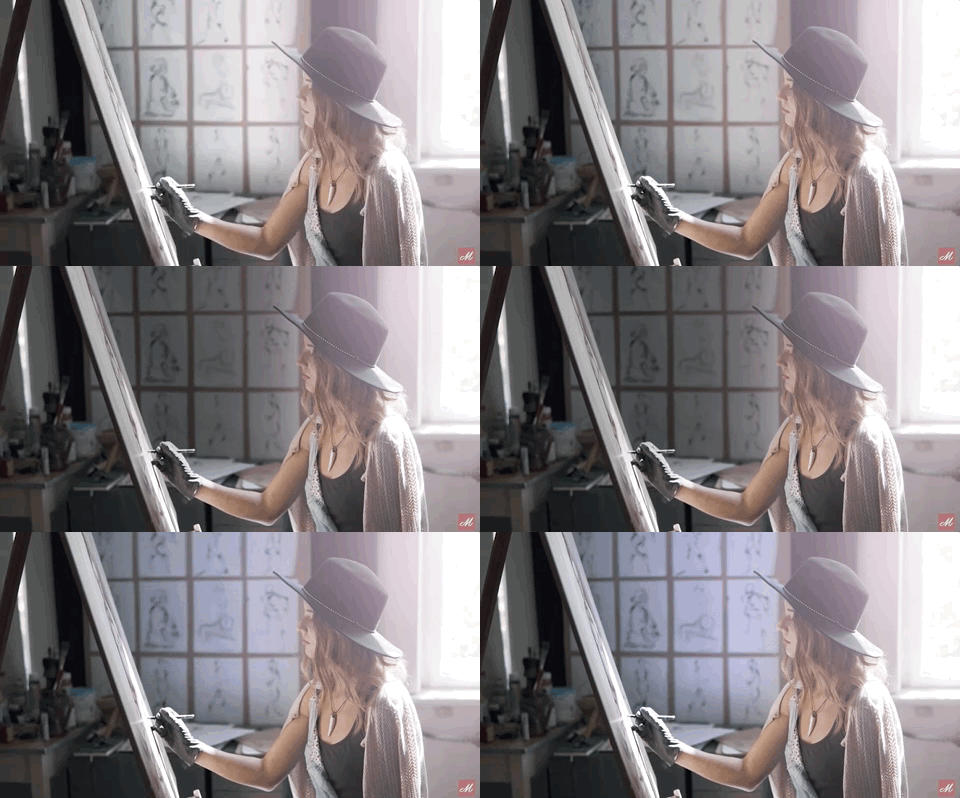
Masks are so powerful they can be used to re-light a scene. The old-school term for this type of mask is a "power window". Jordan uses another static shot, this time of a woman painting. He shows how a mask can be used to brighten, darken, or add color to the background.
Create an adjustment layer and add it above your clip in the Timeline.
With the adjustment layer selected in the Timeline, use the Pen tool under Opacity in the Effect Controls panel to free-draw a mask in the Program monitor. Reducing the zoom in the Program monitor can make it easier to draw masks outside the edges of the frame.
Feather mask A LOT.
Apply your desired lighting or color effects to the adjustment layer.
3. Make Text Feel 3D
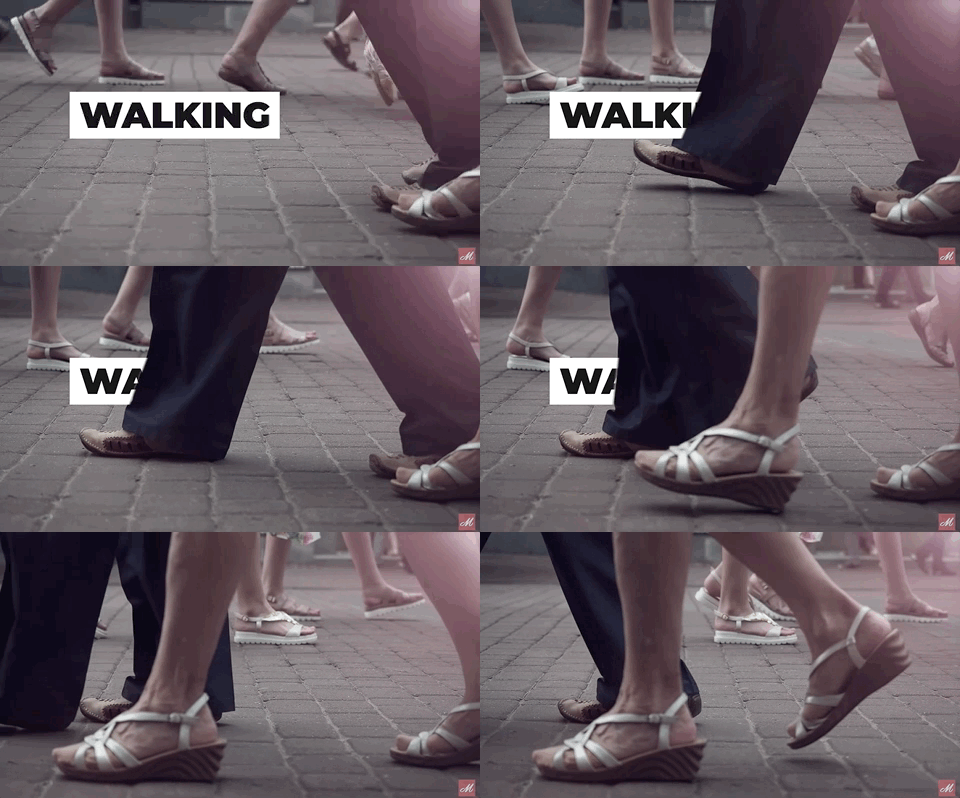
Up to this point, we have not animated individual points of a mask. In this faux 3D technique, Jordan animates mask points over some text to make it appear like a subject's leg steps in front of the text and wipes it off screen. Again, not a moving shot.
Start with a simple mask—the less points the better. You can always add more points as needed.
Click the Mask Path animation stopwatch. Use the Pen tool to reposition mask points frame-by-frame along the edge of subject/object as it crosses the frame. This process takes time!
Add a subtle feather if needed to make the mask blend with the subject/object.
4. Make Faces Pop
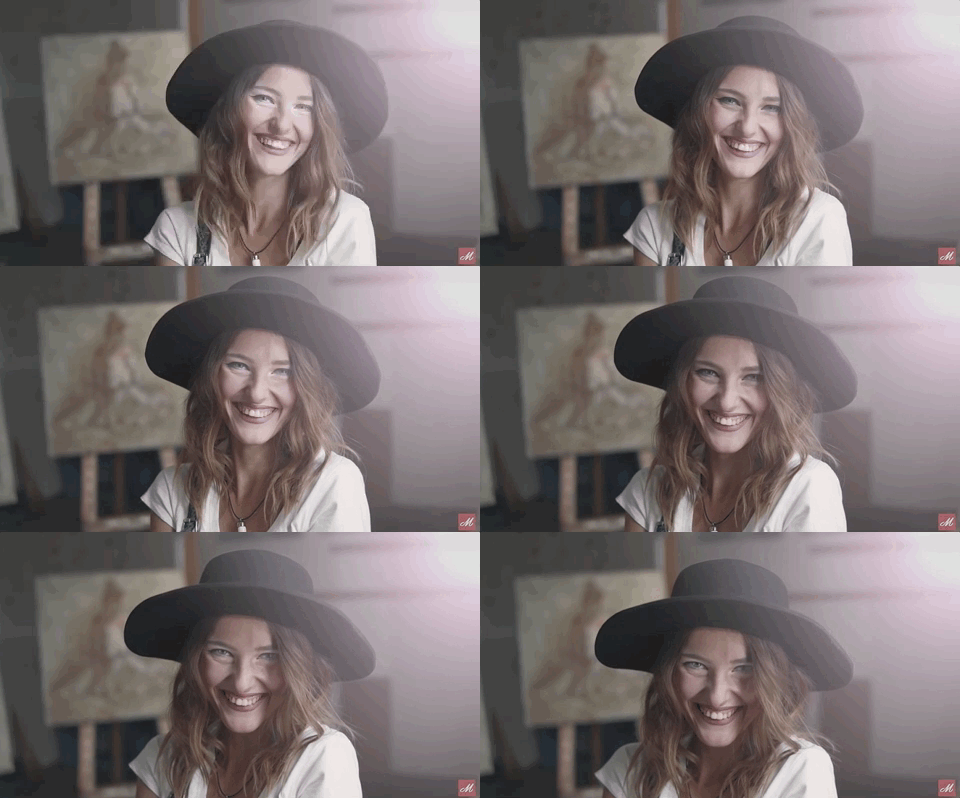
Faces are typically the greatest point of interest in a shot; brightening the face can help draw the viewer's attention to the subject. In this example, Jordan demonstrates how to use Premiere Pro's built-in mask tracking tools to automatically track an ellipse mask on his subject's face. He points out the fact that Premiere Pro handles face tracking very well.
Create a simple ellipse mask around the face or eyes of the subject.
Click the "Track selected mask forward" button and watch Premiere Pro do it's work.
Duplicate the clip above itself in the Timeline. Delete the mask from the bottom clip; this will restore the background.
Apply your desired color effects to the top clip with the tracked mask. Increase the feather as needed.
Alternatively, the mask and track could be applied directly to the Lumetri Color effect, eliminating the need for duplicated clips in the Timeline.
Bropinion
Masks are literally windows to a whole new way of looking at your clips. They give video editors control over everything in the frame. With time and practice, you will develop a sense for when to use masks to eliminate distractions and direct your viewer towards the story you are telling.
What's the craziest thing you've had to mask out of a shot? (Please no porn!)
Motion Array
Motion Array is the ultimate video maker's platform. Create, review and publish amazing videos using one integrated solution. Motion Array's Premiere Pro tutorials are created by Jordan Dueck.


