Adding Audio Track Keyframes in Premiere Pro

The Difference Between Audio Clip and Audio Track Keyframes in Premiere Pro and Why it Matters.
In this tutorial, featuring a video by Adobe Creative Cloud, voiced by Maxim Jago, you will learn how to create audio track keyframes in Premiere Pro, as well as learn the distinct benefits they have over audio clip keyframes. The video demonstrates how to use audio track keyframes to create a fade up that’s “pinned” to the audio track in Premiere Pro, regardless if the music track is replaced. This allows music tracks to be auditioned quickly without having to recreate the fade on every clip. Follow our guide below to learn how to do this yourself!
What are Audio Keyframes?
Just like any animation keyframe in Premiere Pro, an audio keyframe marks an audio adjustment at specific point in time. Audio effects can be keyframed just like video effects. One of the most common uses of audio keyframes are clip volume keyframes. These can be use to attenuate audio spikes, lower music underneath dialogue, reduce the intensity of an audio segment, etc. Watch the beginning segment of the video below to see how Maxim uses audio clip keyframes to create a simple fade up on his music tracks.

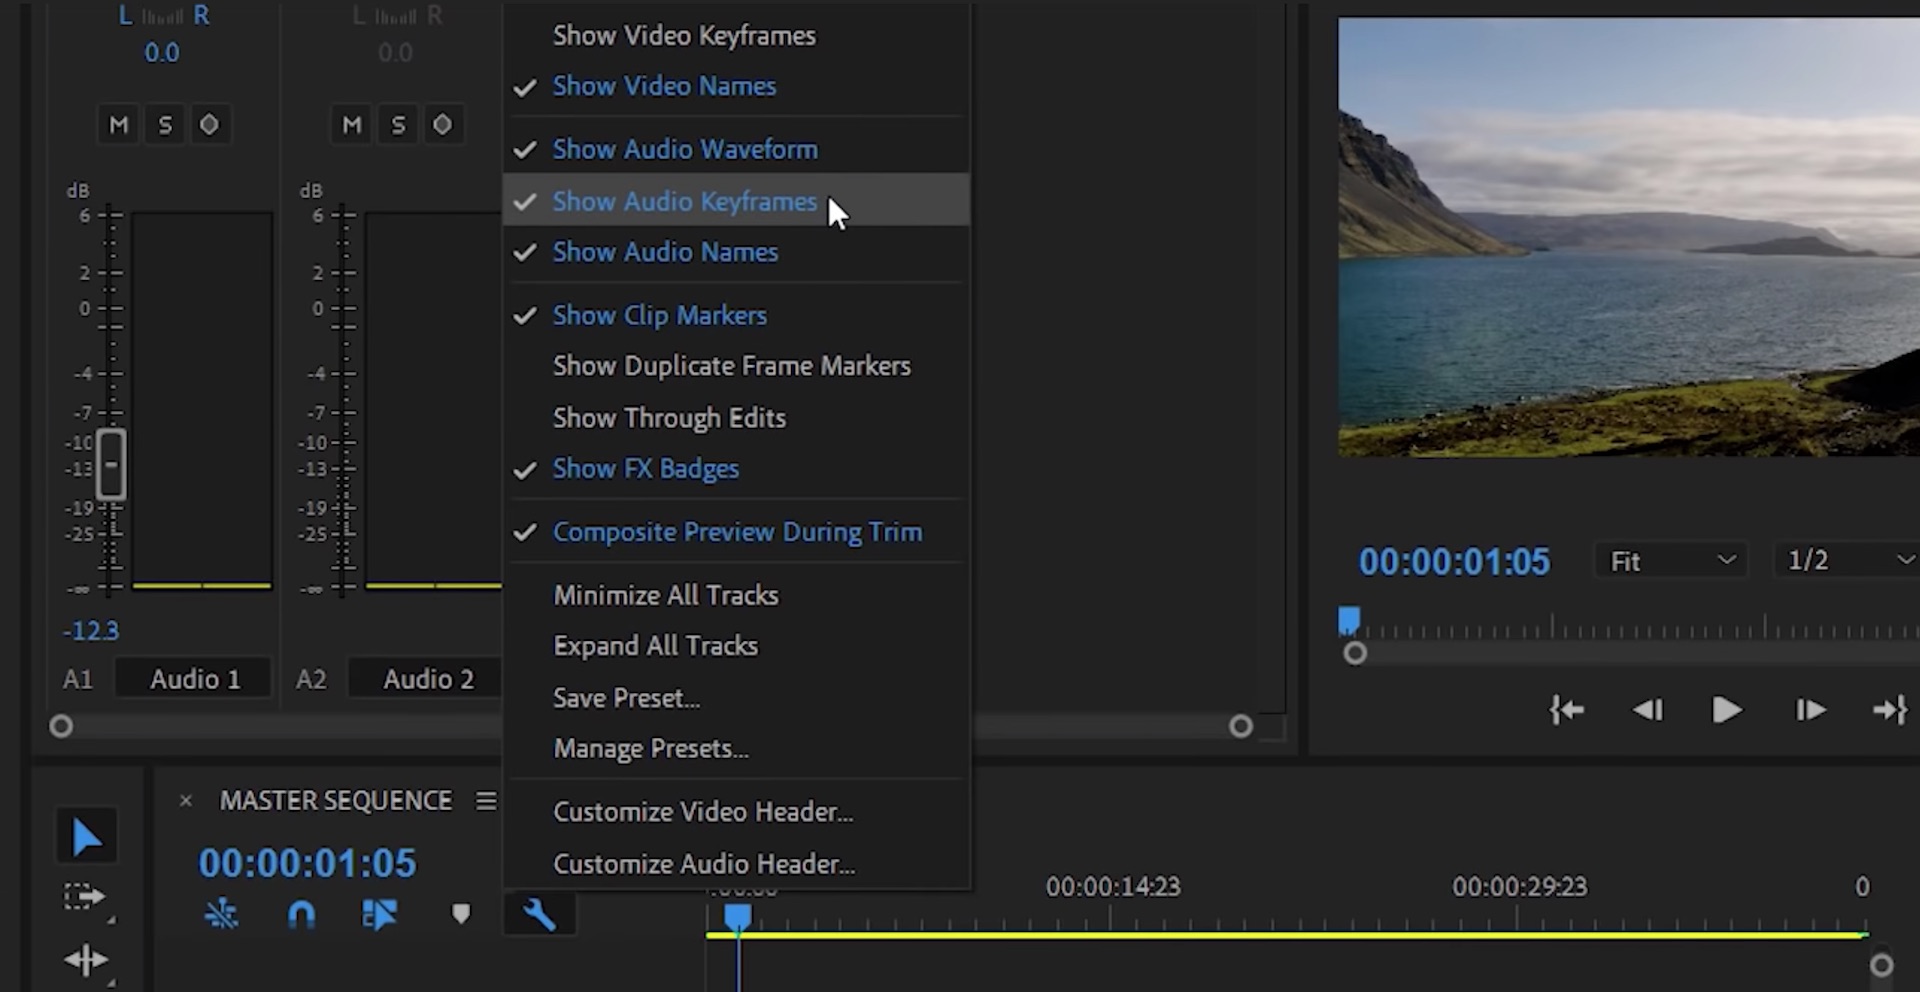
One important thing to gain from this segment is Show Audio Keyframes has to be enable under the Timeline panel settings (wrench icon). This reveals the “rubber band”, a white line running across the middle of all your audio clips in the Timeline. This is where audio clip keyframes can be created. A keyframe on the rubber band indicates an audio adjustment at the point in the clip.
Via Adobe Creative Cloud
Fun fact, the rubber band in the Timeline mimics the same function as in the Effect Controls panel. The difference is the rubber band can only show one audio parameter at a time, whereas you can see and control all audio parameters in the Effect Controls panel.
One tip Maxim employs in this segment is using the CMD/CTRL keyboard modifier to create keyframes instead of switching to the Pen tool. Holding the CMD/CTRL keys while clicking on the rubber band will create keyframes in Premiere Pro. Notice the Pen tool is not active in the GIF below.

Via Adobe Creative Cloud
What are Audio Track Keyframes?
One specific thing Maxim says in the segment above is that he hasn’t chosen which piece of music he wants to use in his edit. With audio clip keyframes, he would have to recreate the audio fade for every music track he auditions. Not efficient at all.
This is where audio track keyframes are very useful. Audio track keyframes, as the name indicates, are added to the track (not track as in music track, they actual audio track in Premiere Pro) and they remain independent of the audio clips placed on it. So you can reposition or replace audio clips on the track and the audio track keyframes will still take effect. Watch the segment below to see how to create audio track keyframes in Premiere Pro.

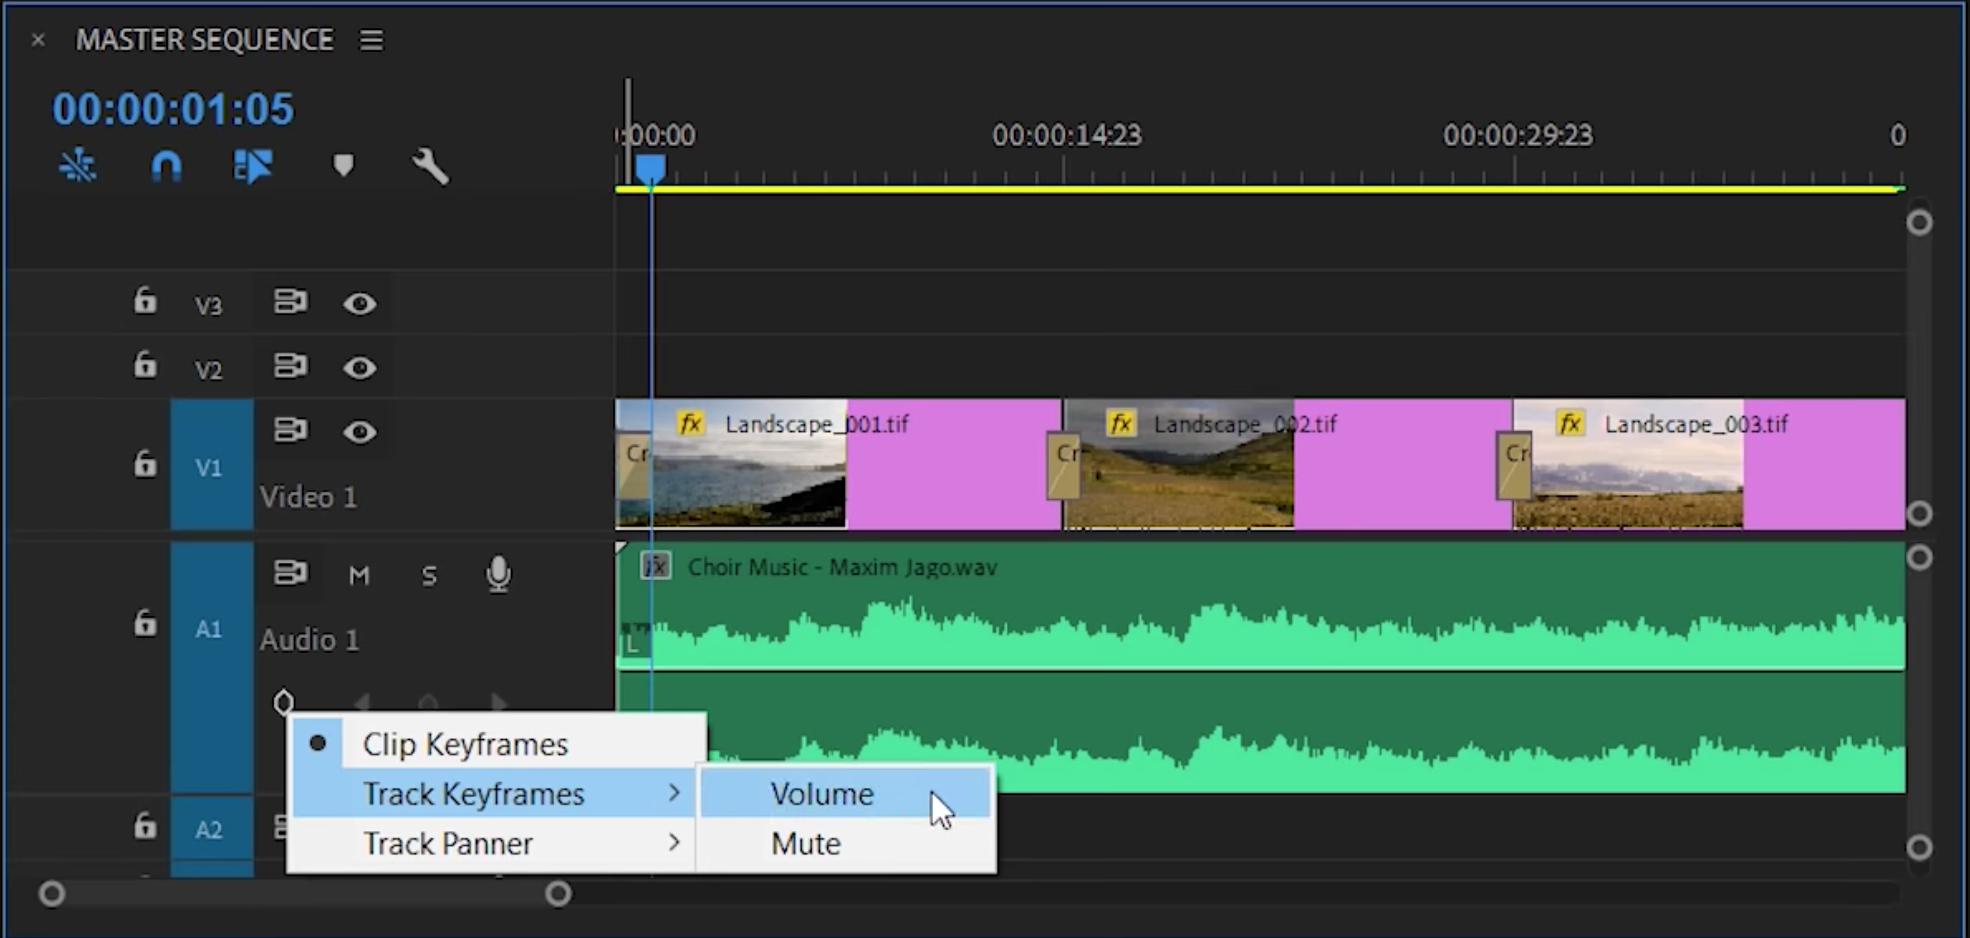
To view audio track keyframes, double click the audio track header to expand it in order to view the track controls. Click the Show Keyframes button and select Audio Track Keyframes > Volume. Note that any audio effects applied to the track in the Audio Track Mixer would also be visible here. Now, keyframes on the rubber band will be “pinned” to the track and not to any specific audio clip.

One visual change that occurs when switching the view to audio track keyframes that Maxim points out is the keyframe rubber band will continue past the clip, down the timeline. (When working with clip keyframes the rubber band is constrained to the clips.)

Via Adobe Creative Cloud
An Easy Way to Tell if Audio Track Keyframes
If you create audio track keyframes and, for whatever reason, decide to switch back to clip keyframe view, how can you visually tell if the track keyframes are still there? Technically, you can’t. Premiere Pro won’t show them to you underneath the audio clip. However, Maxim has a clever trick that will show you the results of audio track volume keyframes. Watch how he does it in the segment below.
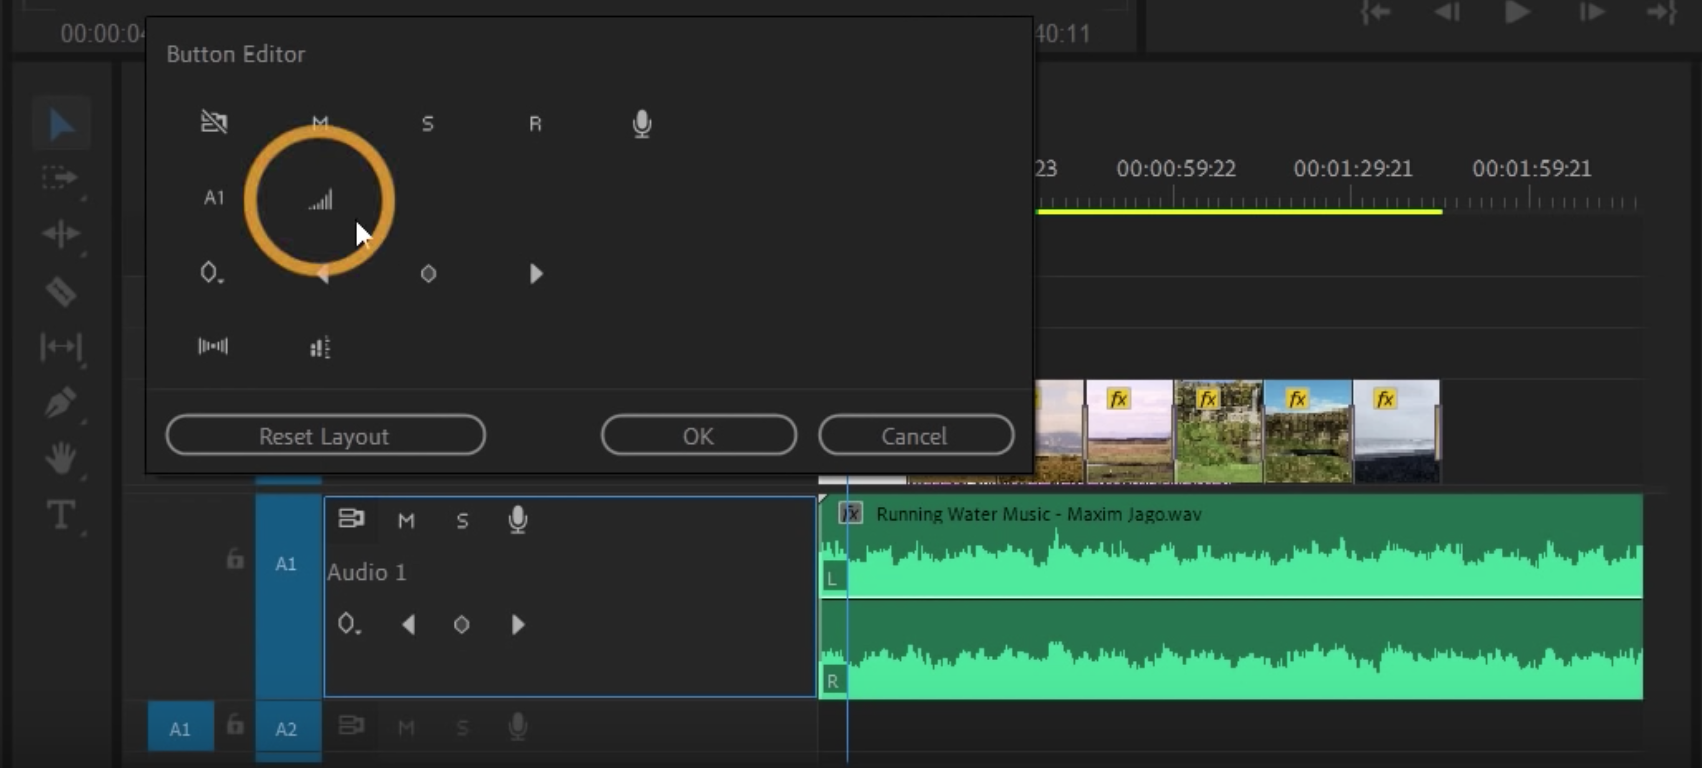
The trick is customizing the audio track header by adding the Track Volume control. This enables you to see the volume level adjustment as the audio track keyframes animate.
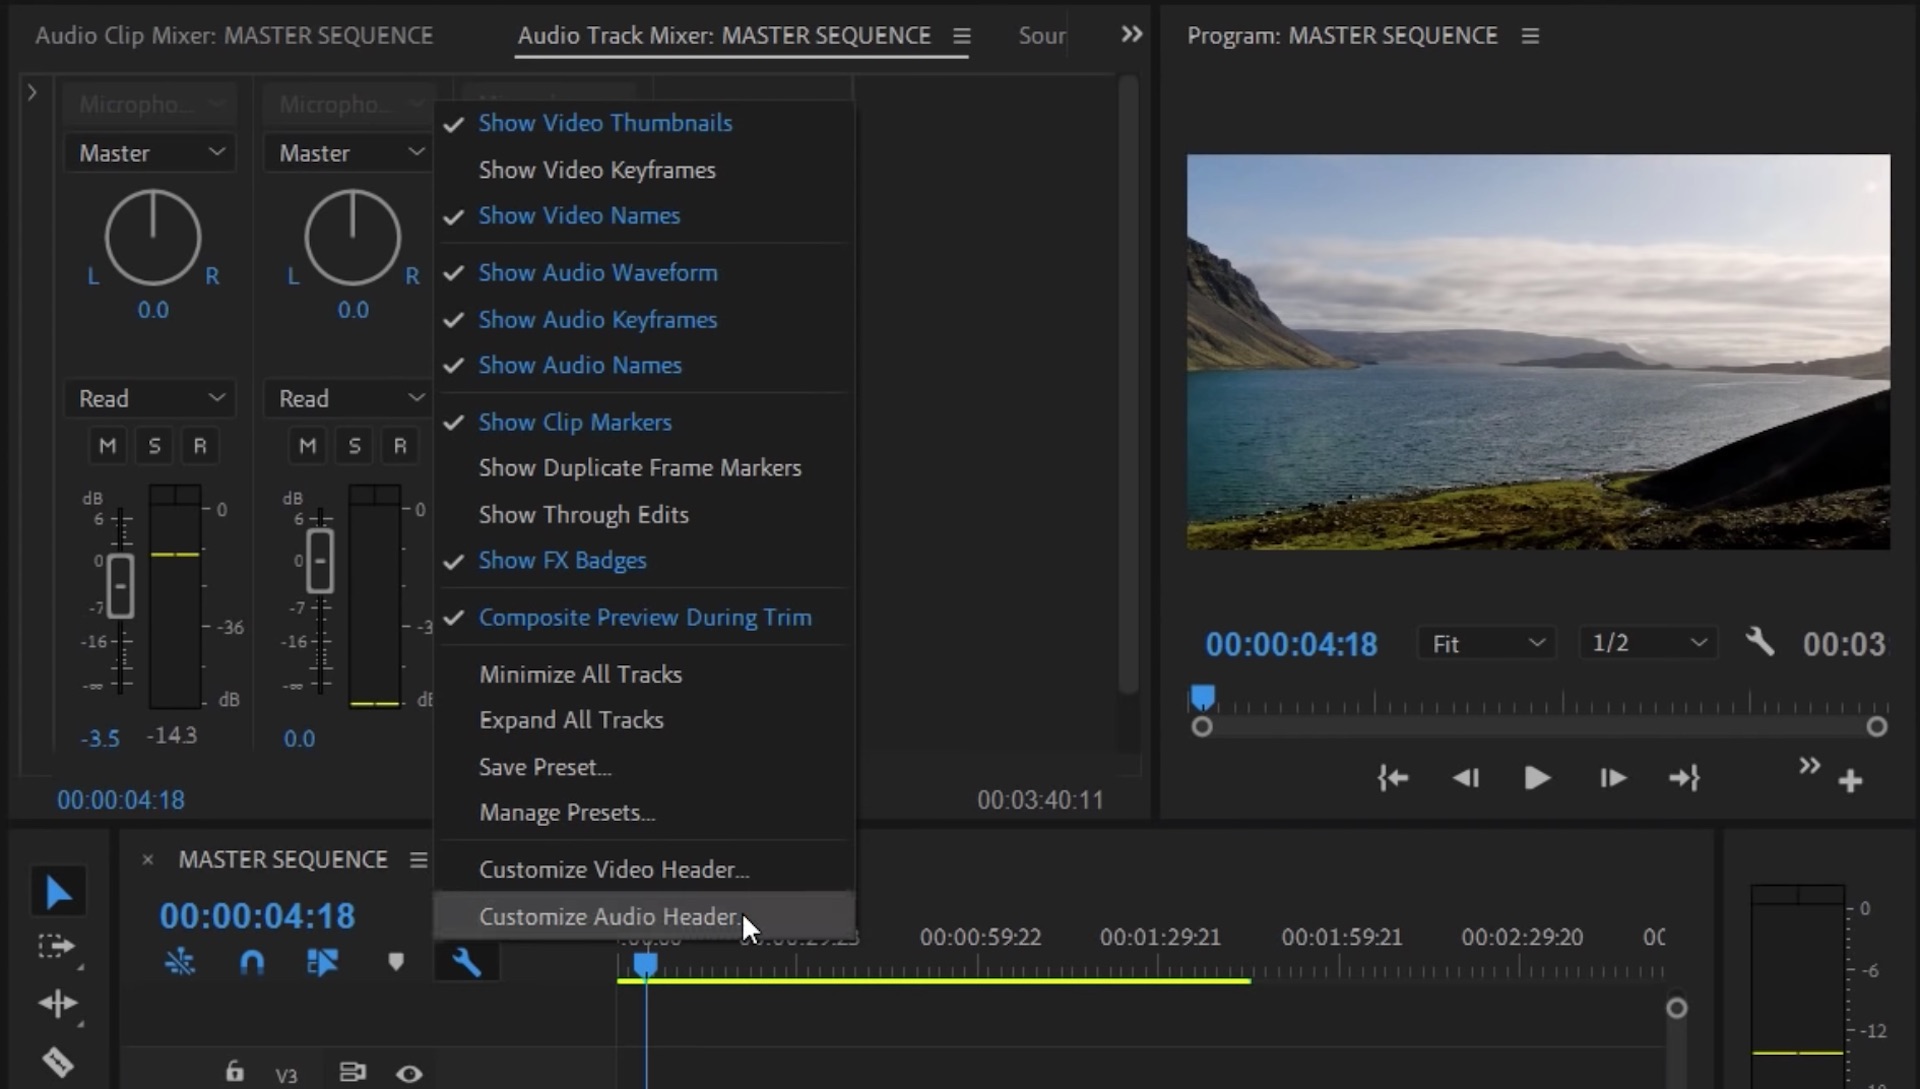
To customize the track header, you can right click the header area and choose Customize. Or, you can click the Timeline panel settings (wrench icon) and choose Customize Audio Header, like Maxim does in the video.
Via Adobe Creative Cloud
Even when audio track keyframes are not visible, the Track Volume control in the audio track header can at least display the levels changing whenever they are present.
Are audio track keyframes new to you? What other ways could you use them in your audio editing workflow? Let us know below!