
Cinema Grade: Modern Color Grading Plugin For Premiere Pro

Cinema Grade Brings DirectGrade, Step-by-Step Guided Grading, and Hollywood Film Looks to Premiere Pro.
[Sponsored Post]
Cinema Grade is an all-new color grading application by Color Grading Central. Take control of the colors in your shots with DirectGrade, a new approach to color grading directly in the image. Learn how to color grade like a professional colorist using the workflow steps built in to the Cinema Grade interface. Choose from dozens of Hollywood-grade color filters and LUTs or copy the look of any still image with Cinema Grade’s look transfer tool.
Cinema Grade arrives at an interesting time with the release of Premiere Pro CC 2019, featuring the Hue Saturation Curves in the Lumetri Color panel. You will be interested to see how Cinema Grade might actually be faster than Premiere Pro’s new selective color grading tools. In this post, you will learn how Cinema Grade can accelerate your color grading workflow and help you achieve cinematic results in Premiere Pro.
What is Cinema Grade?
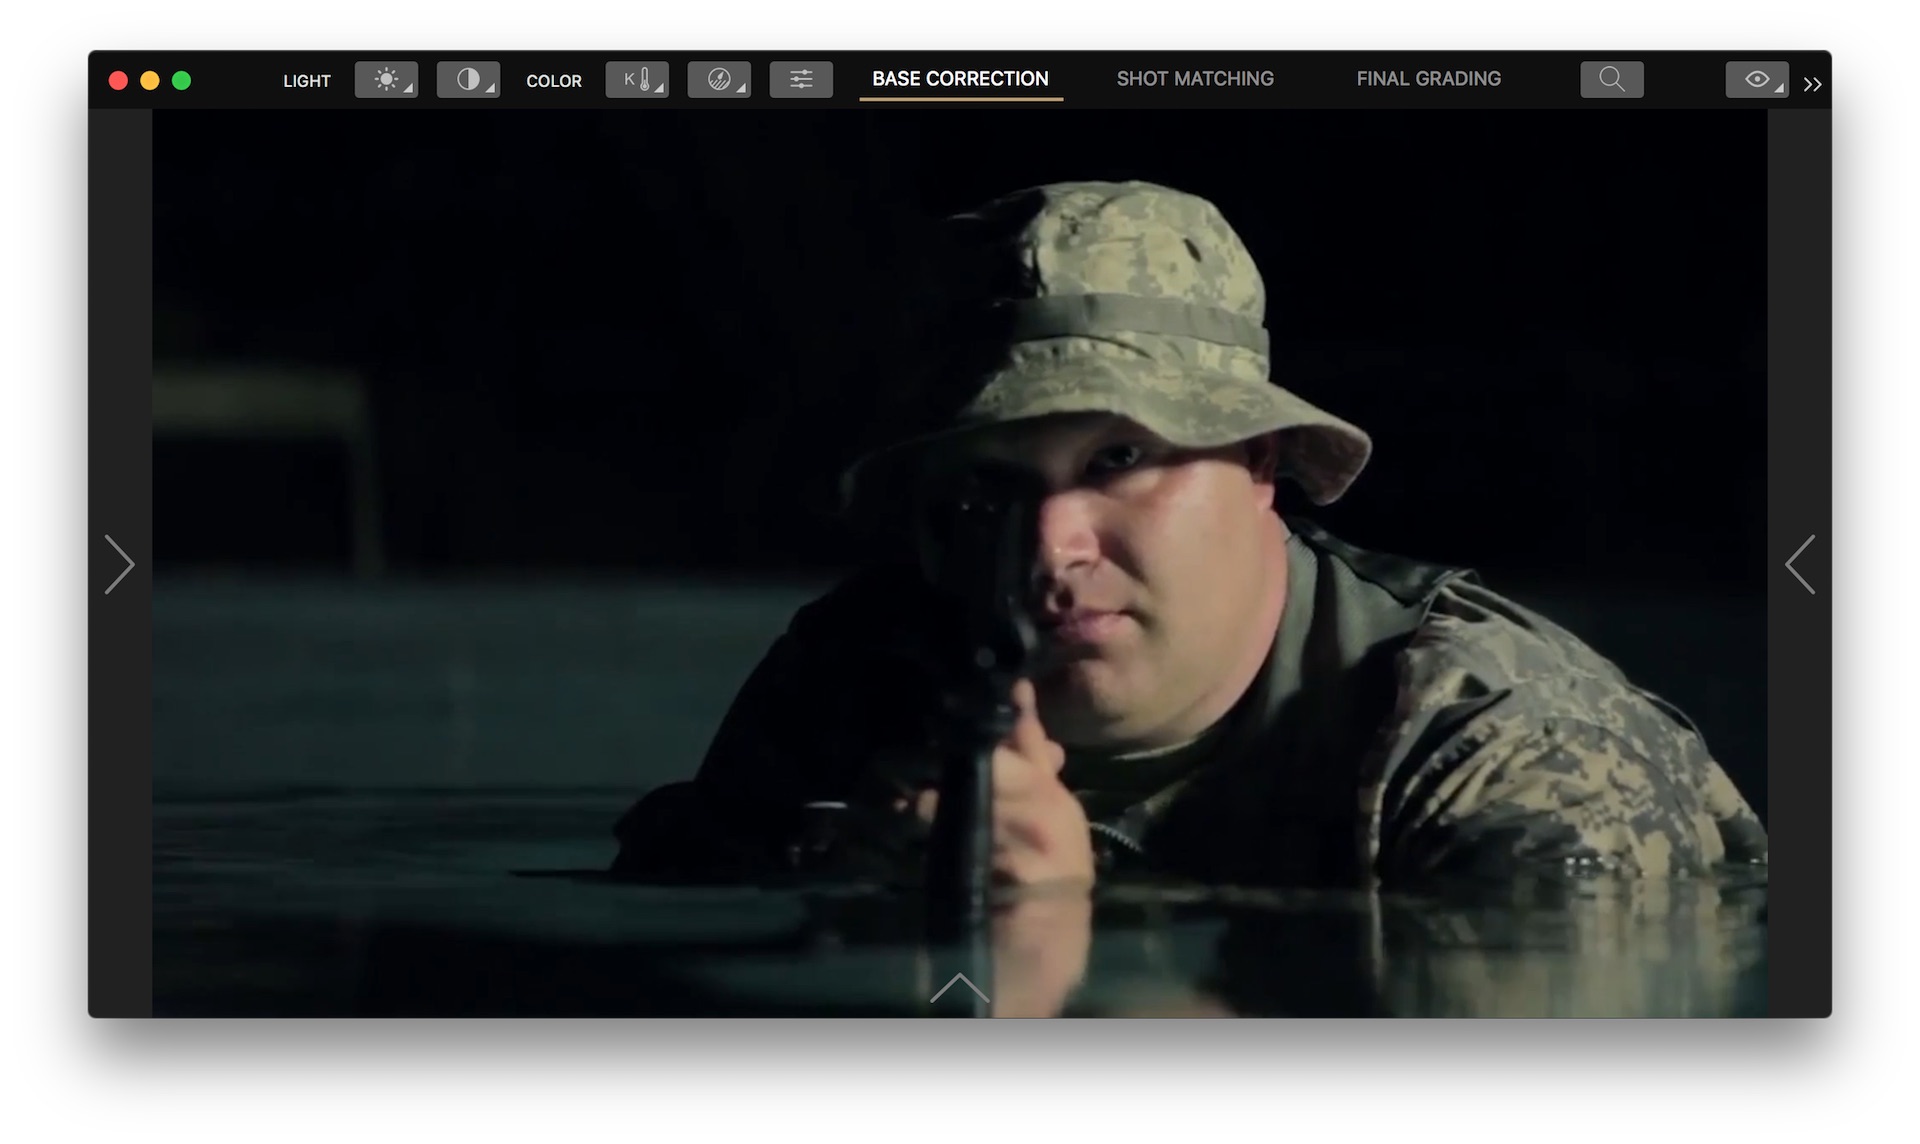
Cinema Grade is a Mac-only color grading application that lives inside Premiere Pro and other hosts as an effect plugin. Cinema Grade Pro has additional features and is only available for Premiere Pro CC 2018 and CC 2019. Apply the Cinema Grade effect to clips in the timeline and launch the application from the Effect Controls panel. Watch Cinema Grade’s promo video below to see it in action.

Cinema Grade identifies itself as a “modern color grading software for the independent filmmaker.” Two things you can glean from this marketing statement:
Cinema Grade is going to look and feel more progressive than the color tools you’re used to. In fact Cinema Grade claims professional results without the “pain and frustration” of traditional color grading tools. It’s the color grading software of tomorrow
Cinema Grade is targeting individuals—filmmakers and video creators—as opposed to the professional editing and color grading market. Does this make Cinema Grade any less of a professional tool? Absolutely not! Anyone doing color grading can benefit from Cinema Grade.
At the end of the day, regardless of user skill level, once you “buy in” to Cinema Grade’s approach to color grading, it’s blazing fast! Especially for making isolated hue adjustments.
But let’s not get ahead of ourselves just yet. There’s so much more to Cinema Grade than meets the eye, and we mean that literally. The interface cleverly hides tools so that the image is the biggest thing in the interface, as it should be... Sorry, getting ahead of ourselves again. Cinema Grade is just so cool!
Getting Started with Cinema Grade
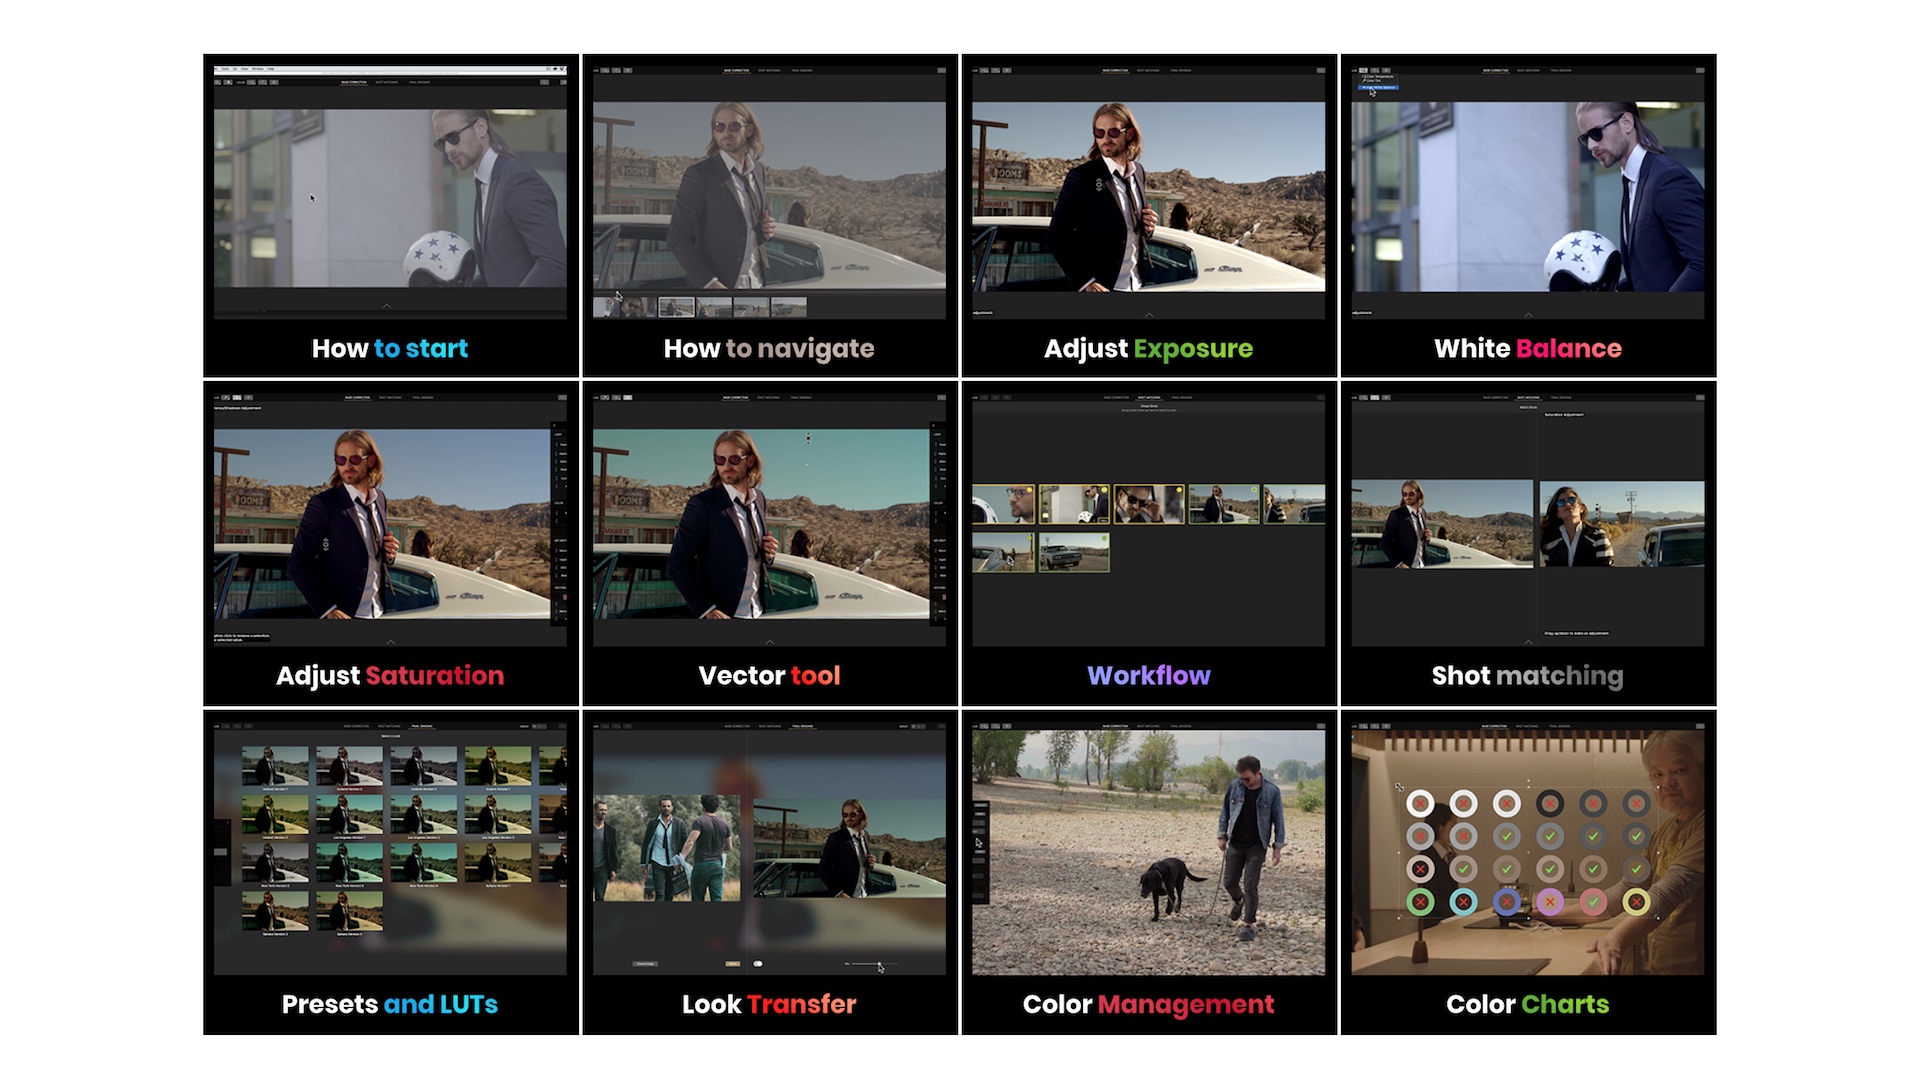
The best place to learn Cinema Grade is the How it Works section at cinemagrade.com. (We could care less about Bounce Rates if it means you’re getting the best possible help!) At the time of this writing, Cinema Grade has 12 video tutorials that are well made and simply brilliant. You’ll have a conceptual understanding of Cinema Grade in no time. That said, we’re going to focus on using Cinema Grade in it’s best form: inside Premiere Pro.
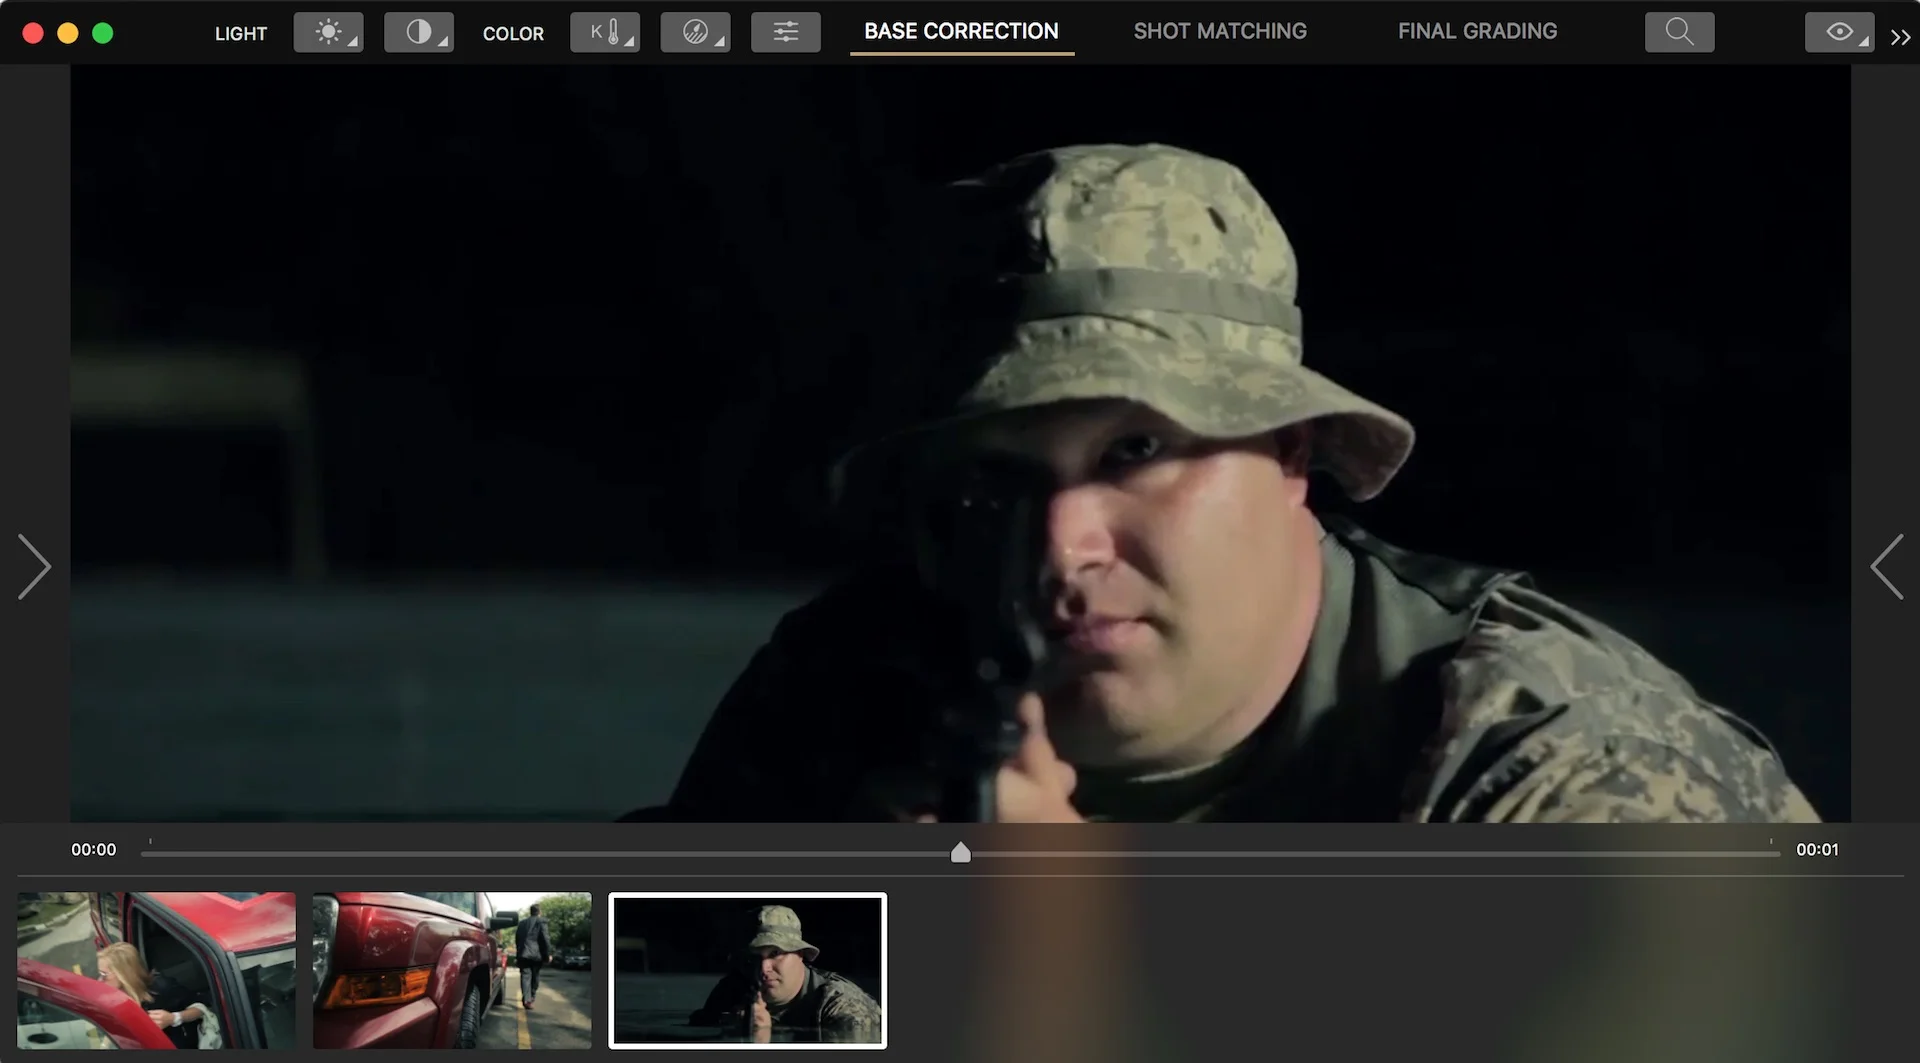
Once Cinema Grade is installed and activated, open Premiere Pro CC and navigate to the Cinema Grade in the Effects panel. The first thing you want to do is apply Cinema Grade to ALL the clips in your sequence. Cinema Grade is able to “see” all the clips in the timeline with the effect applied.

PRO TIP: A good workflow tip for working with long-form projects is to break it up into shorter sequences for grading.
Select any one of the clips, go to the Effect Controls panel and under Cinema Grade click Open Controls. Cinema Grade will launch in it’s own application window.

PRO TIP: Maximize the Cinema Grade screen. This will prevent you from being distracted by Premiere Pro or your desktop in the background. Take advantage of Cinema Grade’s well-designed, image-first UI and maximize! (There’s some rhymes.)
The Cinema Grade Interface and DirectGrade
Understanding the layout of Cinema Grade is essential to maximizing its efficiency and not getting frustrated with its design. (Remember, it’s not what you’re used to!) The first thing you’ll notice about Cinema Grade is it’s basically one big monitor.
DirectGrade
The intention for Cinema Grade’s image-first design is to bypass traditional color grading tools and make adjustments directly in the image. This is done by clicking and dragging on the colors you want to change. Cinema Grade calls this functionality DirectGrade. A good example of DirectGrade is changing the hue of an object in the frame: click on the object to add a control point, then drag up or down to shift the hue.
At the top of the Cinema Grade interface are different Light and Color tools for DirectGrade:
Exposure
Contrast
Color Temperature
Saturation Highlights / Midtones / Shadows
Hue / Saturation / Luma

Toggle these to activate them for DirectGrade adjustments. When using Saturation Highlights / Midtones / Shadows and Hue / Saturation / Luma, the first click will set a control point on your color selection. Control points are indicated by small white plus icons. Drag on the control point to make adjustments. Use CMD+click to add more control points to your selection and Opt+click control points to remove them. Also note, control points will disappear when switching tools, they’re not permanent.

It might take a little time to get used to DirectGrading, but Cinema Grade makes it easy to understand what you’re doing with onscreen tip overlays.
3 Cinema Grade Workspaces/Modes
Next are three color “workspaces”: Basic Correction, Shot Matching, and Final Grade. They’re more than workspaces though; they’re the recommended workflow order for grading your clips. This a huge part of Cinema Grade and we’ll cover this in detail in a minute.

By now you’re probably wondering, where are all the tools in Cinema Grade? Access Cinema Grade’s controls by hovering over the left, bottom, and right sides of the frame. Doing so reveals the color tools for each workspace. Click the center of the image to hide the controls again. Remember this to avoid getting frustrated with the layout: hover to reveal, click away to hide.

1. Basic Correction Interface
Hover over the left side of the frame to reveal Cinema Grade’s Color Management and Color Chart settings.
Color Management - Import or select Input LUTs and apply color conversions for specific cameras and displays.
Color Chart - Use only for Xrite Color Checker charts. (Apply this to your footage anyway for some trippy color results!)

Hover over the bottom of the frame to reveal all of your clips in Cinema Grade. (Remember: only the clips with the Cinema Grade effect will be visible here.) Above the clip tray is a slider that can be used to scrub the selected clip. Note that Cinema Grade won’t playback your clips in real time. Instead think of the slider as a way to choose your poster frame or hero image for each clip.
Hover over the right side of the frame to reveal Cinema Grade’s Correct tools: Light, Color, Saturation, and Vectors. Anyone familiar with the Lumetri Color panel should feel relatively comfortable with Cinema Grade’s color controls. There are some really cool differences though. For example, in Cinema Grade you can independently control the Saturation for the Shadows, Midtones, and Highlights. Also cool are the Vectors, which let you adjust the Hue, Saturation, and Luma for specific hues.
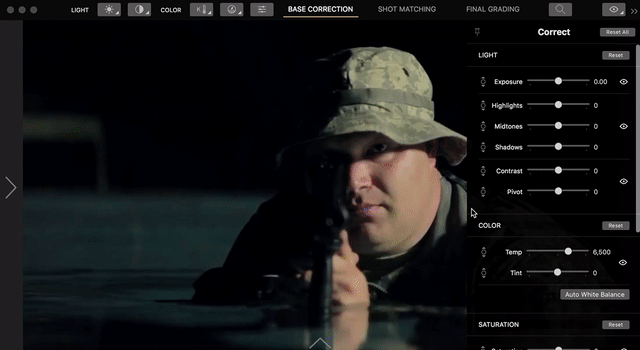
To the left of each slider is a control point icon. Click this to activate the DirectGrade functionality for that specific control. (Similar to toggling the tools at the top of the interface.)
2. Shot Matching Interface
We’re going to skip this section here because we cover Shot Matching as part of the Cinema Grade workflow. Basically, Shot Matching allows users to assign clips to color groups and batch shot match them by copying corrections to the group.
3. Final Grading Interface
Hover over the left side of the frame to reveal Cinema Grade’s Look Selection options: Looks, Luts, and Look Transfer.

Looks - Under Looks you can choose from the following: Genre, Color, Location, Mood, Time of Day. Some of these Look categories ‘look’ the same—what’s the real difference between Genre and Mood?
Luts - Luts come in three different flavors: Ascend, Film Looks, Motion Picture Film. Again, we scratch our heads at the delineation between these categories. Nevertheless, they look great and they are in Cinema Grade for you to use. There are 3-4 LUTs in each category.
Look Transfer - This is a real nifty feature. Choose a still image from your favorite film, music video, whatever, upload it under Look Transfer and Cinema Grade will match that look in your clips. There’s a Mix slider to control the intensity of the applied look.
Hover over the bottom of the frame to reveal your clips again, only this time with their color groups visible. (Again, Shot Matching and color groups will be covered later.)
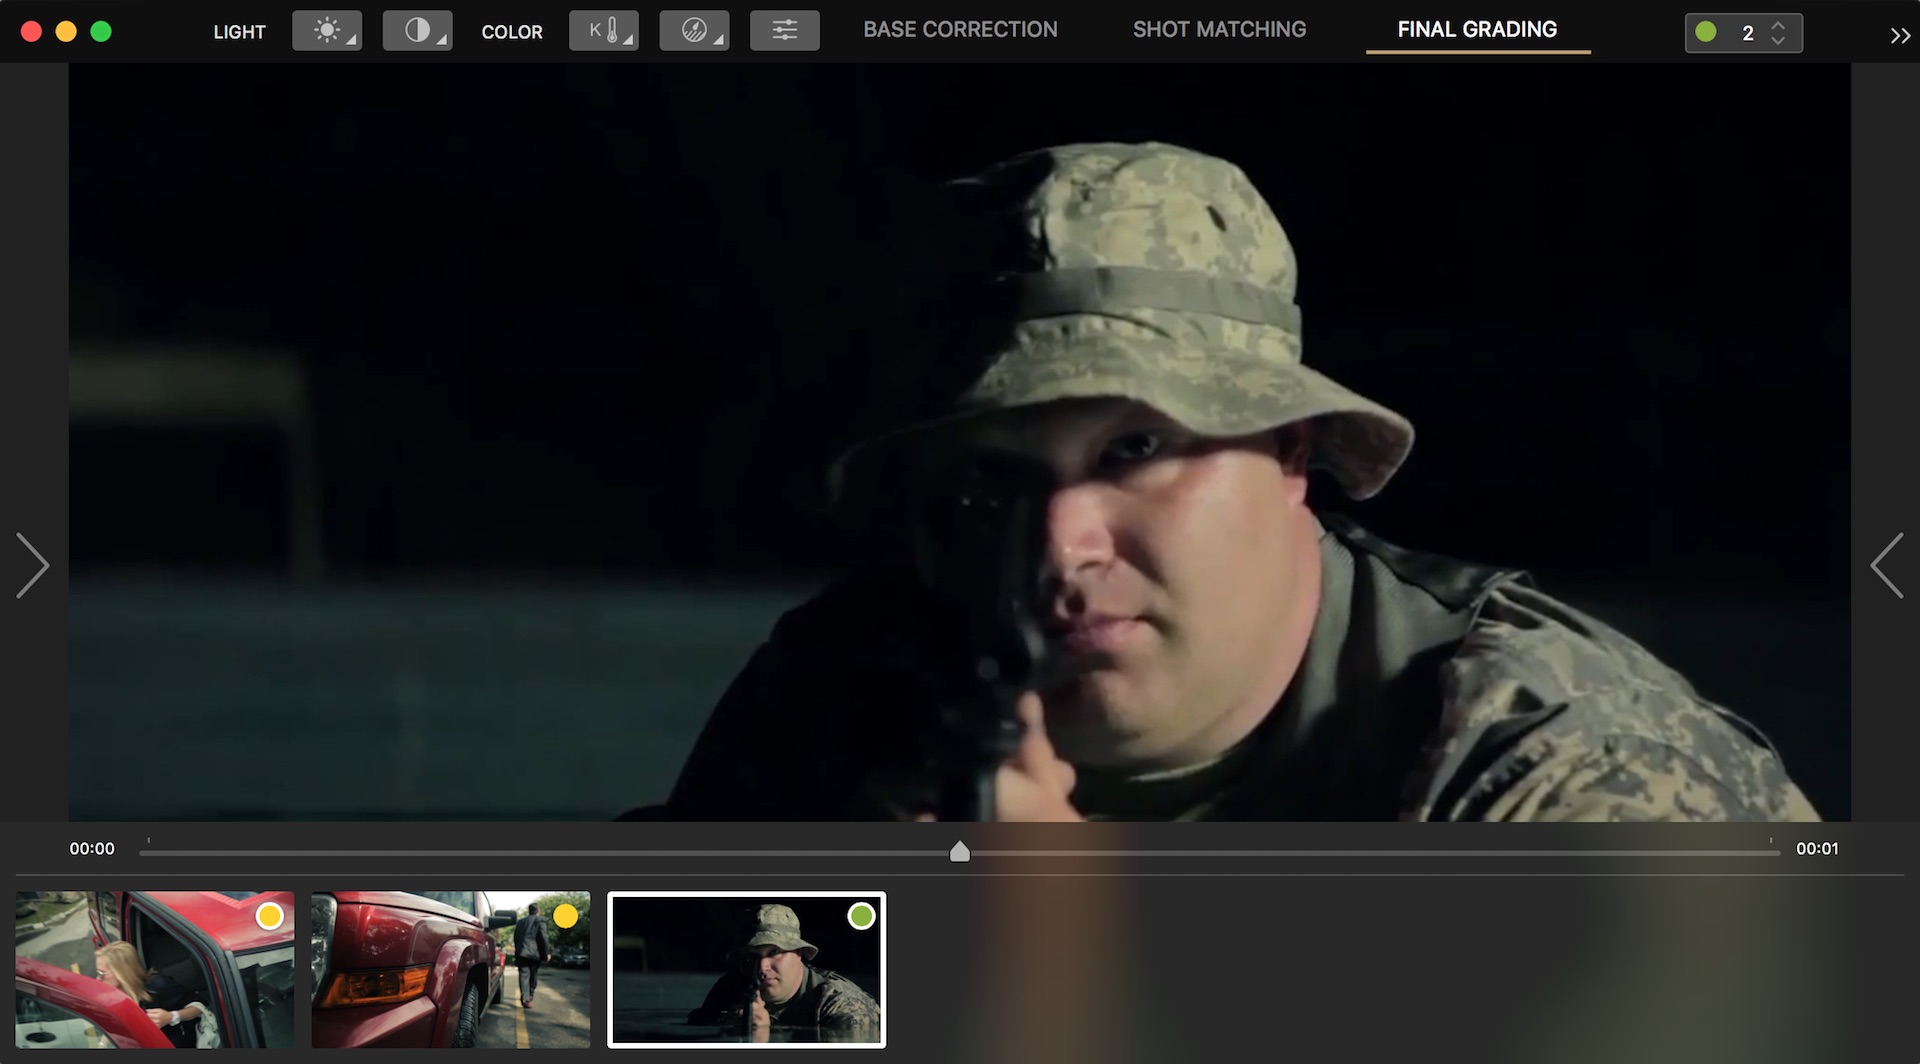
Hover over the right side of the frame reveals Cinema Grade’s Grade controls. They are the same as the basic Correct controls, with the addition of two sliders at the top to control the intensity of the Preset / LUT and Look Transfer filters.

The Cinema Grade Workflow
You can use Cinema Grade however you want, obviously. You’ll love it just for adjusting the hues of objects in your shots. But Cinema Grade has a specific workflow that, when used, is very powerful and efficient. The steps in the workflow are right at the top of the interface: Basic Correction, Color Matching, Final Grade. We’ve already covered the layout and tools in each of these interfaces, but now we’re going to look at them in terms of workflow order.
STEP 1 — Basic Correction
This mode is for color balancing your individual shots. You can also apply specific camera and conversion LUTs for log and raw formats before color balancing. Cinema Grade doesn’t limit you to primary corrections at this stage. You can utilize all the color tools in the Basic Correction Correct panel. But, it’s important to realize the purpose of this step is to correct and color balance your clips. We recommend previewing your clips to determine which ones best represent the majority. Focus on color correcting these particular clips first.
STEP 2 — Shot Matching
Shot Matching in Cinema Grade gives users the ability to group similar shots into color-coded categories to quickly compare and copy color corrections. To assign clips to a group, first select the color and then click on the clips you want to add. For each group, you can designate one “Hero” shot to which all the other clips in the group will be matched. Mark the clips you focused on in Basic Corrections as your Hero shots.

Once clips are grouped, click Match Shots to go to the next step. On the left is the Hero shot and on the right are the other clips in the group. To match shots, click Copy Correction, choose the Light and Color settings you want to copy and apply them to either the current clip or to all the clips in the group. If you need, you can return to Basic Corrections and fix the troublesome clips in the group individually.

Without leaving Shot Matching mode, you can toggle the Edit Grade slider to switch between the Correct and Grade controls, giving you the option to go back and make color adjustments pre- or post-final grade. Which is the perfect segue-way to the final step.

STEP 3 — Final Grade
With your shots balanced and matched, it’s time to apply a final look that tells a story and makes all your shots feel cohesive. The key thing about Final Grade is color adjustments are applied to all the clips the groups you created in Shot Matching. This enables users to quickly apply the “final grade” to their clips.
NOTE: If you hop back to Basic Corrections you will see the clips in their pre-Final Grade state. You can make tweaks to your basic color corrections without the interference of the final look.
Save Grade in Premiere Pro
When you’re finished color grading in Cinema Grade, hit CMD/CTRL+S to save your grade to your clips in Premiere Pro. (Closing Cinema Grade will also prompt saving your changes.)

Grades are baked into the Cinema Grade effect in the Effect Controls panel, which you can mute, but that’s all you can do on the Premiere Pro side. However, you can always re-launch Cinema Grade to continue color grading where you left off.
So there you have the complete Cinema Grade workflow. It’s a very common workflow used by professional colorists. But it’s very much streamlined in Cinema Grade thanks to its DirectGrade tools, group-based shot matching and final grading looks.
Other Cinema Grade Features
Cinema Grade has 3 video scopes: Waveform, Vectorscope, and Histogram. You can acces them under the View menu in any of the 3 workspaces/modes.

Cinema Grade is a new company and they are aggressively adding new features based on their user feedback. If you have an comment or concern about Cinema Grade, contact them!
Try or Buy Cinema Grade
You can download a free 7-day trail of Cinema Grade or purchase Cinema Grade for $99. Cinema Grade is $149 for Premiere Pro only, as shown in the screenshot below.

Is Cinema Grade new to you? We’re curious to hear your thoughts on Cinema Grade’s approach to color grading, particularly DirectGrade. If you’re familiar with Cinema Grade, we’d love to hear your best tips for working with it in Premiere Pro. Leave us a comment below and we’ll respond.

