
8 Tips for Editing Music in Premiere Pro
Level up your music editing skills with these practical Premiere Pro tips.
[Sponsored Post]
When it comes to editing music in Premiere Pro, there are a couple specific tricks and tools that will help you. Editing music requires a good sense of pacing and rhythm; you’ve got to ‘feel’ the beat. A good editor will edit the music to fit the story. That means knowing when the music should start, when it should intensify, change, or drop out completely. These skills take a lot of practice and experience to develop. This post will get you started by teaching you some of the fundamentals of editing music in Premiere Pro.
Motion Array
If you want to try any of these tips, you’re obviously going to need to need some music. We recommend you check out Motion Array’s library of high-quality royalty free music and sound effects.

All their music is YouTube-ready; you video won’t get slapped with a content ID. Better still, you can use their tracks over and over again on as many projects as you like without having to purchase additional licenses!
Now, let’s get on to our list of music tips in Premiere Pro.
BONUS TIP: Rename music tracks in timeline
Yes, we’re starting this list with a bonus tip. Renaming music tracks is a very simple way to identify and organize tracks in the timeline. First, make sure you can see the track names. Use these keyboard shortcuts to adjust video and audio track heights:

Track height keyboard shortcuts
Next, right click on the track name and choose Rename. Do the same for the rest of your audio tracks. Now you have an organized system for arranging audio in your sequence.

Rename tracks in Premiere Pro
Tip 1: Actually editing a music track
Editing music in Premiere Pro is the same as any media in the Timeline. You can cut, trim, speed up, slow down, etc., same as video clips. Because most music follows a beat, electronic music especially, it’s easy to extend or shorten a music track by splicing music clips on the beat. The audio waveform can help you identify the beat, but trust your ear more than your eyes when you’re looking for the right place to cut.
Edit the Music to Length First
If you’re editing a project that needs to be a specific length, a good workflow is splicing your music to the required length first, and then edit your footage. Once you’ve edited the music, short Crossfades, 2-4 frames long, can help smooth out your cuts.
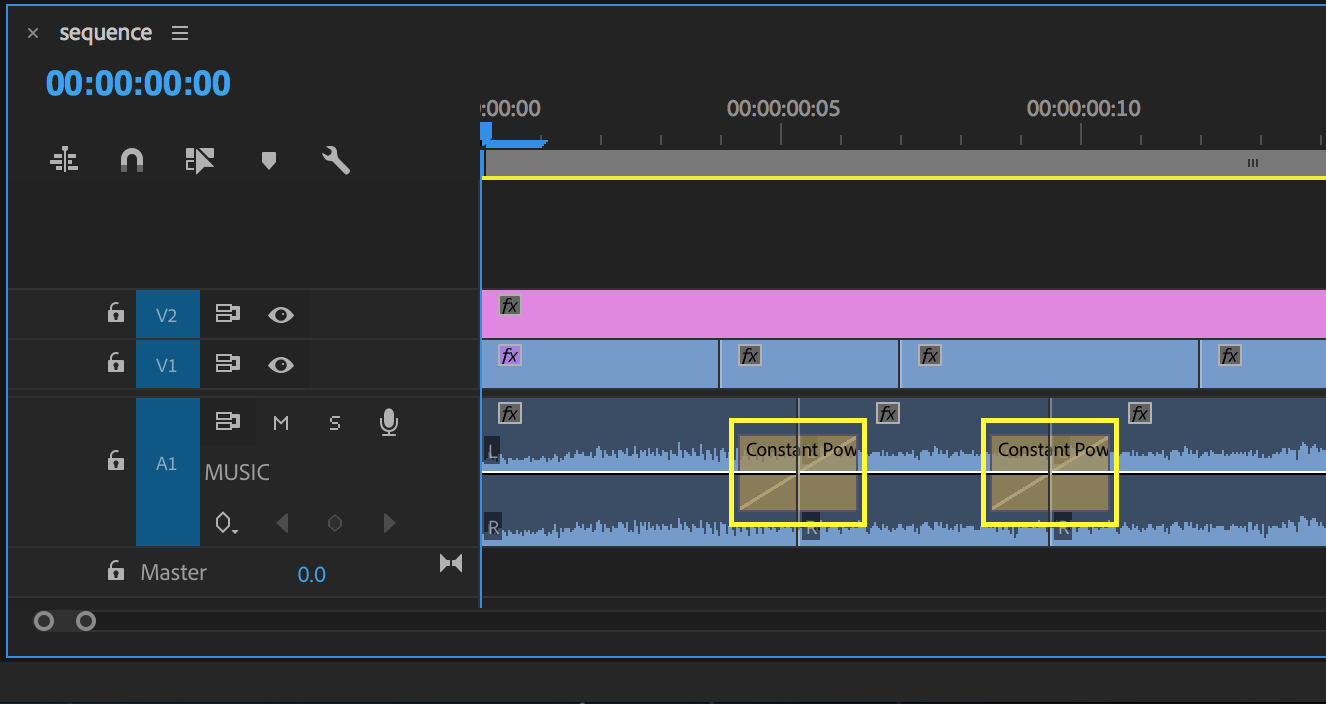
Add short Crossfades to smooth audio cuts
Add Crossfades to Smooth Edits
In most cases, cutting music by frames works just fine. But unlike video, music is recorded in samples, not frames. So what do you do when you want to splice music on a beat that’s between frames? Well, Premiere Pro can switch the Timeline view from frames to samples. Right click the top of the timeline (above the work area bar) and choose Show Audio Units. This will allow you to make sub-frame edits to your music track.
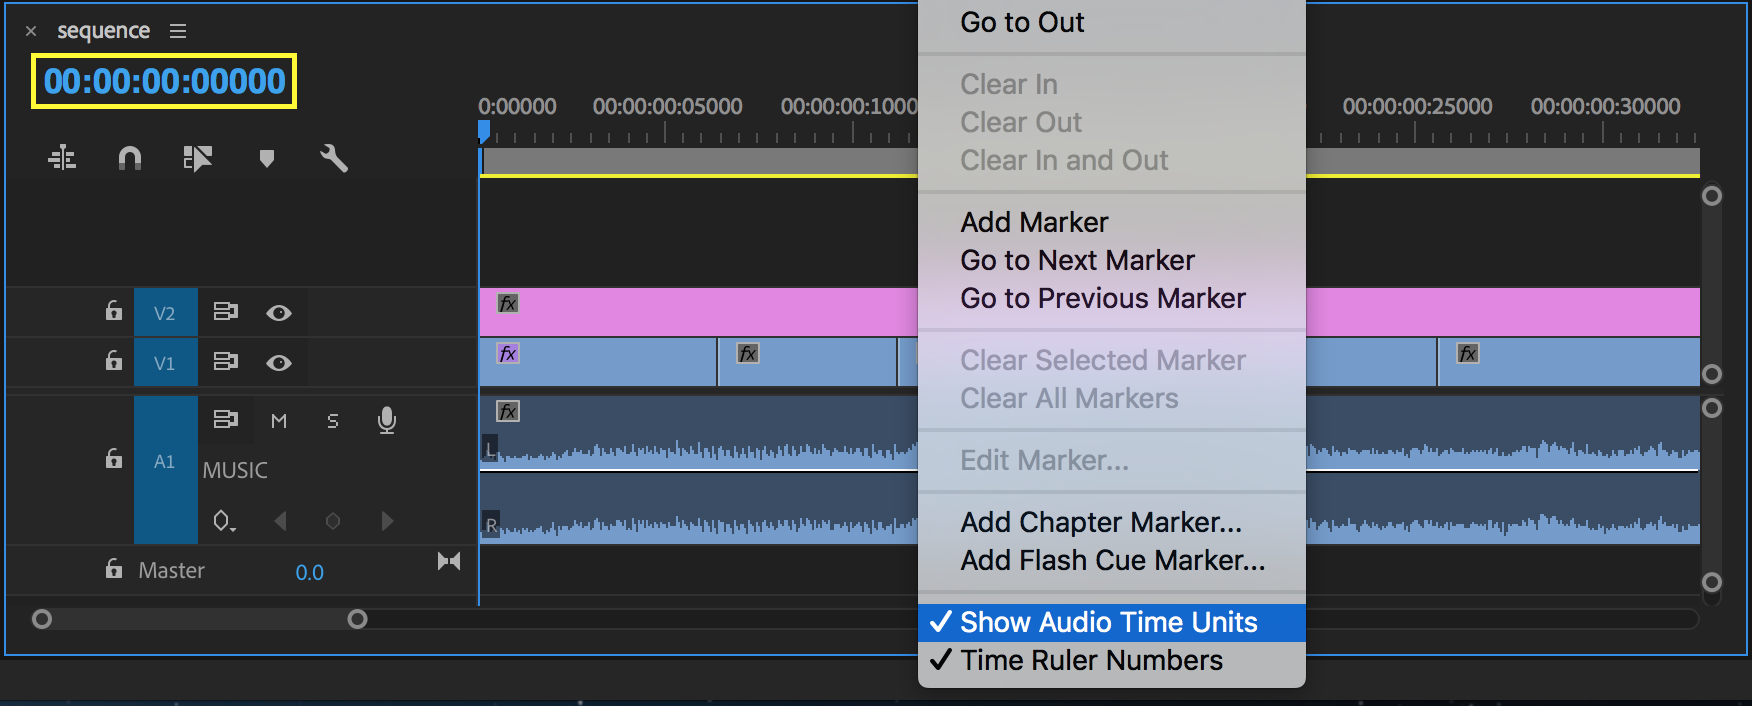
Show Audio Time Units to make sub-frame edits
Toggle Track Lock
When you’re finished splicing your music to the desired length, lock the music track to prevent yourself from accidentally moving or cutting the music while editing your video clips.

Lock tracks to prevent acciedntal changes
Tip 2: Dissolve music cuts independently
What if you want to blend two different songs? Sometimes a simple Crossfade will work. Other times it won’t, no matter how long you make the transition. Before scrapping your music choices, try fading them independently. Separate the songs on different tracks. Trim the first song to your desired end point and the second song to where you want it to begin. Add Crossfades to the ends of each clip. Now you can independently adjust the position and duration of each fade on both clips.
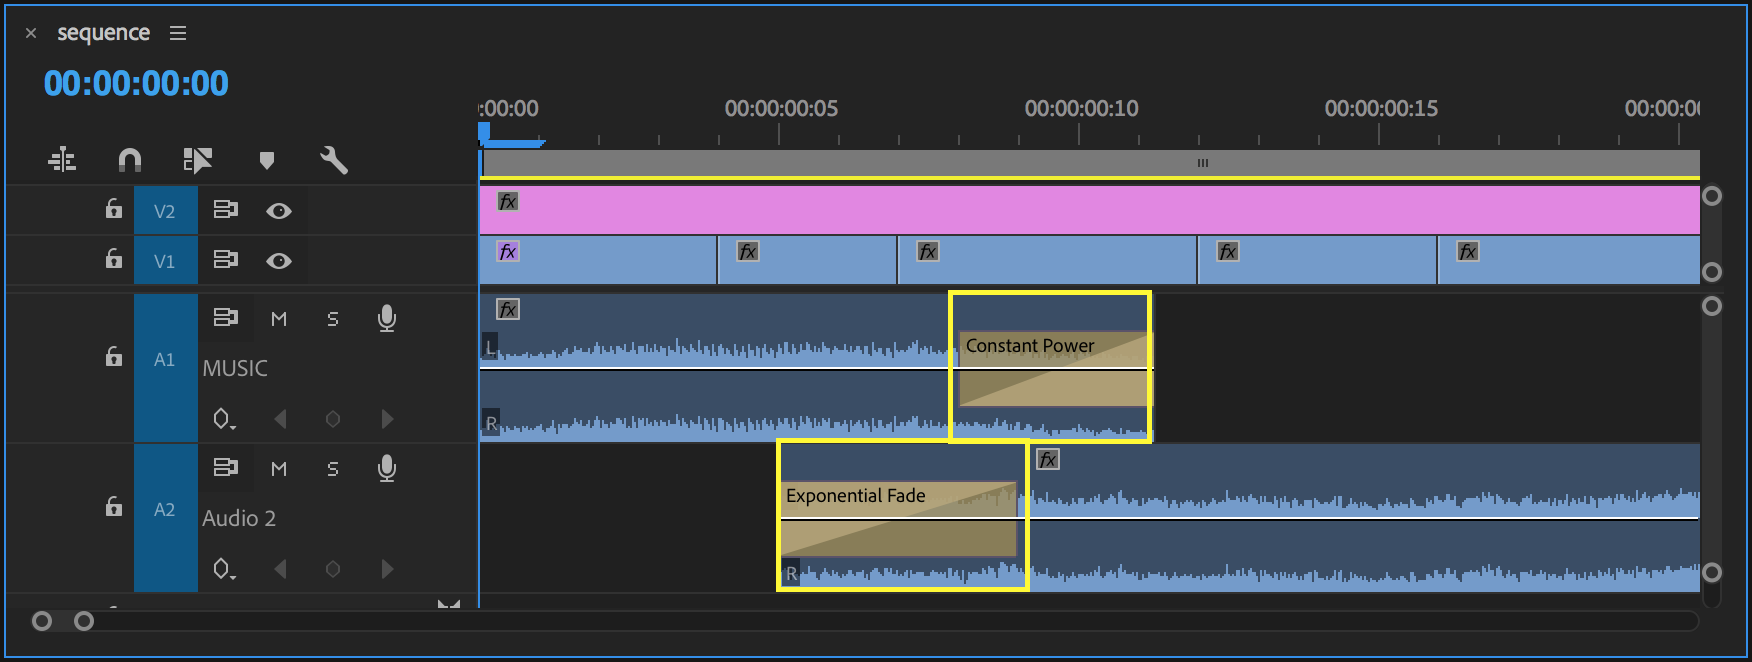
Crossfade songs independently on different tracks
Still not working? Try nudging your clips with keyboard shortcuts CMD+Left/Right till you find a spot where the songs blend the best. You can also experiment with both the Constant Power and Exponential Fade to see if one works better than the other.
Tip 3: How to add track-based effects
Let’s say you’ve shortened a music track by splicing several segments together. How do you add an effect to the whole song? You could copy/paste the effect to all the clips. But what if you want to modify the effect later? You would have to remove the old effect from all the clips and then paste the new one. Sorry, no thanks to that. So, what do you do? It’s not like adjustment layers work on audio tracks. (Now there’s an idea!) You need to use the Audio Track Mixer. This can be found under Window > Audio Track Mixer.
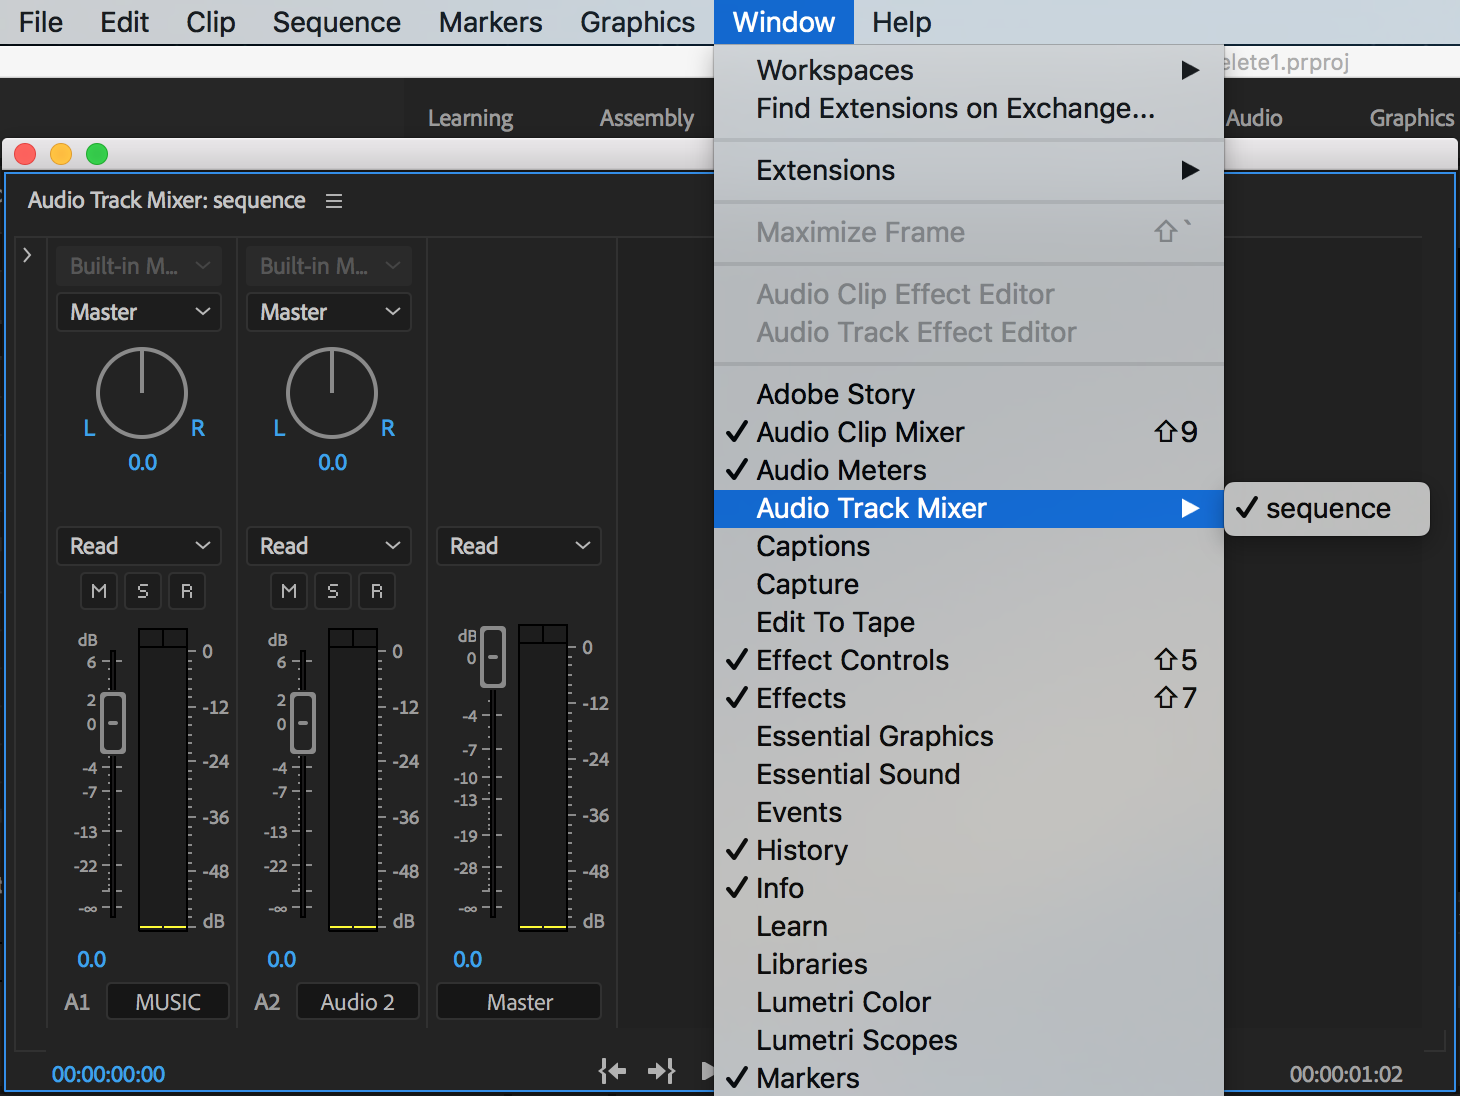
Use the Audio Track Mixer to apply track-based audio effects
Twirl down the Show/Hide Effect Sends triangle to reveal the effects area of the Audio Track Mixer.
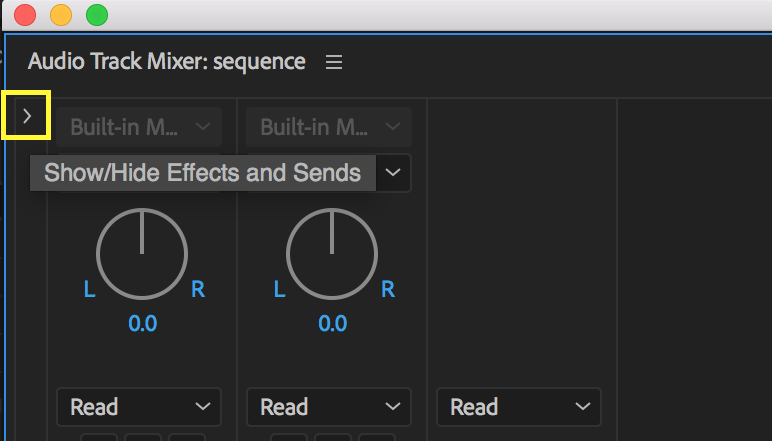
Click the disclosure triangle to open Effects and Sends in the Audio Track Mixer
To patch in an audio effect, click one of the Effect Selection drop downs to the left of the effect slots. Select an effect and it will be applied to all the clips in the audio track. Now it’s easy to modify the effect on all the audio clips. Obviously, this is very handy for dialogue and sound effects as well.

Patch in audio effects using the Effect Selection drop down
Tip 4: EQ “Hole” for music
Make your mix sound better with this EQ trick to differentiate your dialogue from the background music. In our mind, this audio technique is one of those things that separates pros from beginners. First, apply the Parametric Equalizer to your music track in the Audio Track Mixer.

Apply the Parametric Equalizer effect to your music track in the Audio Track Mixer
Double click the effect to open the Parametric Equalizer interface. Create the “hole” by adding a curve to the graph around 1250hz with -18db and Q=4, shown below. (We got these numbers from Hollywood editor Vashi Nedomansky. You can download his audio presets here.) This is the range for the average human voice. Doing this will reduce the frequencies in the music that compete with your dialogue. Essentially, you’re carving out a hole in the music for your dialogue to sit in.

Create an EQ "hole" in the music for the dialogue to live
Tip 5: Automating music levels
The Audio Track Mixer can also be used to record volume slider adjustments during playback. Slider adjustments are recorded as audio track keyframes.
First, make sure audio keyframes are visible in the Timeline. Expand the audio tracks and you should see a thin white line through your audio clips. (If you don’t, turn on Show Audio Keyframes under the Timeline Wrench settings.) The white line is the keyframe “rubber band”. Selecting the Pen tool and clicking the rubber band will add keyframes to your audio clip. But these are clip keyframes (they move with the clips) we want track keyframes.

Turn on Show Audio Keyframes and note the white keyframe rubber band
Click the Show Keyframes button in the music track header (it should be named after our bonus tip!) and switch from Clip Keyframes to Track Keyframes > Volume. Notice how the keyframe rubber band now extends to the end of the Timeline. Audio track keyframes will stay anchored to the track, even if the clips move.

Switch from clip keyframes to track volume keyframes
Now, look for your music track in the Audio Track Mixer and change the Automation Mode from Read to Write.
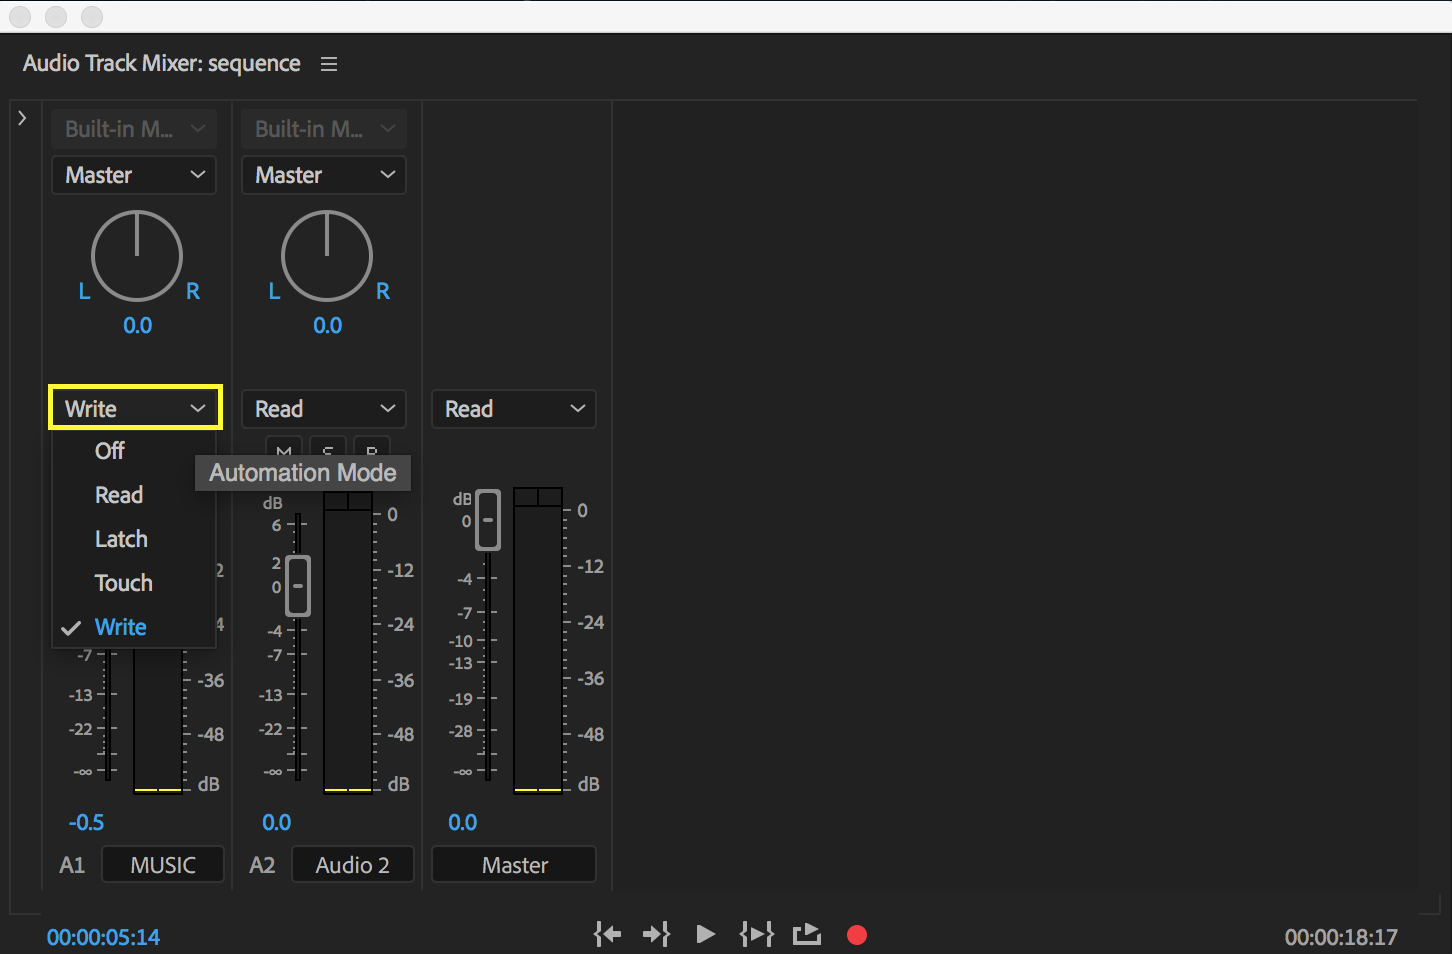
Change the track Automation Mode to Write
Start playback and use the track slider to make level adjustments to your music. When you stop playback, you will see the audio track keyframes appear in the Timeline. When you hit play again, you will see your track slider’s recorded movements.
See audio keyframe automation in action
This is a great method for quickly creating music volume keyframes and useful for lowering the music volume whenever there is dialogue or voiceover. But there’s another, easier way to do this...
Tip 6: Auto-duck in Essential Sound Panel
The Essential Sound panel is a unique feature to Premiere Pro that dramatically simplifies audio workflows for editors. Since CC 2017, Adobe has continued adding more tools to the Essential Sound panel. The latest addition is Auto Ducking. Ducking refers to lowering the music level during dialogue or voiceover so the music doesn't overpower with what’s being spoken. Auto Ducking in Premiere Pro leverages the power of Adobe Sensei, Adobe’s machine learning technology, to intelligently duck music beneath dialogue or voiceover.
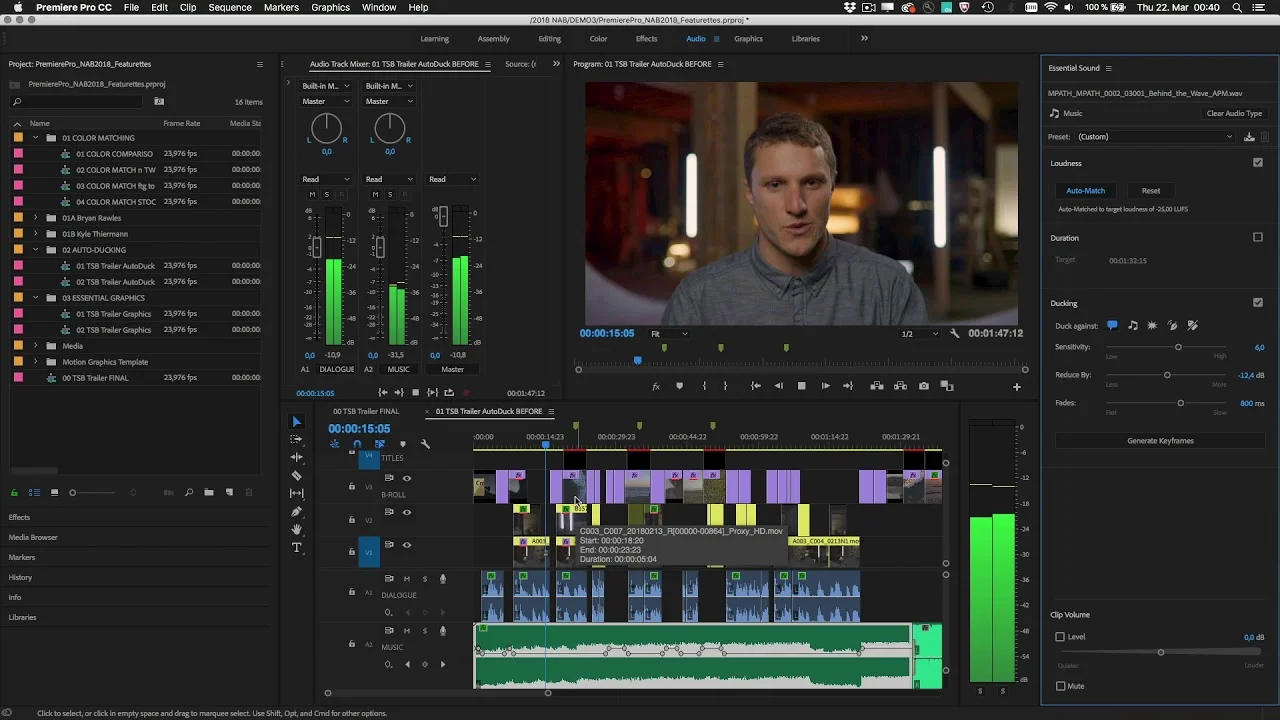
The volume of music can be set to automatically lower when dialogue, sound effects, or other audio clips are detected, eliminating the need to manually adjust every point in the mix.
- Duck Against selects the type of audio to duck against, dialogue in most cases.
- Sensitivity determines the threshold level for ducking to kick in.
- Reduce By is the amount of volume lowered.
- Fades is the smoothness of the duck.

Auto Ducking settings in the Essential Sound panel
Set your parameters, hit Generate Keyframes, and Premiere Pro will automatically create clip keyframes on your music track. You can dial in your settings and run ducking again to generate new keyframes. Or you can manually adjust your keyframes in the Timeline. For more information there is a really good Auto Ducking tutorial at MotionArray.com.
Tip 7: Adding reverb to the end of a song
Using a reverb effect is a classic technique to end a song on a custom end-point. This is not easily done in Premiere Pro because the reverb effect abruptly ends when the clip ends. In order to have the reverb continue, the clip needs to continue. But that messes up your custom end-point in the song. The answer is in this nested sequences tutorial.
Right click your music clip and choose Nest.

Nest your music track with the custom end-point
In the new nested sequence, add some black video or slug to extend the duration of the sequence.

Use black video or slug to artificially extend the length of your nested sequence
Back in your original sequence, you will now be able to extend the nested sequence.

Extend nested music and apply reverb effect
Apply your favorite reverb effect and listen to the reverb continue past your song’s end-point. Extend the duration of the nested sequence if needed.
Tip 8: Exporting audio stems
When you export a video, all the audio gets mixed down into a file based on your audio export settings. In most cases, everything gets mixed down to stereo. After that you won’t be able to make changes to the music or dialogue. (Assuming you don’t have access to the project anymore.) Unless, you export each individual audio track as a separate file. This is commonly referred to as exporting “audio stems”.
Audio stems are the best way to future proof your video short of saving the original project and media. And they’re easy to make. There is a way in Premiere Pro to export audio stems within a single movie file. It involves setting up your sequence with the necessary number of audio channels, routing the audio correctly, and changing the export settings from stereo to multichannel. But that’s its own tutorial. For this tip, we will manually export a stereo stem for each audio track in our edit.

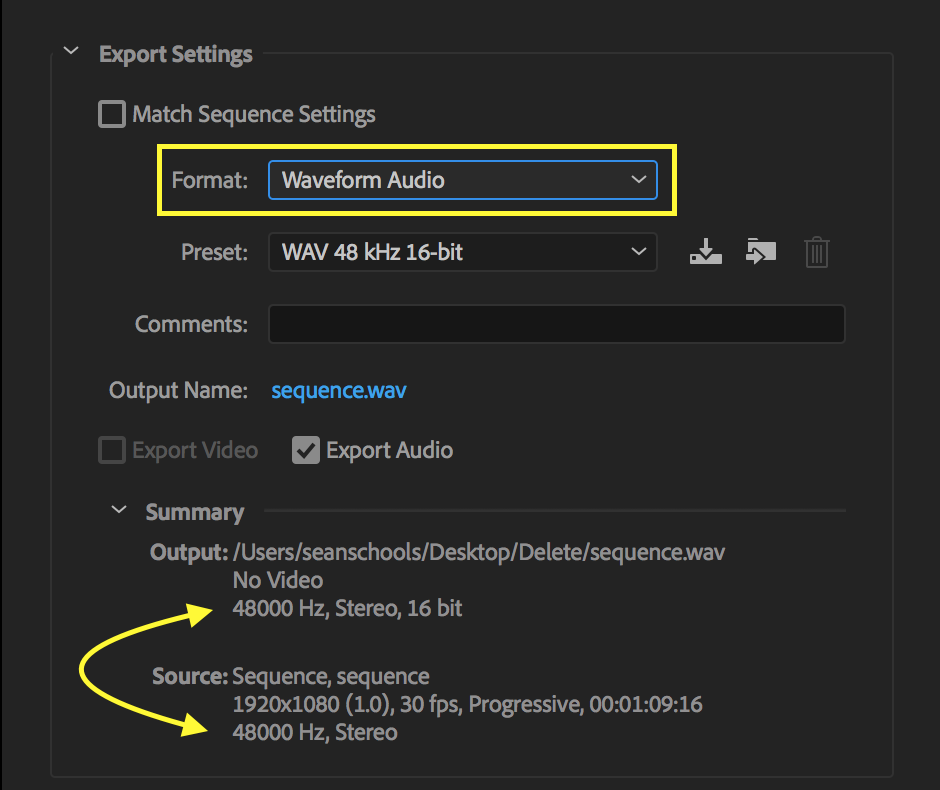
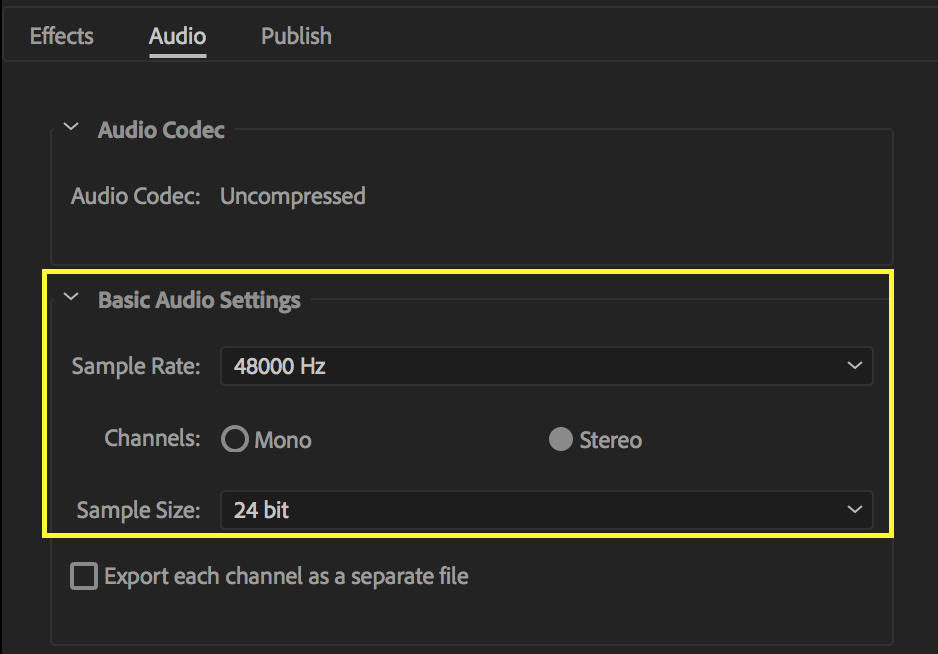
Solo audio tracks to export as stems
All you have to do is solo your audio tracks and export them one at a time. In the Export Settings, change the format to Waveform Audio . Match your audio export settings to your audio settings. If this is all greek to you, then you can put everything at its highest setting. Even the highest-quality audio formats don’t compare to the size of most video files.
When you’ve exported your first stem, go back to the Timeline, unsolo the track and solo the next one. Use the same export settings as the first. Repeat this process until you have individual audio files for every audio track in your edit. Now, if you have to make a change years later, you’ll be able to edit the video and audio tracks independently.
More Music and Audio Tips
Thanks for checking out our list of audio editing tips for Premiere Pro. If you’re still hungry for more you can check out some of our other audio posts:
- Tips and Tools for Editing Music in Premiere Pro
- Premiere Pro Audio Workflow Guide for Editors: Part 1
If you liked what you heard about Motion Array, consider becoming a member. You can try them out for free. If you upgrade to one of their premium plans, make good use of their Unlimited Library. Everything in their Unlimited Library doesn’t count against your number of downloads.
Were any of these music editing tips new to you? Were they helpful? What music editing tip would you add to this list? Lets us know in the comments section!

