
Green Screens and Miniatures Bring “Lonely Gal” to Life

Interview with Director Peder Pedersen on Shooting and Editing PowerSolo’s “Lonely Gal” in Premiere Pro
“Go big or go home” is rarely the reality for independent filmmakers. It certainly wasn’t for Danish director and editor, Peder Pedersen, when he filmed and edited the music video for “Lonely Gal” by PowerSolo. In fact, the saying could have been just the opposite, “Go small and stay home”.
Literally.
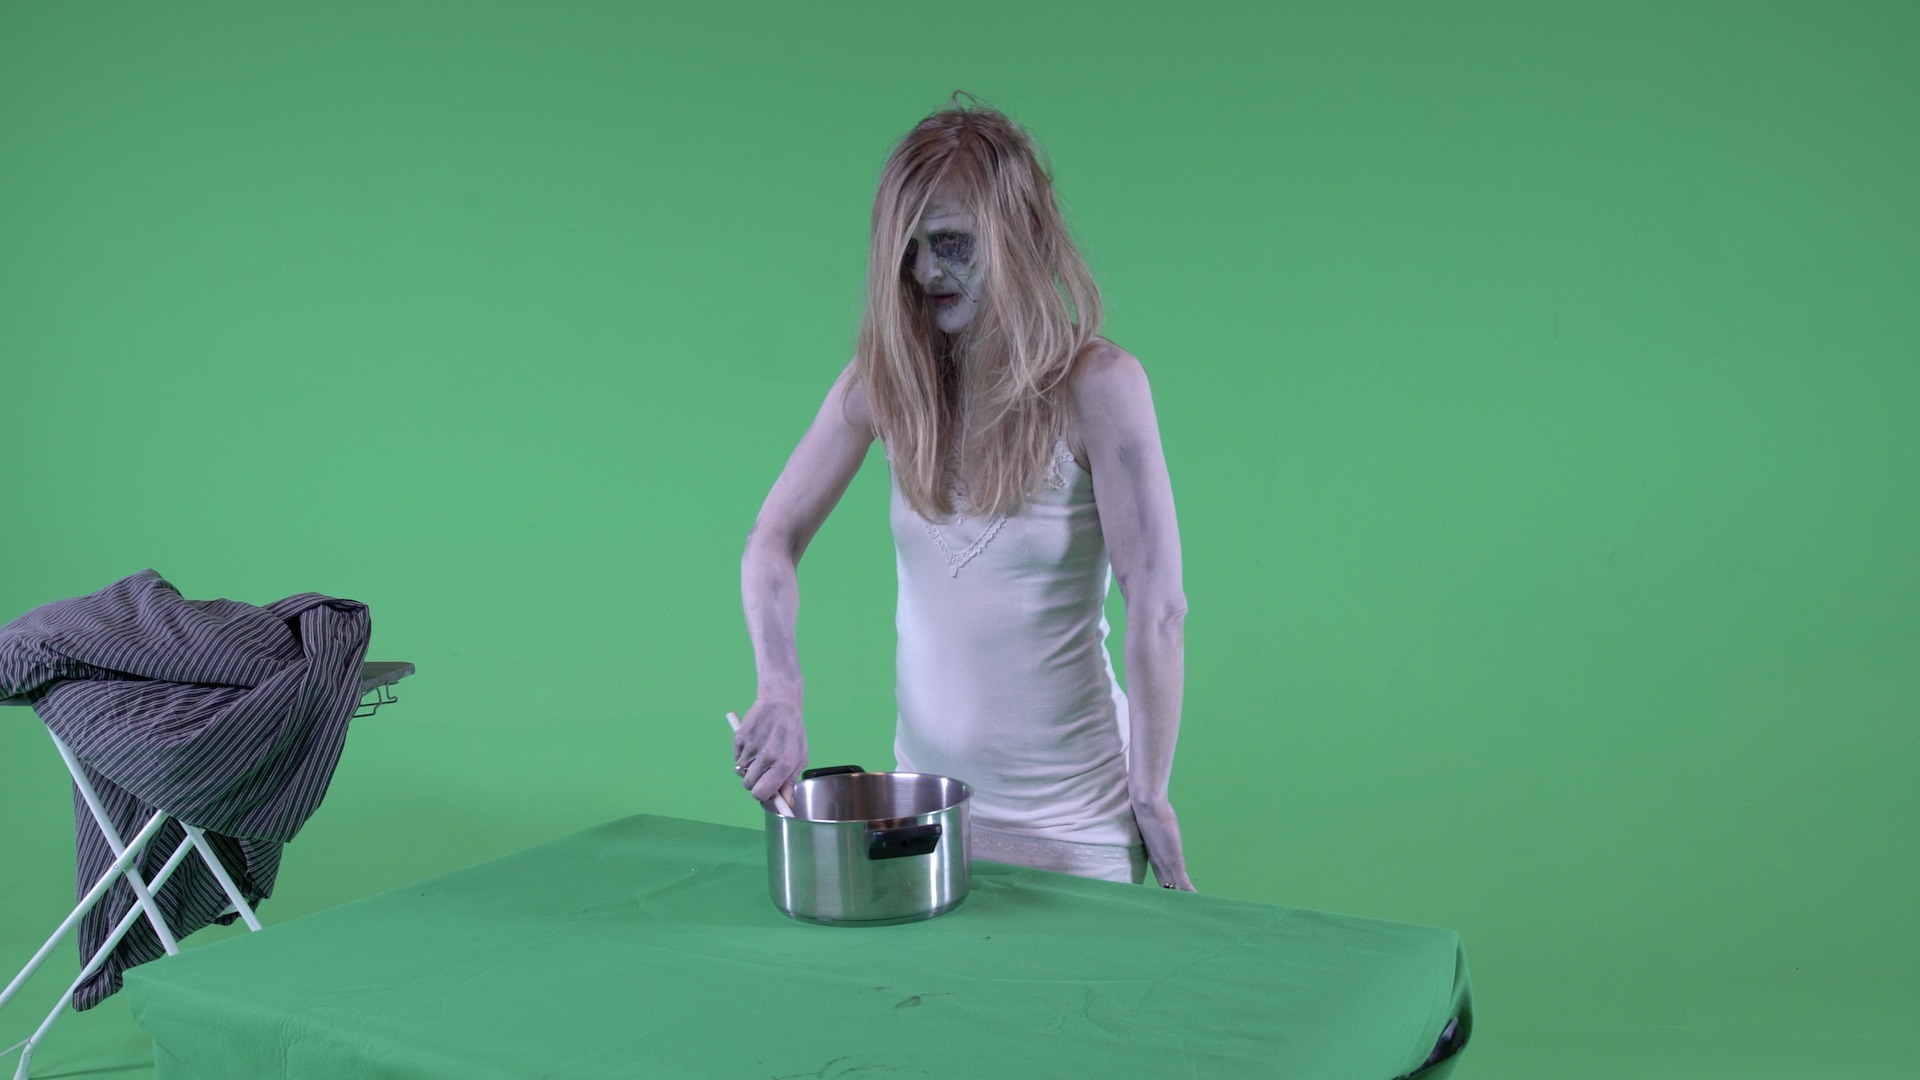
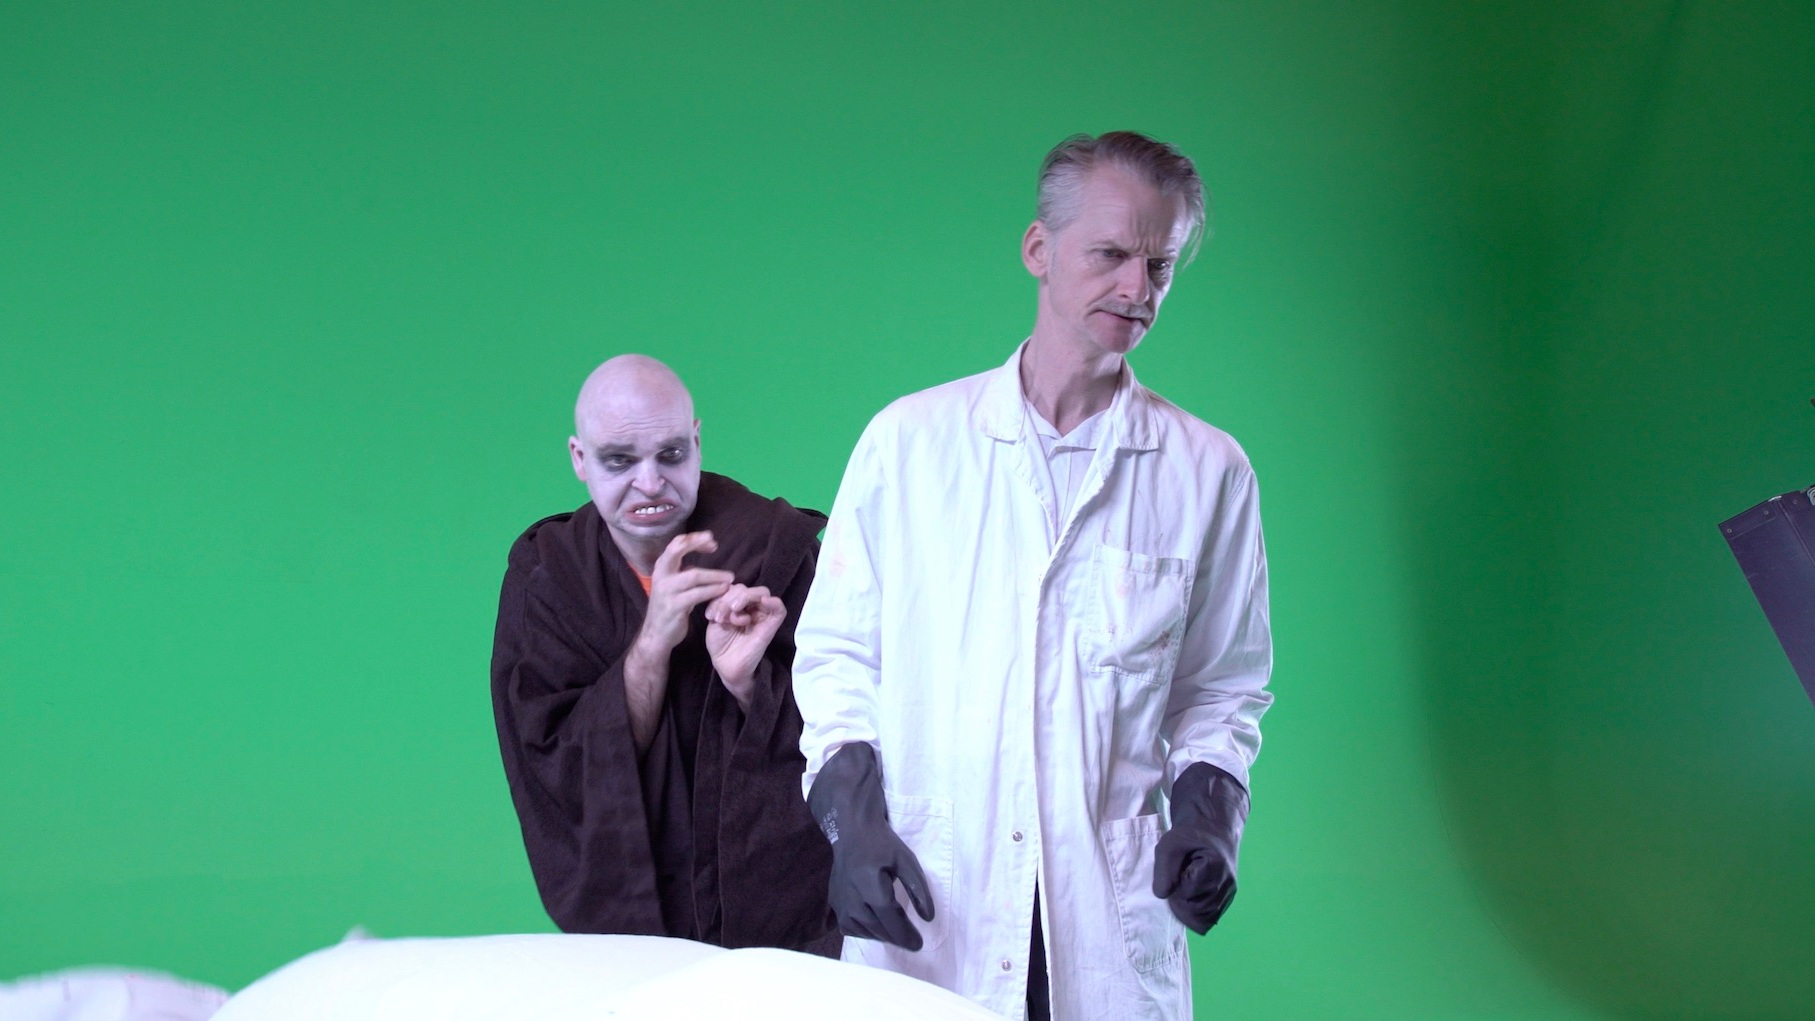
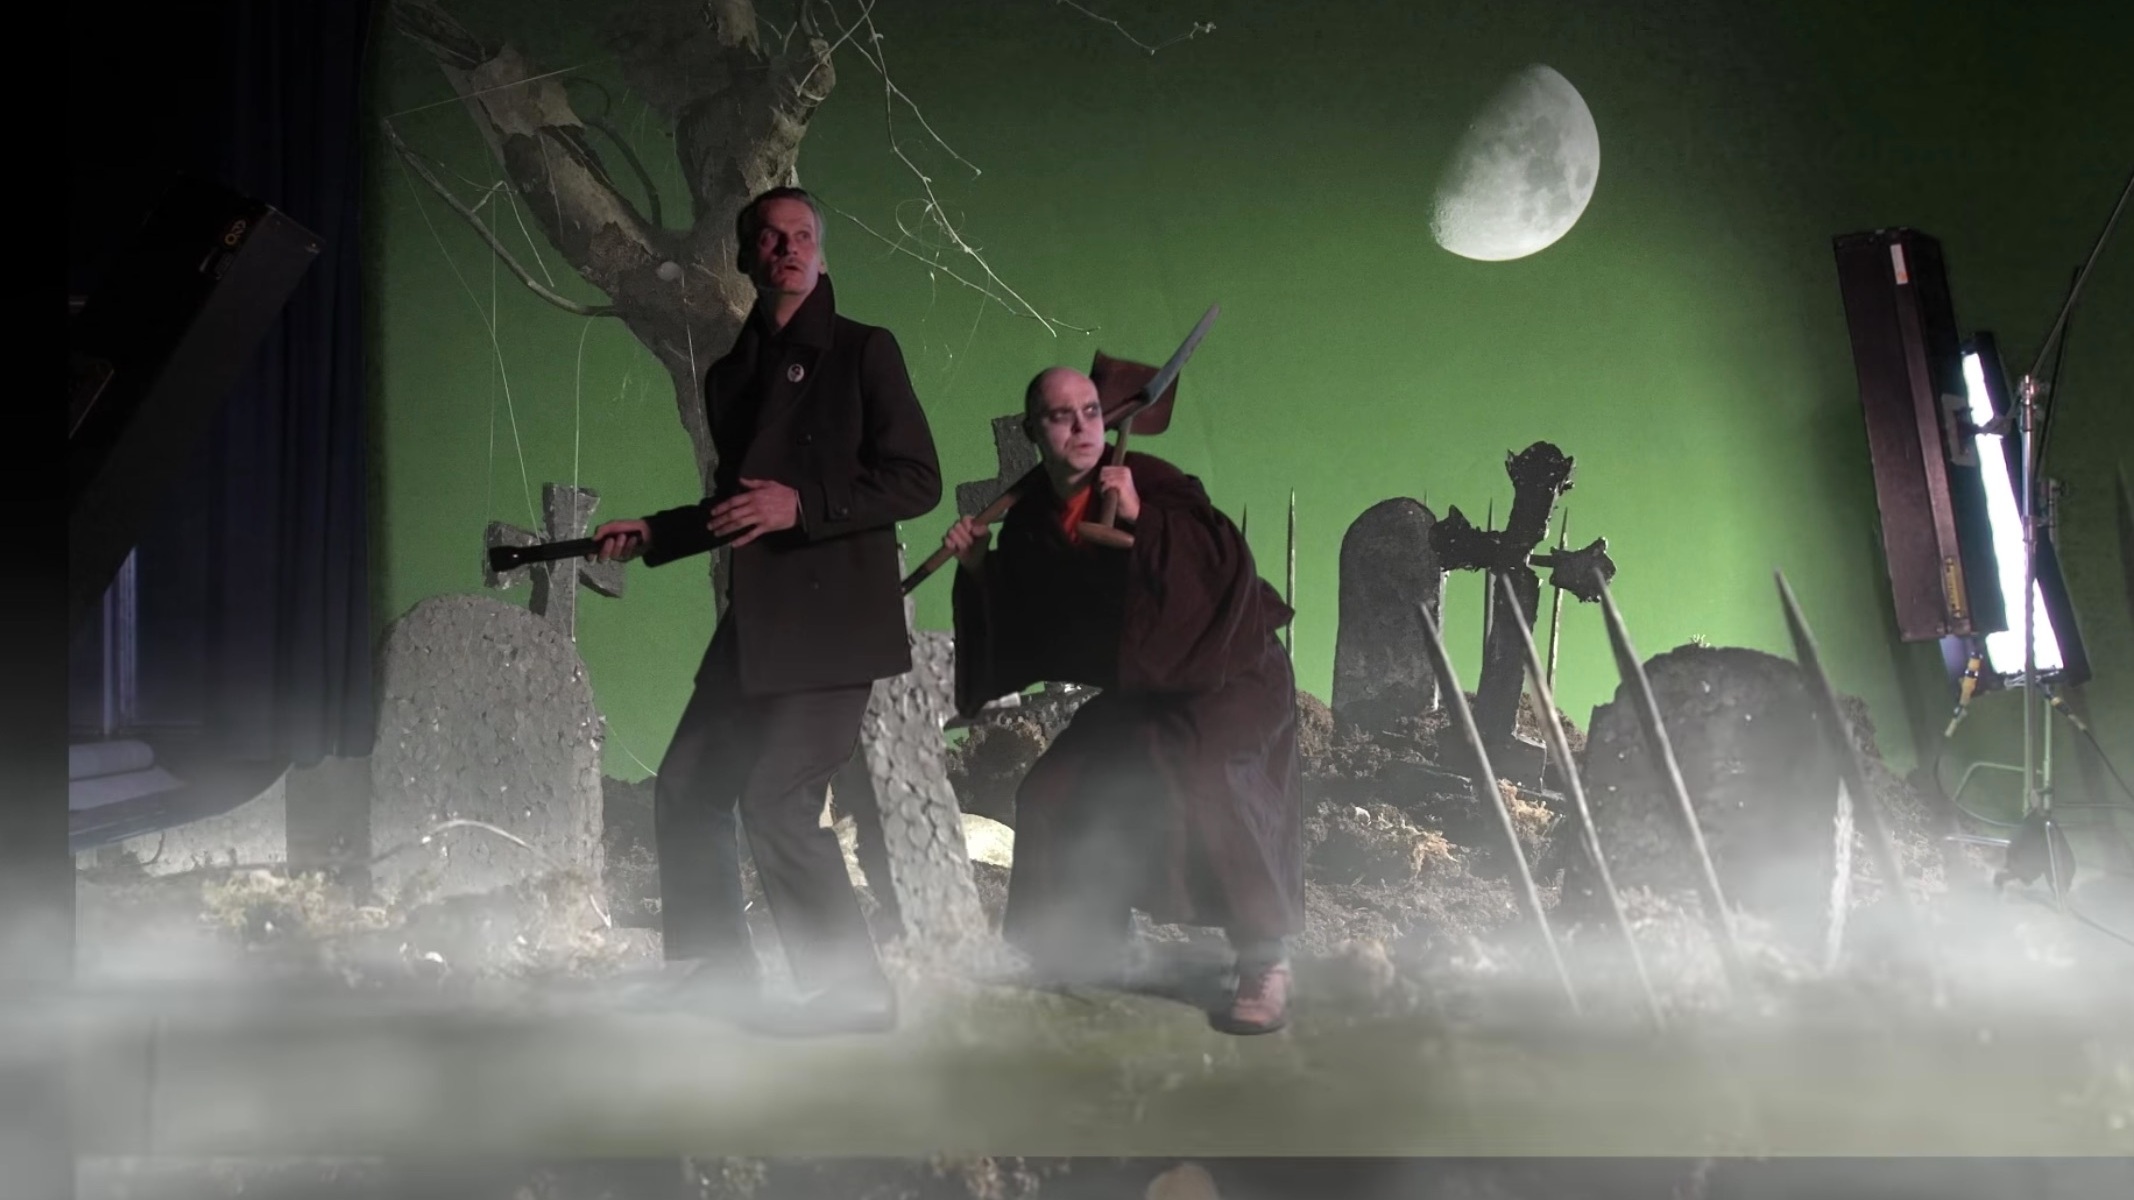
“Lonely Gal” was shot entirely on green screen and miniature cardboard sets and composited in Premiere Pro. The result is a retro-style horror music video that looks absolutely brilliant. Watch it below and check out the behind the scenes video at the end of the post.

HOW WOULD YOU DESCRIBE THE STYLE OF THE MUSIC VIDEO? WHAT INSPIRED THE LOOK?
PEDER: I’m a huge movie-buff. I love old movies, especially horror. Kim Kix, the lead-singer of PowerSolo, shares this interest and he always reminds me of Vincent Price. The lyrics and the title of the track “Lonely Gal” got me thinking of films like Bride of Frankenstein and The Abominable Dr. Phibes. So I thought, could we make a music video like those films, but give it our own twist with some social commentary? That’s why the story takes place inside an ideal American household set in the 50’s. Originally, we wanted to shoot everything live, but you can’t find those kind of houses in Denmark. The budget was really tiny, so building and lighting huge sets was impossible. That made me think of green screen and miniatures. Everything smaller, must cost less, right? Especially when the sets are built from cardboard.
HOW LONG DID IT TAKE TO SHOOT ON THE GREEN SCREEN AND HOW MUCH FOOTAGE DID YOU END UP WITH?
PEDER: We did around 60-70 green screen setups with the actors in a single day. I used the Sony Alpha a7II with a Sigma Art 24-105mm zoom. I shot at iso 800. Again, with the small budget, I only had 4 kino flos and two 800W, one of which didn’t work. I think we had around 20 minutes of green screen footage.
HOW DID YOU LIGHT AND SHOOT THE MINIATURES?
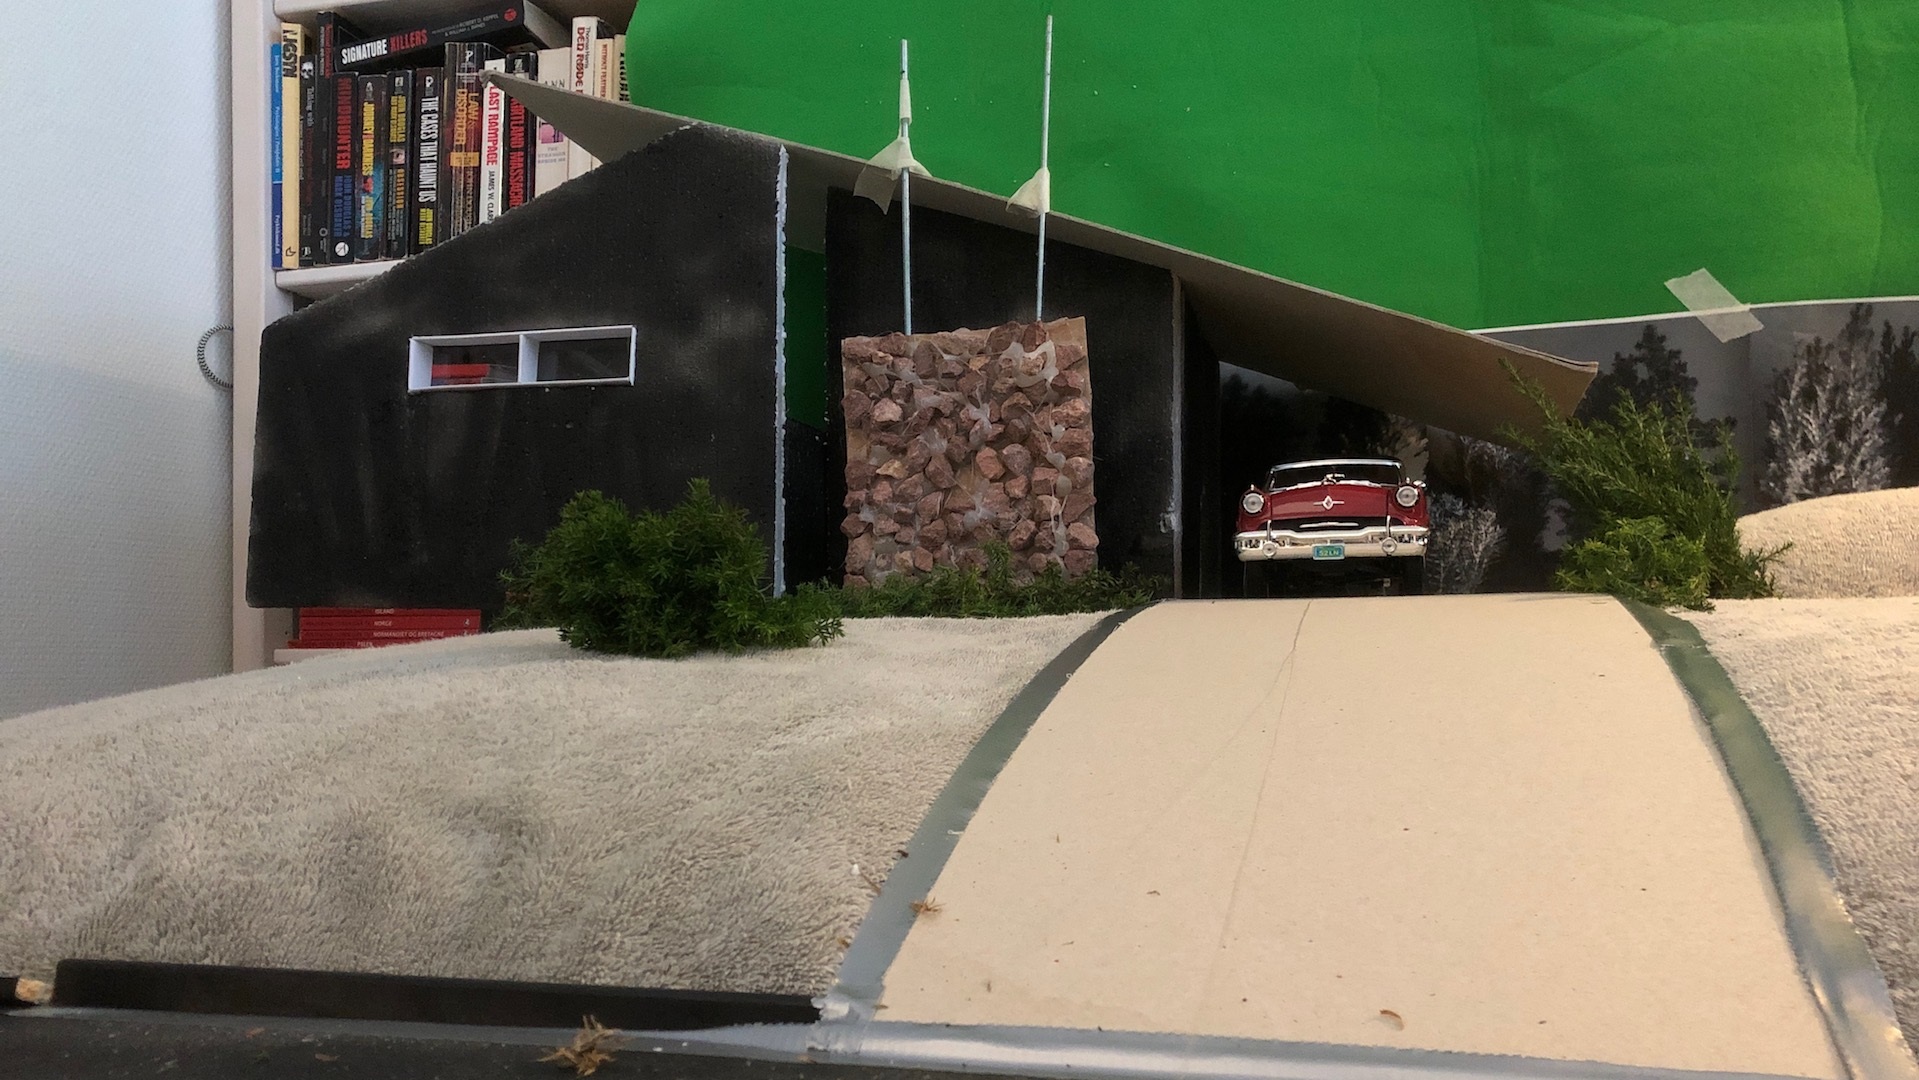
PEDER: The miniature stuff I shot at my house over a week. My family got used to me building the sets throughout the house. For lighting, I used small office lamps, bicycle lamps and a soft base light I created with a Philips Energy Light Therapy Lamp. For most of the miniature environments and sets, I actually just took pictures with the iPhone. I only used video when I had moving elements, like the car driving. I shot on an iPhone SE. A few times I used iPro lenses, but mostly I shot with the native phone lens. What’s great about the iPhone and other smartphone cameras is they are small in size and have a good close focus, which makes small things look bigger. So, I knew I could shoot miniatures on the iPhone and make it match pretty good with the bigger lens on the A7.

WHY DID YOU CHOOSE PREMIERE PRO FOR THIS PROJECT?
PEDER: I’m pretty devoted to Premiere Pro. I like being able to edit, add effects and output masters without having to go back and forth between other applications. In most of the things I direct, I use splitscreens, masks, layers and motion effects while I edit. Premiere gives me more creative options and more control at the same time.

WHAT WAS YOUR WORKFLOW FOR EDITING THE IPHONE FOOTAGE? DID YOU EDIT IT NATIVELY OR DID YOU TRANSCODE IT?
PEDER: I did transcode all the iPhone footage to ProRes 422, except for some last-minute shots which went straight from the iPhone and into the timeline. I decided to transcode because I knew there would be different media formats and video effects. The smartphone is a great tool for shooting miniatures. I would just airdrop the shots to the Mac and drag them into Premiere Pro to see if they worked.
WHAT WAS YOUR WORKFLOW FOR EDITING AND HOW DID YOU HANDLE THE DIFFERENT MEDIA AND RESOLUTION SIZES?
PEDER: My sequence was 1920x1080 ProRes 422 HQ. I did a quick assembly edit of the story and flow, and when I was happy with that, I started doing the effects and comps in a copy of the timeline. I made a copy so I could have some overlength (head and tail frames) for the comp shots, in case I needed that. I did all effects and comps in Premiere Pro—I did not use After Effects at all.
WHAT DID YOU USE TO KEY THE GREEN SCREEN?
PEDER: I used Ultra Key in Premiere Pro. It’s so great. I’m still quite surprised how well it keys. I was able to pull a key on both the underlit Sony A7 footage and the wrinkled green screen miniatures shot on the iPhone. In the more difficult areas, I either did a second key or did a quick mask.
HOW DID PREMIERE PRO HANDLE ALL THE LAYERS AND COMPOSITING?
PEDER: Premiere worked great for positioning and resizing the background, action and foreground layers. I did a few matte paintings in Photoshop and imported those in as individual layers. I also added smoke layers using the Screen blend mode. I exported the comps shot-by-shot and then dumped the clips into a Master timeline. On top of that, I had two adjustment layers, one for each shot where I added Fast Blur and Lumetri Color effects, and another for the retro look by Red Giant.


YOU USED RED GIANT TO CREATE THE RETRO LOOK?
PEDER: Yes, I used the Red Giant Universe plugin. I think it’s supercool. I mainly got it because I want to be able to put grain on my footage and create old school, retro looks, like 8mm, 16mm and VHS. They’ve got good default settings, but I did tweak all the effects individually so they didn’t appear looped. I use Red Giant often. It’s quick for wipes and transitions and easy to adjust to your own liking. Red Giant also has great lens flares by Knoll. I use those a lot. Not like J.J. Abrams, but rather to create a hazy, overglow feel. They are very realistic. They’re also easy to animate, using keyframes for positioning, brightness, size etc.
WHAT METHOD DID YOU USE TO CREATE THE OLD-TIMEY DROP FRAME LOOK?
PEDER: I initially thought I would use Red Giant’s 8mm 18 fps option, but I felt it was too much. And the normal speed looked too smooth, so I had a bit of a dilemma. Until my good friend, editor Jimmy Falinski, suggested I cut out frames randomly to create the jerky feel of old cameras. It worked better than I had imagined and it also helped give the music video rhythm. Kudos Jimmy.
WHAT TIPS WOULD YOU GIVE SOMEONE WANTING TO SHOOT AND EDIT USING MINIATURES AND GREEN SCREEN?
PEDER: Start by studying old movies like King Kong and the films of Ray Harryhausen. See how they create their miniature magic by using depth in the frame. Out-of-focus elements in the foreground can make a huge difference in the shot. In Premiere, you can create depth with the Fast Blur effect on different layers. Anything you can do to make it look like like the actor is interacting with the surroundings will make it so much more believable. Repositioning, resizing, blending layers, the options are plenty.
Watch the Making of “Lonely Gal”

What are your thoughts on the “Lonely Gal” music video? How do you like Peder’s use of green screens and miniatures? Were you surprised to learn all the effects and compositing were done in Premiere Pro? Leave a comment and check out Peder’s other work at pederpedersen.com.

