How to Measure Loudness in Premiere Pro
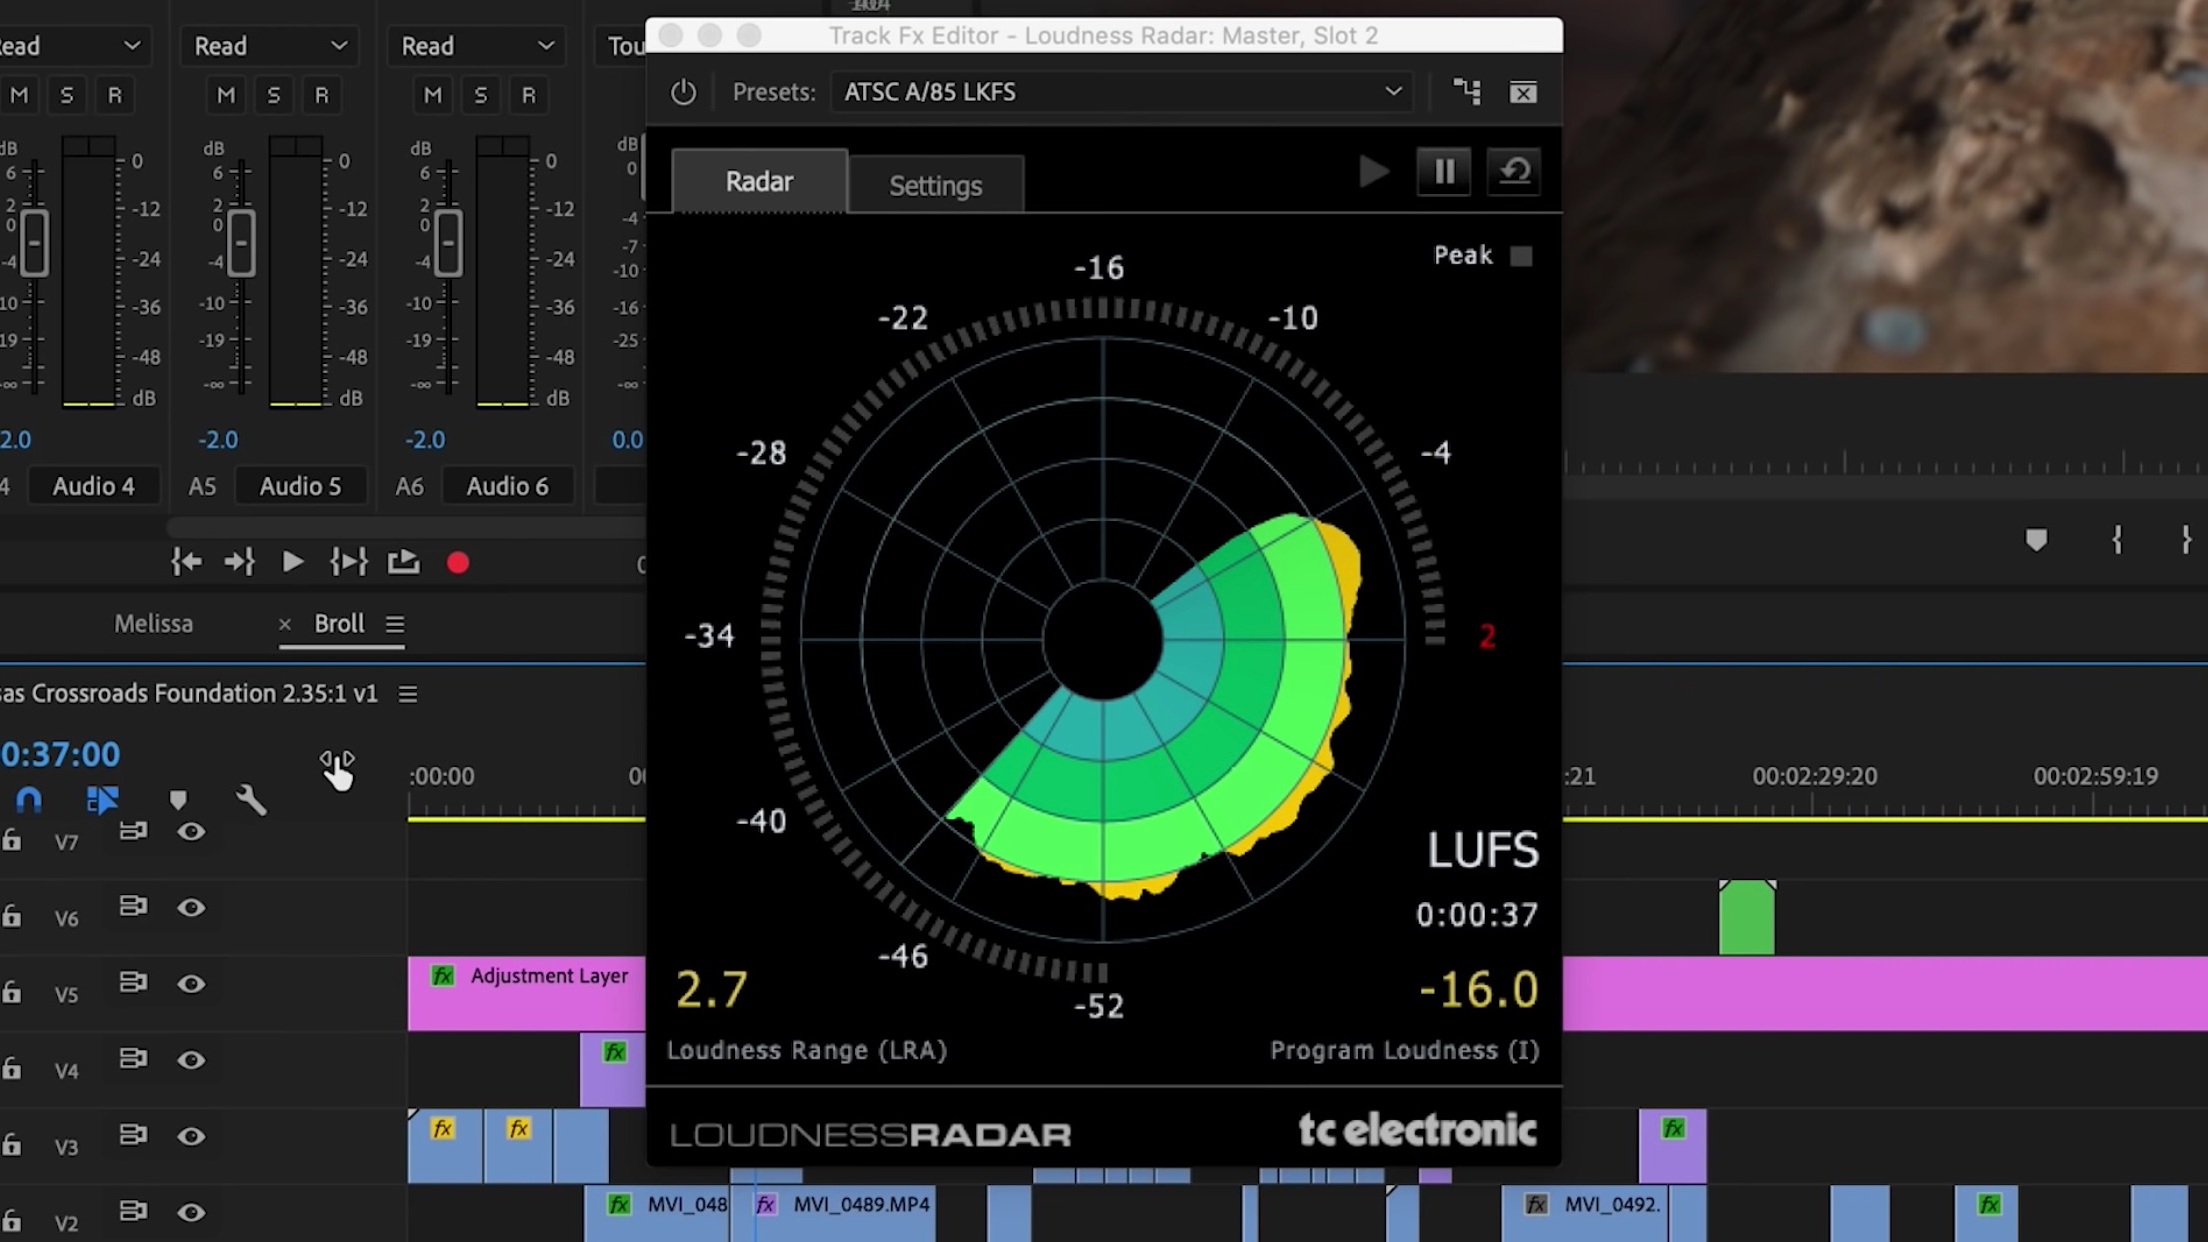
Image via Oliver J Hughes
How loud should my audio be?
Normally, I like to feature videos that have been published within the past day. But, I had to make an exception for this tutorial by Oliver J Hughes on how to use the Loudness Radar in Premiere Pro. This underused tool will help you accurately measure the loudness of your audio, which is something levels and waveforms can’t do.
Audio is often the last thing video creators think about in post-production, and yet it’s the first thing viewers will judge. Achieving a good audio mix can be challenging by itself, but it’s complicated by the fact that there’s no strict requirement for measuring how loud your audio should be, especially when it comes to the web. Oliver does an excellent job explaining a commonly accepted audio standard for loudness and how to meet that standard using the Loudness Radar in Premiere Pro.
Regardless whether you actually end up using the Loudness Radar, you will look 10x cooler when you have it open in your workspace. It’s one of those tools you want to have on your screen when a boss or client walks by because it appears you really know what you’re doing.
What are LUFS?

Key Takeaways:
LUFS stands for loudness units full scale
The best way to measure audio amplitude is in average loudness (LUFS) over time
-16 LUFS is an “accepted” loudness standard for the web
Apply Loudness Radar to Master Track in the Audio Track Mixer

Follow these steps to open the Loudness Radar:
Open the Audio Track Mixer. You can find this under the Window menu. The Audio Track Mixer opens automatically in the default Audio workspace.
Twirl down the effect disclosure triangle in the top left corner of the Audio Track Mixer.
On the Master Track channel strip, go to Special > Loudness Radar
How to set Loudness Radar Settings

Oliver’s recommended Loudness Radar settings:
In the Loudness Radar window, click the Settings tab.
Boost Target Loudness to -16. (In the video, Oliver changes the loudness unit from LKFS to LUFS laster.)
Change the Radar Speed to 1 minute. (Ideally, you want this to match the length of your video, in order to review your entire project’s loudness.)
Back the playhead up the beginning and press Spacebar to play. The Loudness Radar will record the average loudness of your project over time.
How to read the Loudness Radar

Tips for using the Loudness Radar:
The number in the bottom right corner is your project’s average loudness, measured in LUFS.
Amplitude peaks and troughs are represented in the outer edge of the Loudness Radar. In this case, the peaks and troughs of Oliver’s audio all fall with in the light green area. This is a good indicator that the audio is mixed or is at least consistent throughout the project. Ideally, you want the peaks and troughs to be hovering on the line between light green and yellow.
Assuming your project is already mixed, you can use the Hard Limiter effect on the Master Track to increase or reduce amplitude to get your project to -16 LUFS. (For example, in the thumbnail above, adding 3.3 dB will bring average loudness from -19.3 LUFS up to -16 LUFS.)

Is the Loudness Radar new to you? If not, how do you use it in your audio workflow in Premiere Pro? Please share your tips!