
10 Little Features in Premiere Pro CC 2019

Small Updates in Premiere Pro CC 2019 That You Might Have Missed.
Selective Color Grading and Intelligent Audio Cleanup got all the glory in the release of Premiere Pro CC 2019. (And deservedly so—they’re amazing!) But there’s a lot more features packed into this release than you probably realized. In fact, we guarantee you’ll learn at least one new feature in Premiere Pro from this post. (Two of them are completely undocumented by Adobe.)
So, get in touch with your inner editing geek because we’re looking at the small, minuscule, and seemingly insignificant improvements and enhancements in Premiere Pro CC 2019!
NOTE: This list does not contain any features related to Team Projects or VR/Adobe Immersive Environment.
1. Create Multiple Lumetri Color Effects in the Lumetri Color Panel
The biggest small feature on this list is the ability to add and edit Lumetri Color effects directly in the Lumetri Color panel. This saves users from having to go the Effect Controls panel to edit previous Lumetri Color effects.

The top of the Lumetri Color panel now has a drop down menu where new Lumetri Color effects can be created.

Lumetri Color effects can also be renamed directly inside the Lumetri Color panel. Naming Lumetri Color effects is a good idea for keeping color adjustments organized.

Lumetri Color Performance Enhancements
According to Adobe, performance in the Lumetri Color panel has been improved in Premiere Pro CC 2019.
Improved image processing provides more responsive playback, rendering, and Lumetri Color performance. —Adobe
In previous versions, it was recommended to disable tabs in the Lumetri Color panel that were not being used. Otherwise, Premiere Pro would treat them as active, even when no adjustments were made. The performance hit might have seemed inconsequential, but after adding multiple Lumetri Color effects to a single clip, playback could become sluggish. This no longer seems to be relevant in Premiere Pro CC 2019. At IBC 2018, Adobe’s Jason Levine was quoted saying he experienced no loss in performance when adding many Lumetri Color effects in Premiere Pro CC 2019.
Lumetri Color Limitations
One thing you can’t do directly in the Lumetri Color panel is reorder Lumetri Color effects. (This would be a nice update. Submit a feature request if you agree.) To reorder Lumetri Color effects, you have to go back to the Effect Controls panel.
Also, why not have the option to rename Lumetri Color effects when they’re first created? It would save the step of having to rename them later.
2. Consolidate Duplicates
This is our favorite “little feature” in Premiere Pro CC 2019. As its name implies, Consolidate Duplicates removes duplicate assets from your project. It can found under Edit > Consolidate Duplicates. You can also assign it a custom keyboard shortcut.

The interesting thing is there’s no documentation for Consolidate Duplicates to be found. Not even on the official Adobe Premiere Pro Learn and Support site. Here are a couple of our observations from using this feature:
Consolidate Duplicates applies to everything in the Project panel.
Consolidate Duplicates applies even when duplicate assets are used in a sequence.
When duplicate clips are renamed in the Project panel, Consolidate Duplicates will not apply.
When duplicate clips are renamed in the Timeline (and “Display the project item name and label color for all instances” is unchecked under Project Settings > General), Consolidate Duplicates will apply.
Consolidate Duplicates applies even when duplicates have different file paths. (We can’t figure out the logic behind which duplicate Consolidate Duplicates decides to keep. We’ve run multiple tests and it seems very arbitrary.)
[Updated 11/12/18]
Consolidate Duplicates will keep the version that is further down in a bin hierarchy or “more organized” in Premiere Pro. For example, if there are two duplicates:
Footage > Cam A > Card 1 > Clip 01
Random > Clip 01
Consolidate Duplicates will keep the first one. The logic being that the “more organized” the file is, the more likely it’s the one you want to keep. Also, if you have hidden duplicates in your project because the Hide Dependent Clips preference is enabled, Consolidate Duplicates will remove the hidden versions.
One way to tell is Consolidate Duplicates did anything is via the History panel. If any duplicates were removed, the command will be visible in the History list.
3. Display Color Management
NOTE: This feature requires GPU Acceleration.
Displaying accurate colors on your monitor is essential for color grading, especially if you’re delivering to a broadcaster. Premiere Pro CC 2019 has a new Display Color Management preference, which automatically converts colors to match the color space of your display.

Will this setting magically transform your display into a broadcast monitor? No. Will it make your footage look correct on YouTube if you’ve fiddled with your monitor’s display settings? No. (It doesn’t fix the notorious Quicktime gamma shift problem, if that’s what you were hoping for.)
This setting is specifically intended for accurately displaying Rec709 and Rec2020 footage on Rec709, sRGB, and P3 monitor displays. It’s only useful for matching color spaces, not monitor color profiles. Leaving Display Color Management off is fine for Rec709 or sRGB delivery, a.k.a. YouTube. Turn it on if you want your display to mimic the colors of a broadcast reference monitor. For a detailed explanation of this feature and when you should use it, check out Jarle Leirpoll’s blog post: How Display Color Management in Premiere Pro works.
4. Delete Clip Markers in Timeline
In previous versions, clips had to be loaded in the Source monitor, either manually or using Match Frame (F), in order to delete clip markers. In Premiere Pro CC 2019, clip markers can be deleted directly in the Timeline. To do this, select the clip, go to the Markers menu and choose Clear All Markers. You can also use the keyboard shortcut Opt+Cmd+M (Mac) or Alt+Ctrl+M (Win).
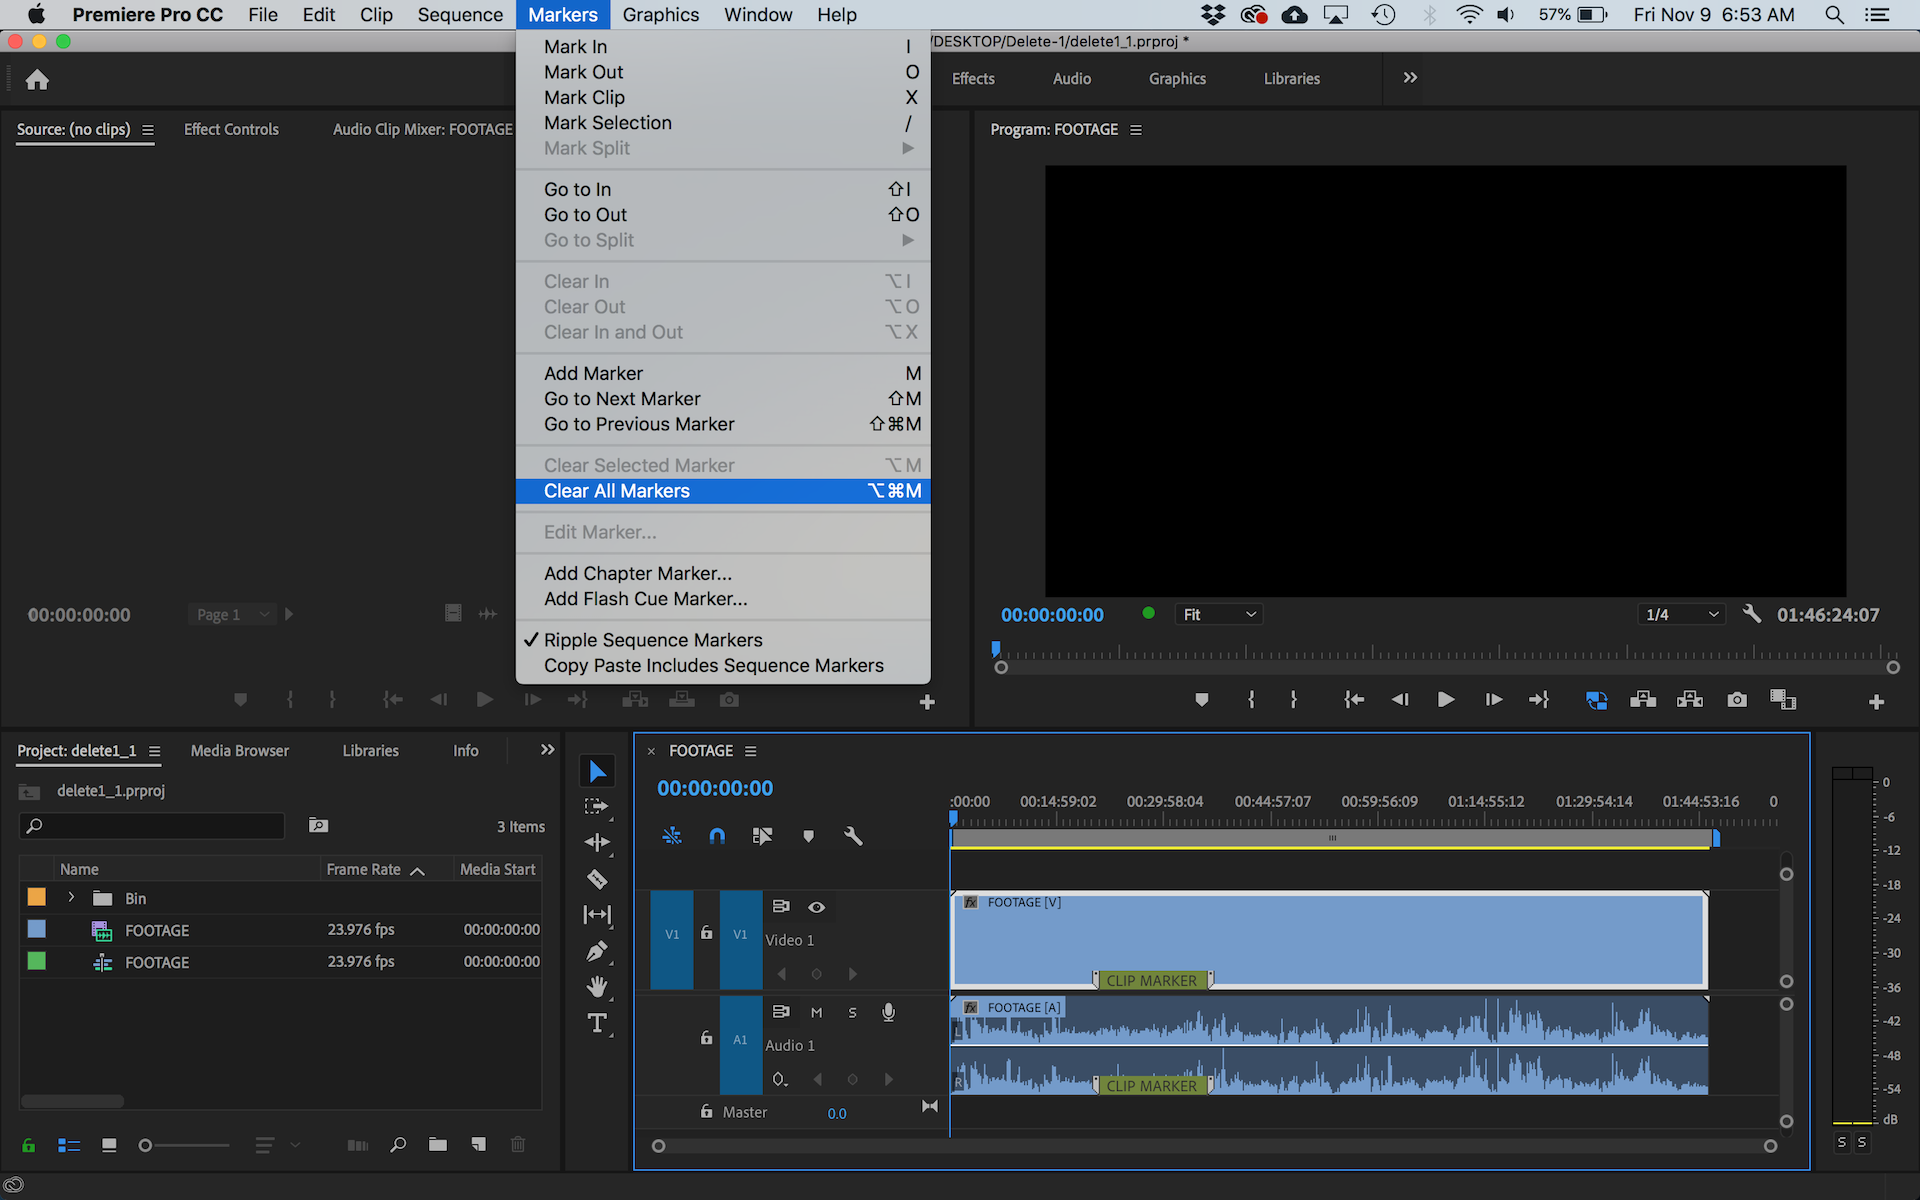
Clip Marker Limitations
Here’s the rub: you can only Clear All Markers from a clip in the timeline. Unfortunately, individual clip markers still can’t be selected in the timeline, so Clear Selected Marker is impossible. It also means re-positioning or editing the duration of clip markers still has to be done in the Source monitor. Another feature request.
Another annoyance is you can’t right click the clip to delete markers. You have to use the Markers menu or the keyboard shortcut.
5. Auto Save Improvements
Premiere Pro CC 2019 has a new Auto Save preference: Auto Save also saves the current project(s). This is setting is off by default. When enabled, Premiere Pro will create a backup project file for all open projects (as it did before) but it also saves the current working project file as well. It’s a subtle difference, but it adds another layer of protection against losing work.

The naming system for the Auto Save files also changed. The file names are now appended with dates (shown below) instead of ascending numbers. This makes identifying past project states so much easier! Not the greatest project name, we know.

Also, notice the last Auto Save file and working project file were saved at the same time, as shown in the Date Modified column. This is what the new Auto PreferSave improvement does.
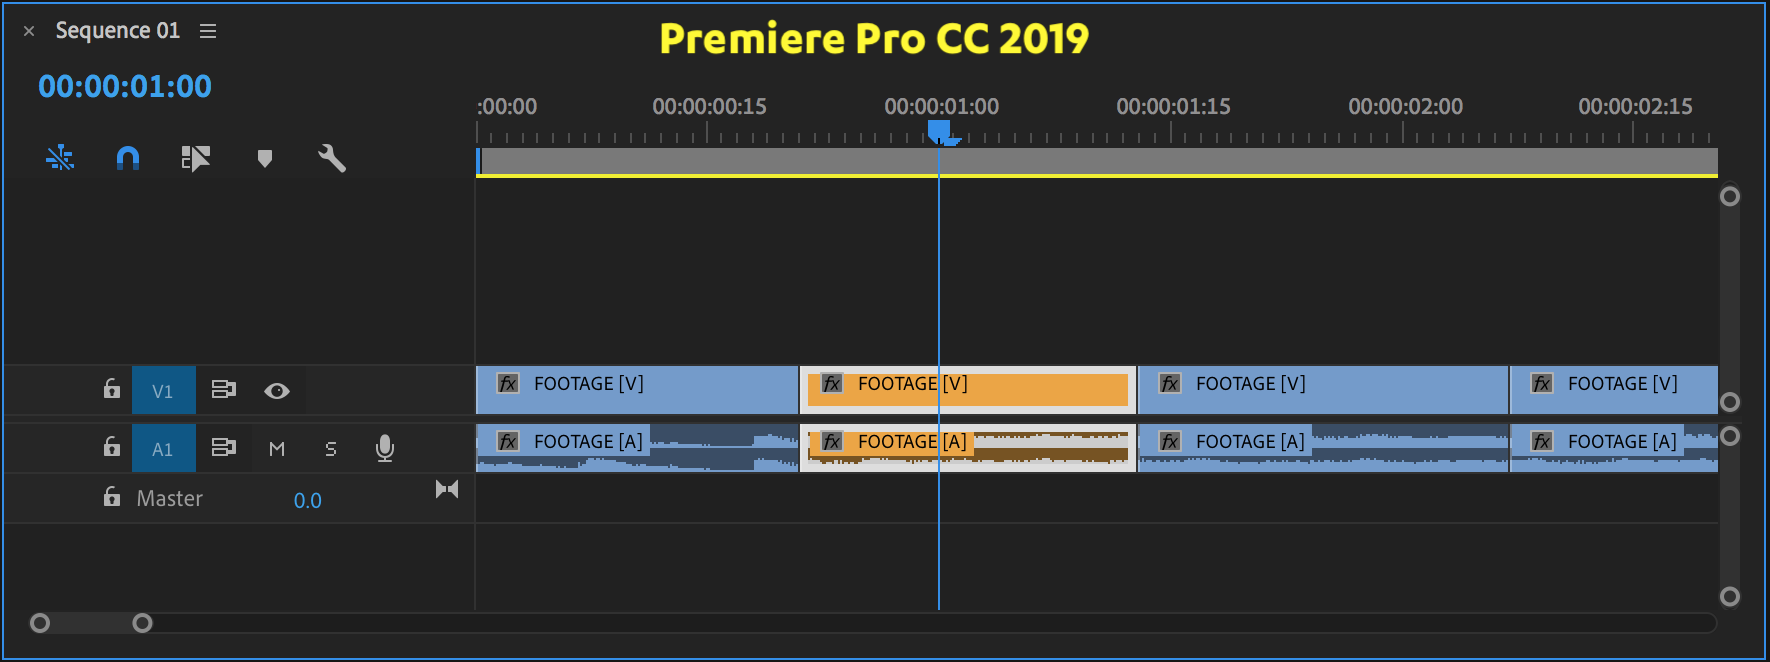
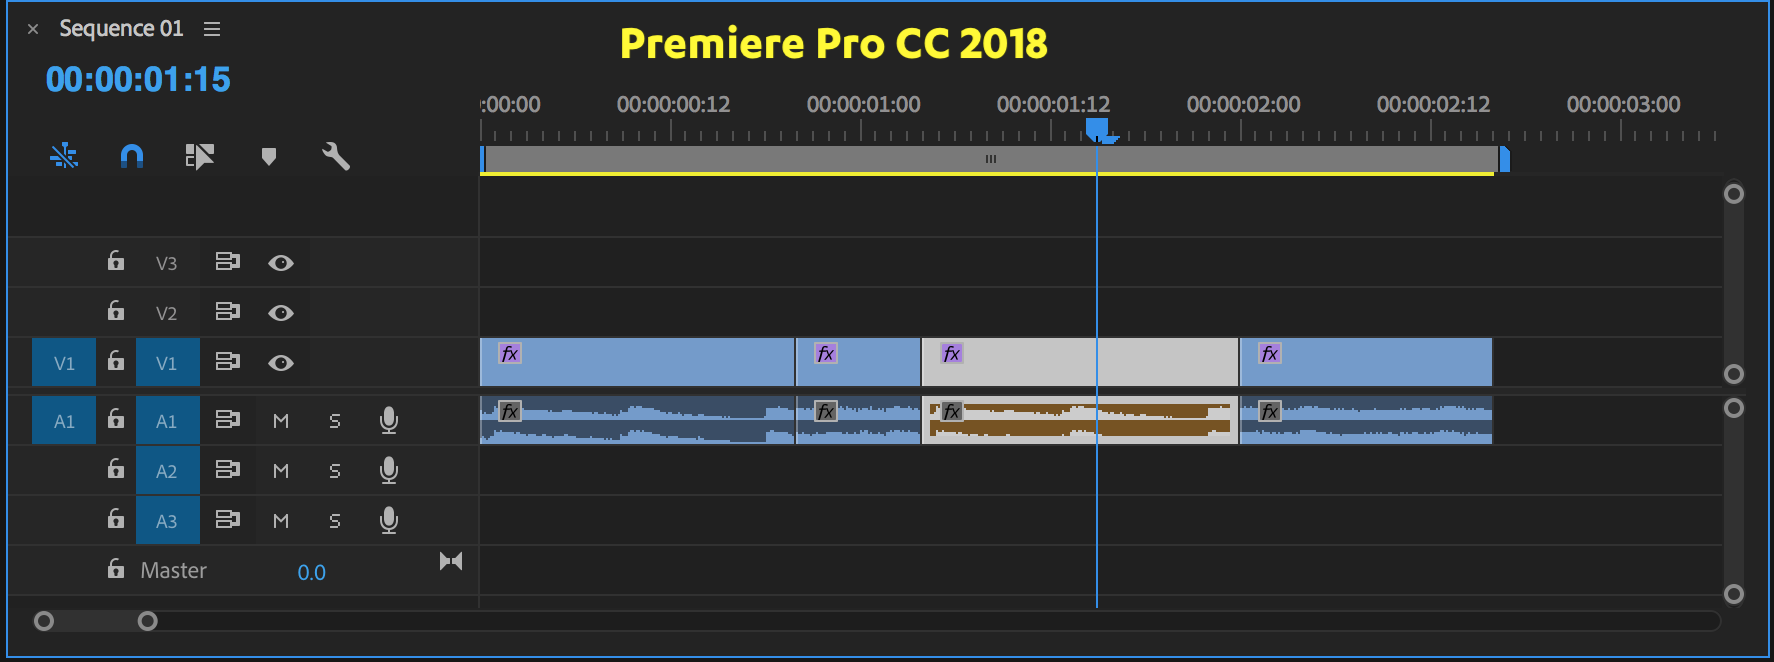
6. Selected Clip Label Color
We first became aware of this “problem” in a Taran Van Hemert video. In past versions of Premiere Pro, when you selected a clip in the timeline, the white-out selection indicator hid the clip label color. Now, in Premiere Pro CC 2019, selected clips will still show label colors. Talk about subtle! But once you see it side-by-side, it really makes a significant visual difference.
7. ESC to Deselect All in Timeline
Premiere Pro CC 2019 enables the Escape key to deselect everything in the timeline. We find this a very handy alternative to the default SHIFT+CMD/CTRL+A for Deselect All. It’s especially convenient when you have Selection Follows Playhead enabled, guaranteeing something in the Timeline is almost always selected. Hitting Escape prevents you from accidentally making an edit to an unintentionally selected clip(s).
The Escape can’t be mapped to anything else, in case you were wondering. Hitting Escape closes the Keyboard Shortcut Editor.
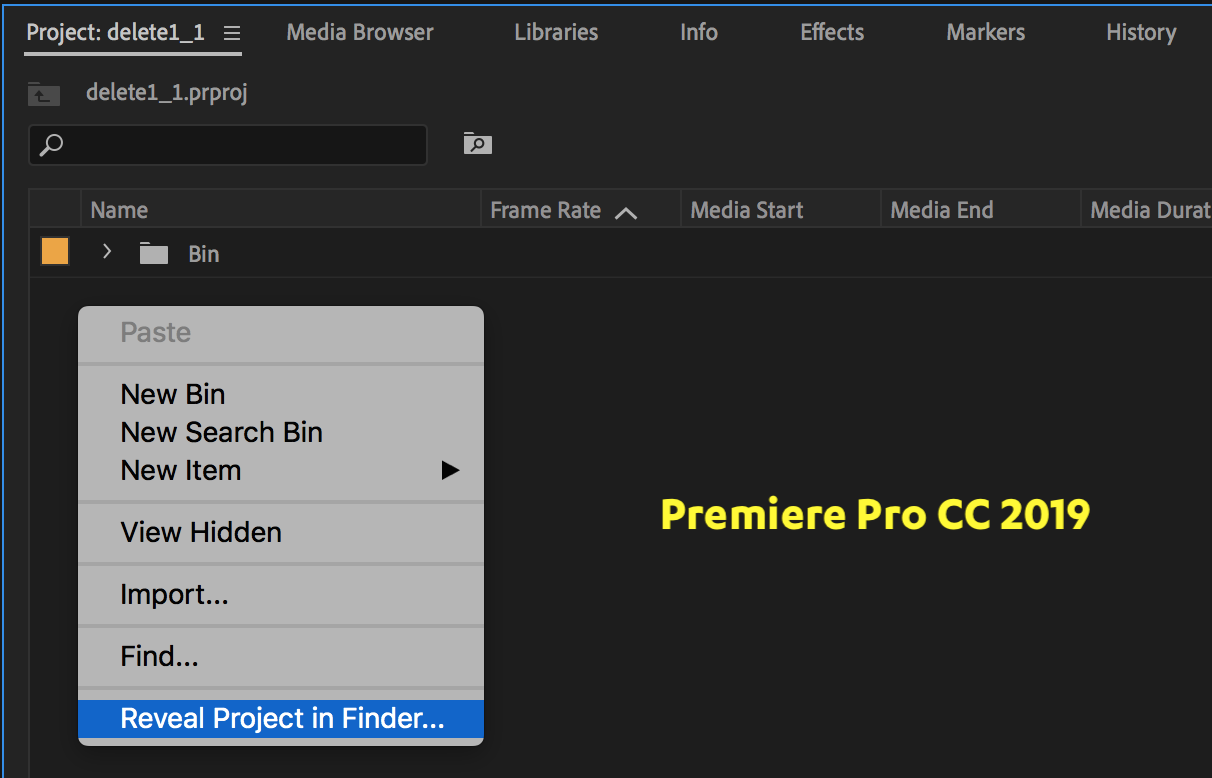
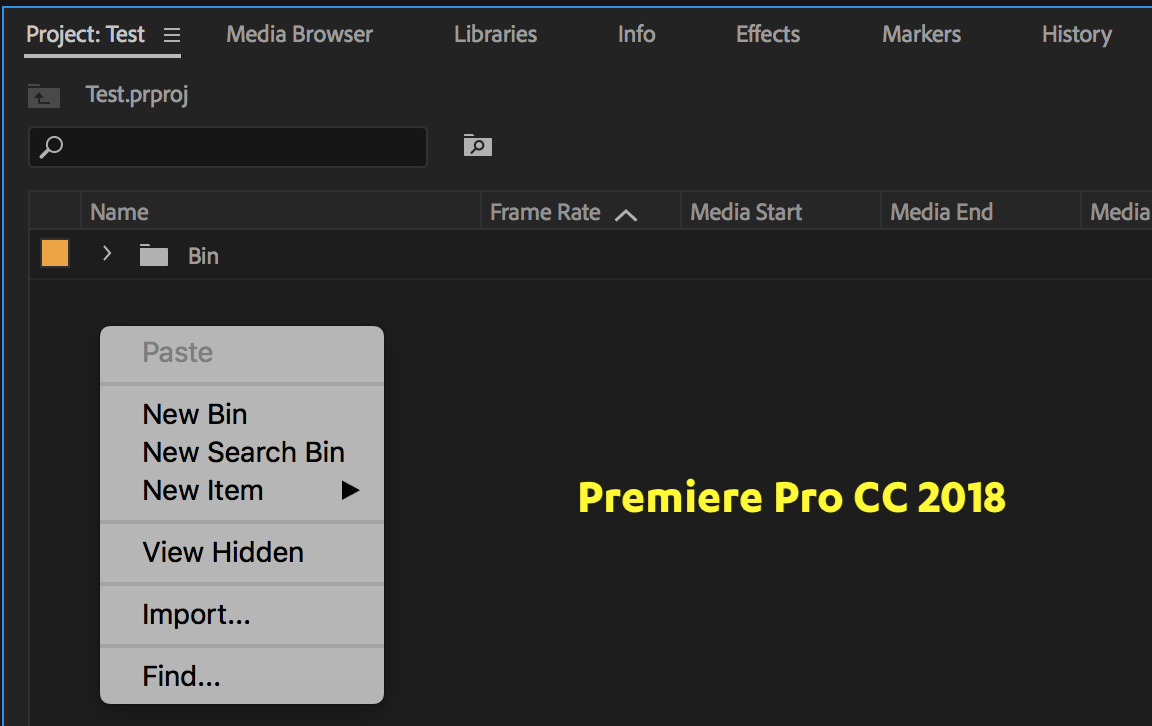
8. Reveal Project in Finder/Explorer
This is a small feature that we stumbled across while we were writing this post. We discovered right-clicking on an empty area of the Project panel in CC 2019 shows a new option to Reveal Project in Finder. This was not an option in the last version of Premiere Pro CC 2018 (12.1.2), as shown below. We’ve seen no mention of this update anywhere, so hopefully you learned something new here!
9. Timecode Shorthand Substitutes
We’ll be honest. We don’t know what the deal is with this new feature. Adobe claims to have added timecode shorthand substitution in Premiere Pro CC 2019.
You can now use shorthand substitutes when you enter timecode values (for example, a period instead of two zeros). You no longer have to type the zeros manually. —Adobe
However, we don’t see how this is different from previous versions. You were able to enter a period as a substitute for two zeros in Premiere Pro CC 2018 and earlier. Can anyone explain to us exactly what’s new here? Feel free to make us feel dumb in the comments.
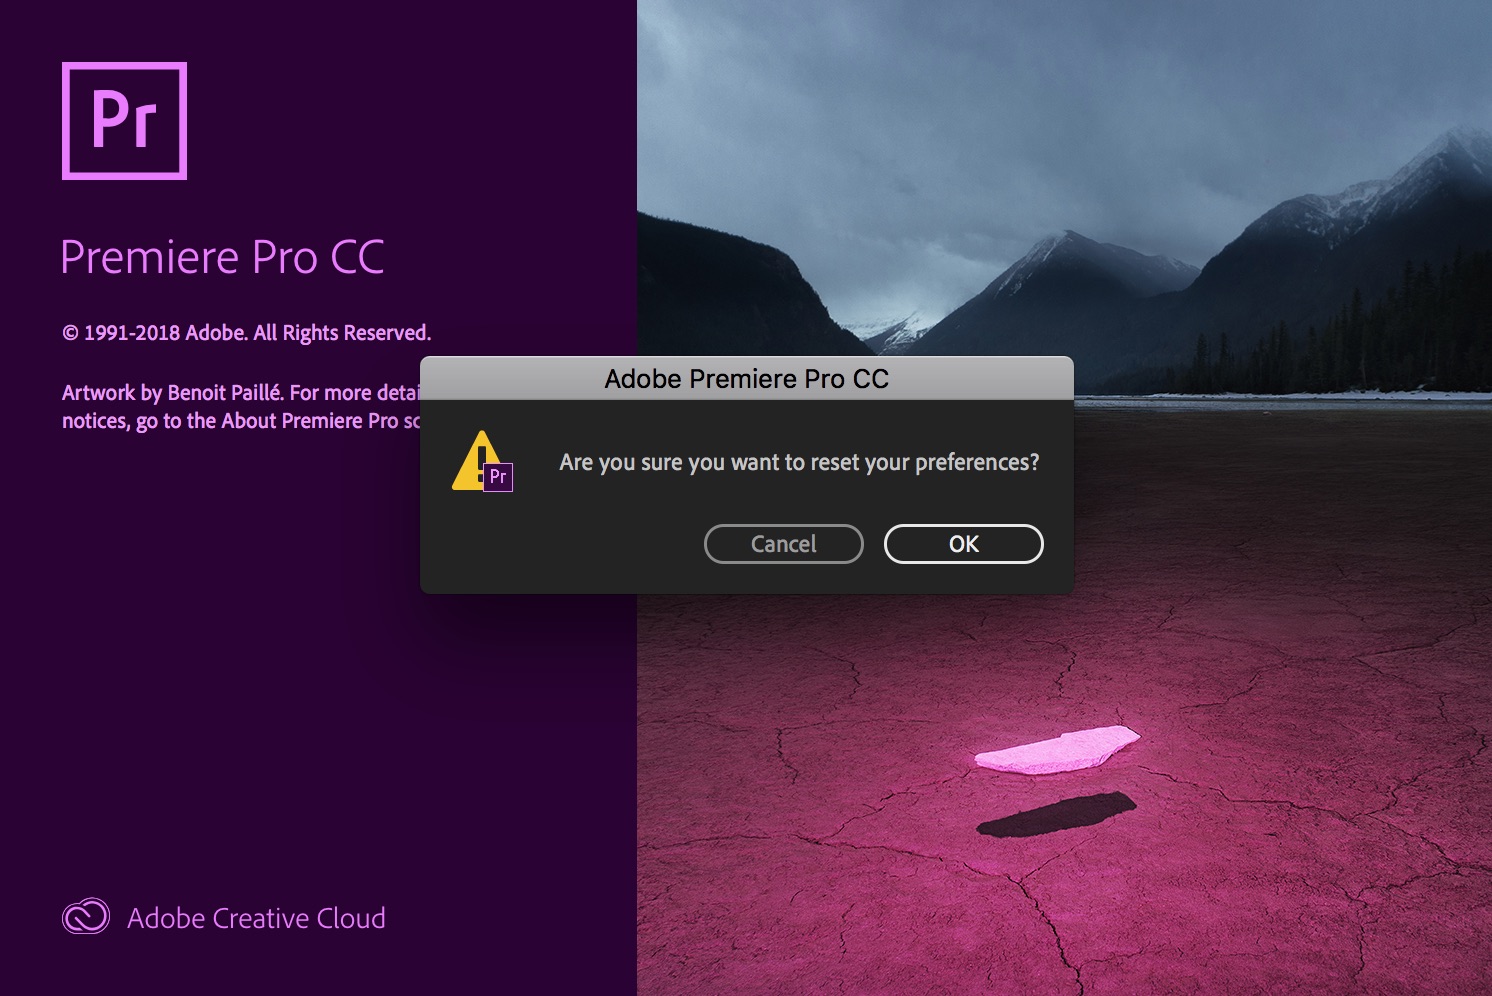
10. Reset Preferences Confirmation
Resetting preferences in Premiere Pro will restore all preferences to their original settings. This is useful for giving Premiere Pro a “fresh start” and it’s a good troubleshooting technique as well.
To reset preferences, hold the Opt/Alt key when you launch Premiere Pro. (You can let go when the splash screen appears.) There used to be no visual confirmation that the preferences had been reset. Now, Premiere Pro CC 2019 displays a dialogue window asking users to confirm if they want to reset their preferences.
[UPDATED 11/12/18]
BONUS: New Home Button
Premiere Pro CC 2019 gives users a new way to access the home screen without closing their projects. It’s a Home button in the top left corner of the interface. Clicking the button will bring up the Home screen window that appears at startup, but the current project(s) will remain open in the background. Users can use this as an alternative to open recent projects instead of going through the File menu.

Did you learn something new about Premiere Pro CC 2019? What’s your favorite “little” feature? Did we leave out anything that deserves to be on this list? Let us know in the comments. We’d love to hear from you!

